Multi-Recipient Checkout with Drawer & Slide Carts on Shopify
Send To Many works with any cart style. If the multi-recipient checkout button doesn't appear automatically in your drawer or slide cart, here's how to add it with a simple theme edit.
Send To Many works with any cart style, including drawer carts, slide-out carts, and flyout carts. In many cases, the "Send to Multiple Recipients" button will appear automatically. If it doesn't show up in your drawer or slide cart, you can add it with a small theme code change.
How the Button Works
The Send To Many cart button is a Shopify theme app block that auto-positions itself near your theme's checkout button. On dedicated cart pages, this works out of the box. On drawer and slide carts, the auto-positioning may or may not work depending on your theme's cart implementation.
If the button doesn't appear in your cart drawer, the fix is straightforward: add a button directly to your theme's cart drawer template that links to your multi-recipient checkout page.
Adding the Button to Your Cart Drawer
1. Find your checkout page URL
Before editing your theme, you need the URL of your multi-recipient checkout page. If you've already set up checkout following the steps in Setting Up Multi-Recipient Checkout, you'll have a page with the Send To Many checkout block on it. The URL will look something like /pages/multi-recipient-checkout.
You can find this in Online Store → Pages in your Shopify admin. Look for the page you created with the Send To Many checkout template.
2. Open your theme's cart drawer file
- Go to Online Store → Themes in your Shopify admin.
- Click "..." next to your active theme and select Edit code.
- In the file list on the left, look in the Snippets or Sections folder for your cart drawer template. Common file names include
cart-drawer.liquid,header-cart-drawer.liquid,cart-sidebar.liquid, ormini-cart.liquid. The exact name depends on your theme.
3. Add the button code
Find the section in your cart drawer template where the checkout button is rendered. Look for elements like checkout, cart__checkout, or cart_footer. Add the following code near the existing checkout button:
{% render 'element_button',
  type: "button",
  name: "send_to_many",
  text: "Send to multiple recipients",
  href: "/pages/multi-recipient-checkout",
  class: "cart__checkout-btn",
  style: "margin-top:10px;"
%}
The exact code will vary depending on your theme. Some themes use a render snippet for buttons (as shown above), while others use plain HTML. If your theme doesn't have a button snippet, you can use a simple link instead:
<a href="/pages/multi-recipient-checkout"
   class="button btn cart__checkout-btn"
   style="display:block; text-align:center; margin-top:10px;">
  Send to multiple recipients
</a>
Match the CSS classes to whatever your theme uses for its checkout button so the styling is consistent.
4. Save and preview
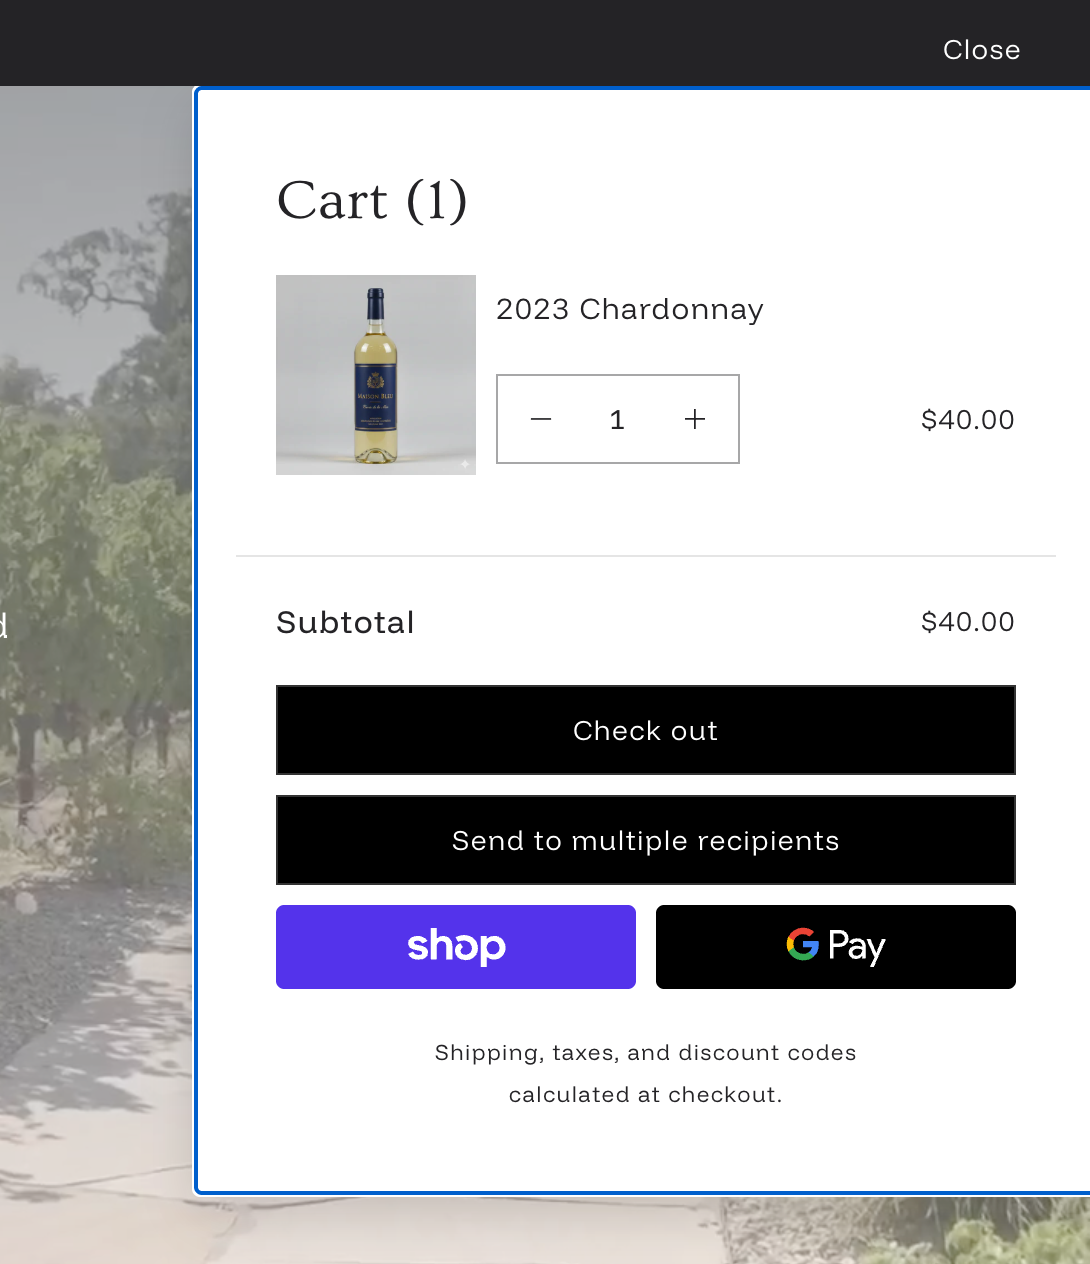
Click Save, then open your store and add a product to your cart. Open the cart drawer and confirm the "Send to multiple recipients" button appears below the checkout button.
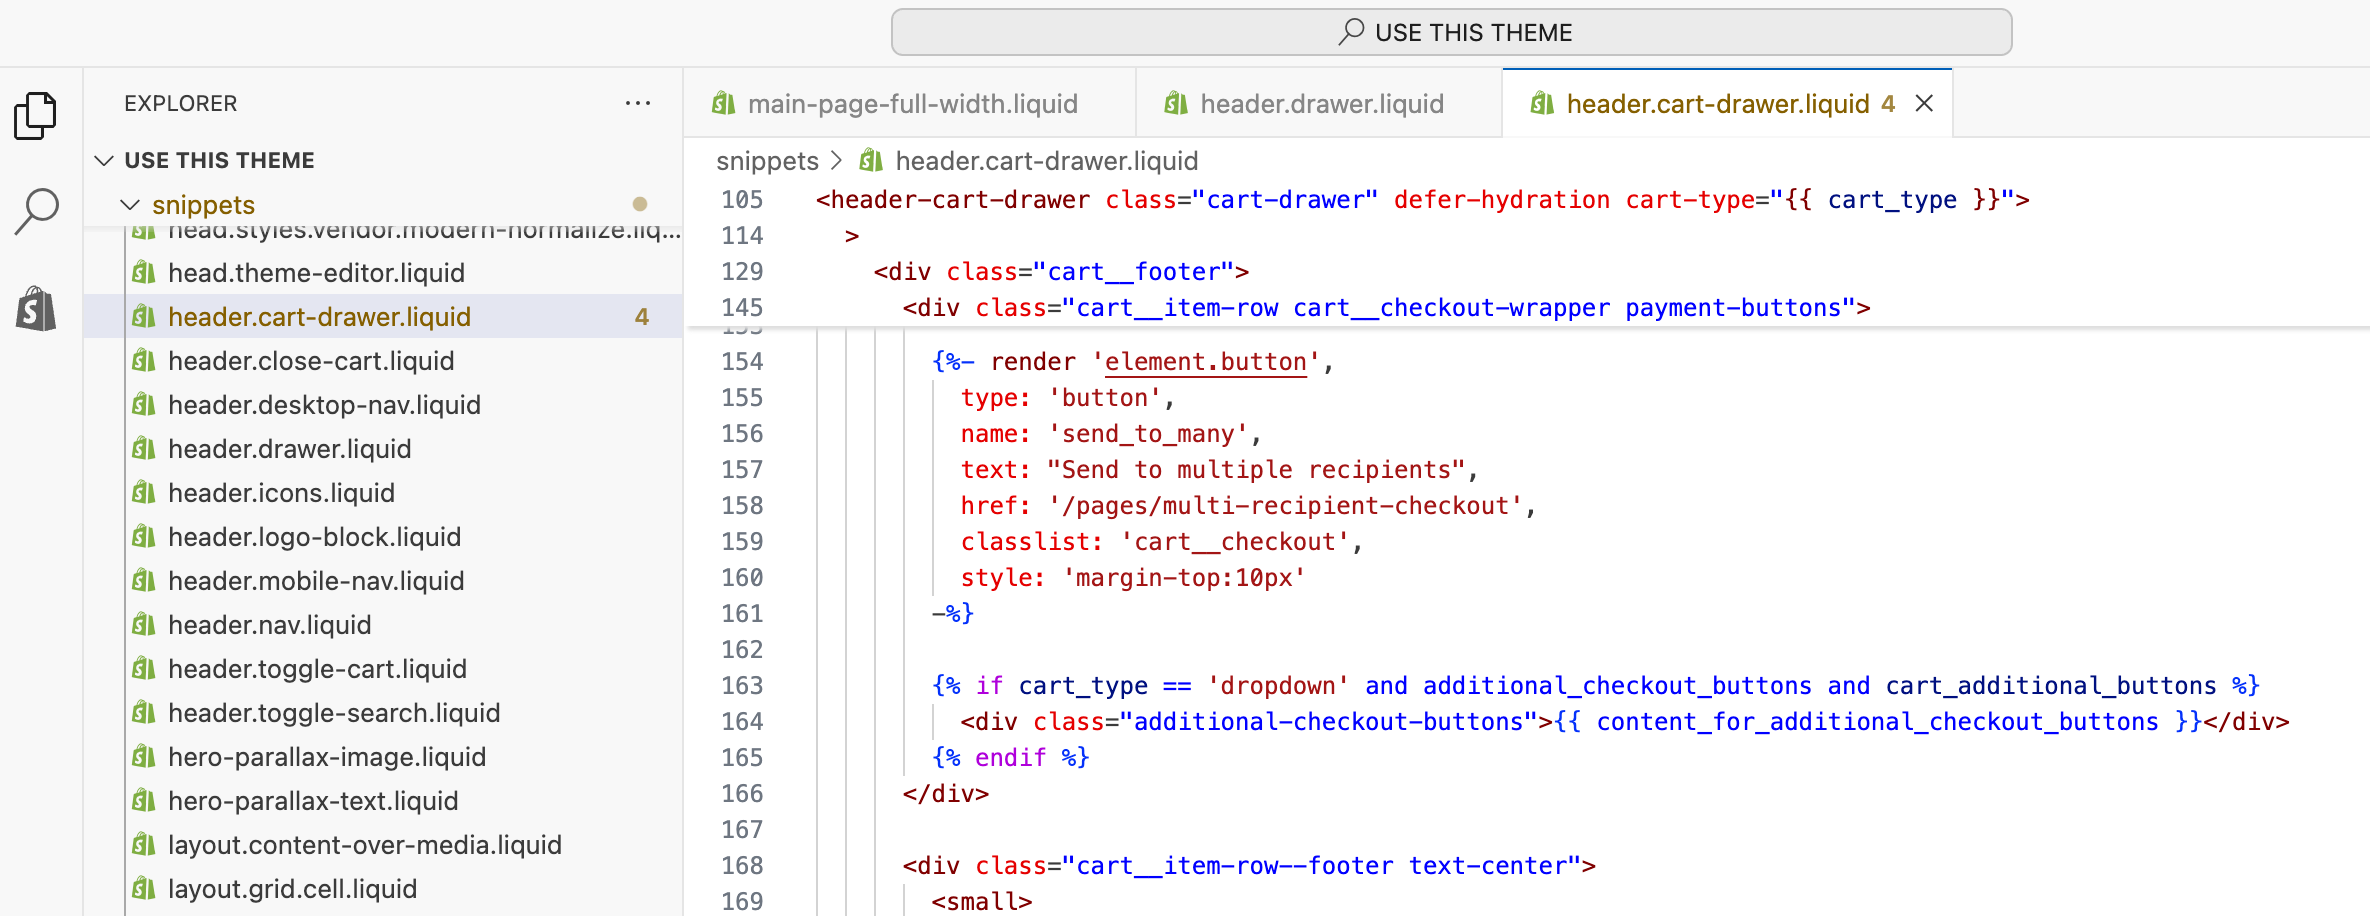
Example Theme Code
Here's what the edit looks like inside a theme's cart drawer file. The Send To Many button is added in the cart footer section, right next to the existing checkout and payment buttons.
Styling the Button
The button you add to your cart drawer is standard HTML/Liquid, so it inherits your theme's styles. If you want to adjust its appearance, you can modify the inline styles or add a custom CSS class.
For styling the multi-recipient checkout page itself (not the cart button), see Customizing Checkout with CSS.
Next Steps
- Adding multi-recipient checkout to your Shopify theme: Full setup walkthrough for the checkout page and app block
- How Multi-Recipient Checkout Works: Overview of the shopper experience from cart to order
- Configuring Checkout: Basics: Order processing, recipient fields, and shipping options