How to Add a Gifting Inquiry Form to Your Shopify Store
Place the corporate gifting inquiry form on your Shopify store using the theme editor. Choose a page, customize appearance, and start collecting requests.
Once you've configured your form fields, the next step is adding the form to a page on your store so customers can find and submit it.
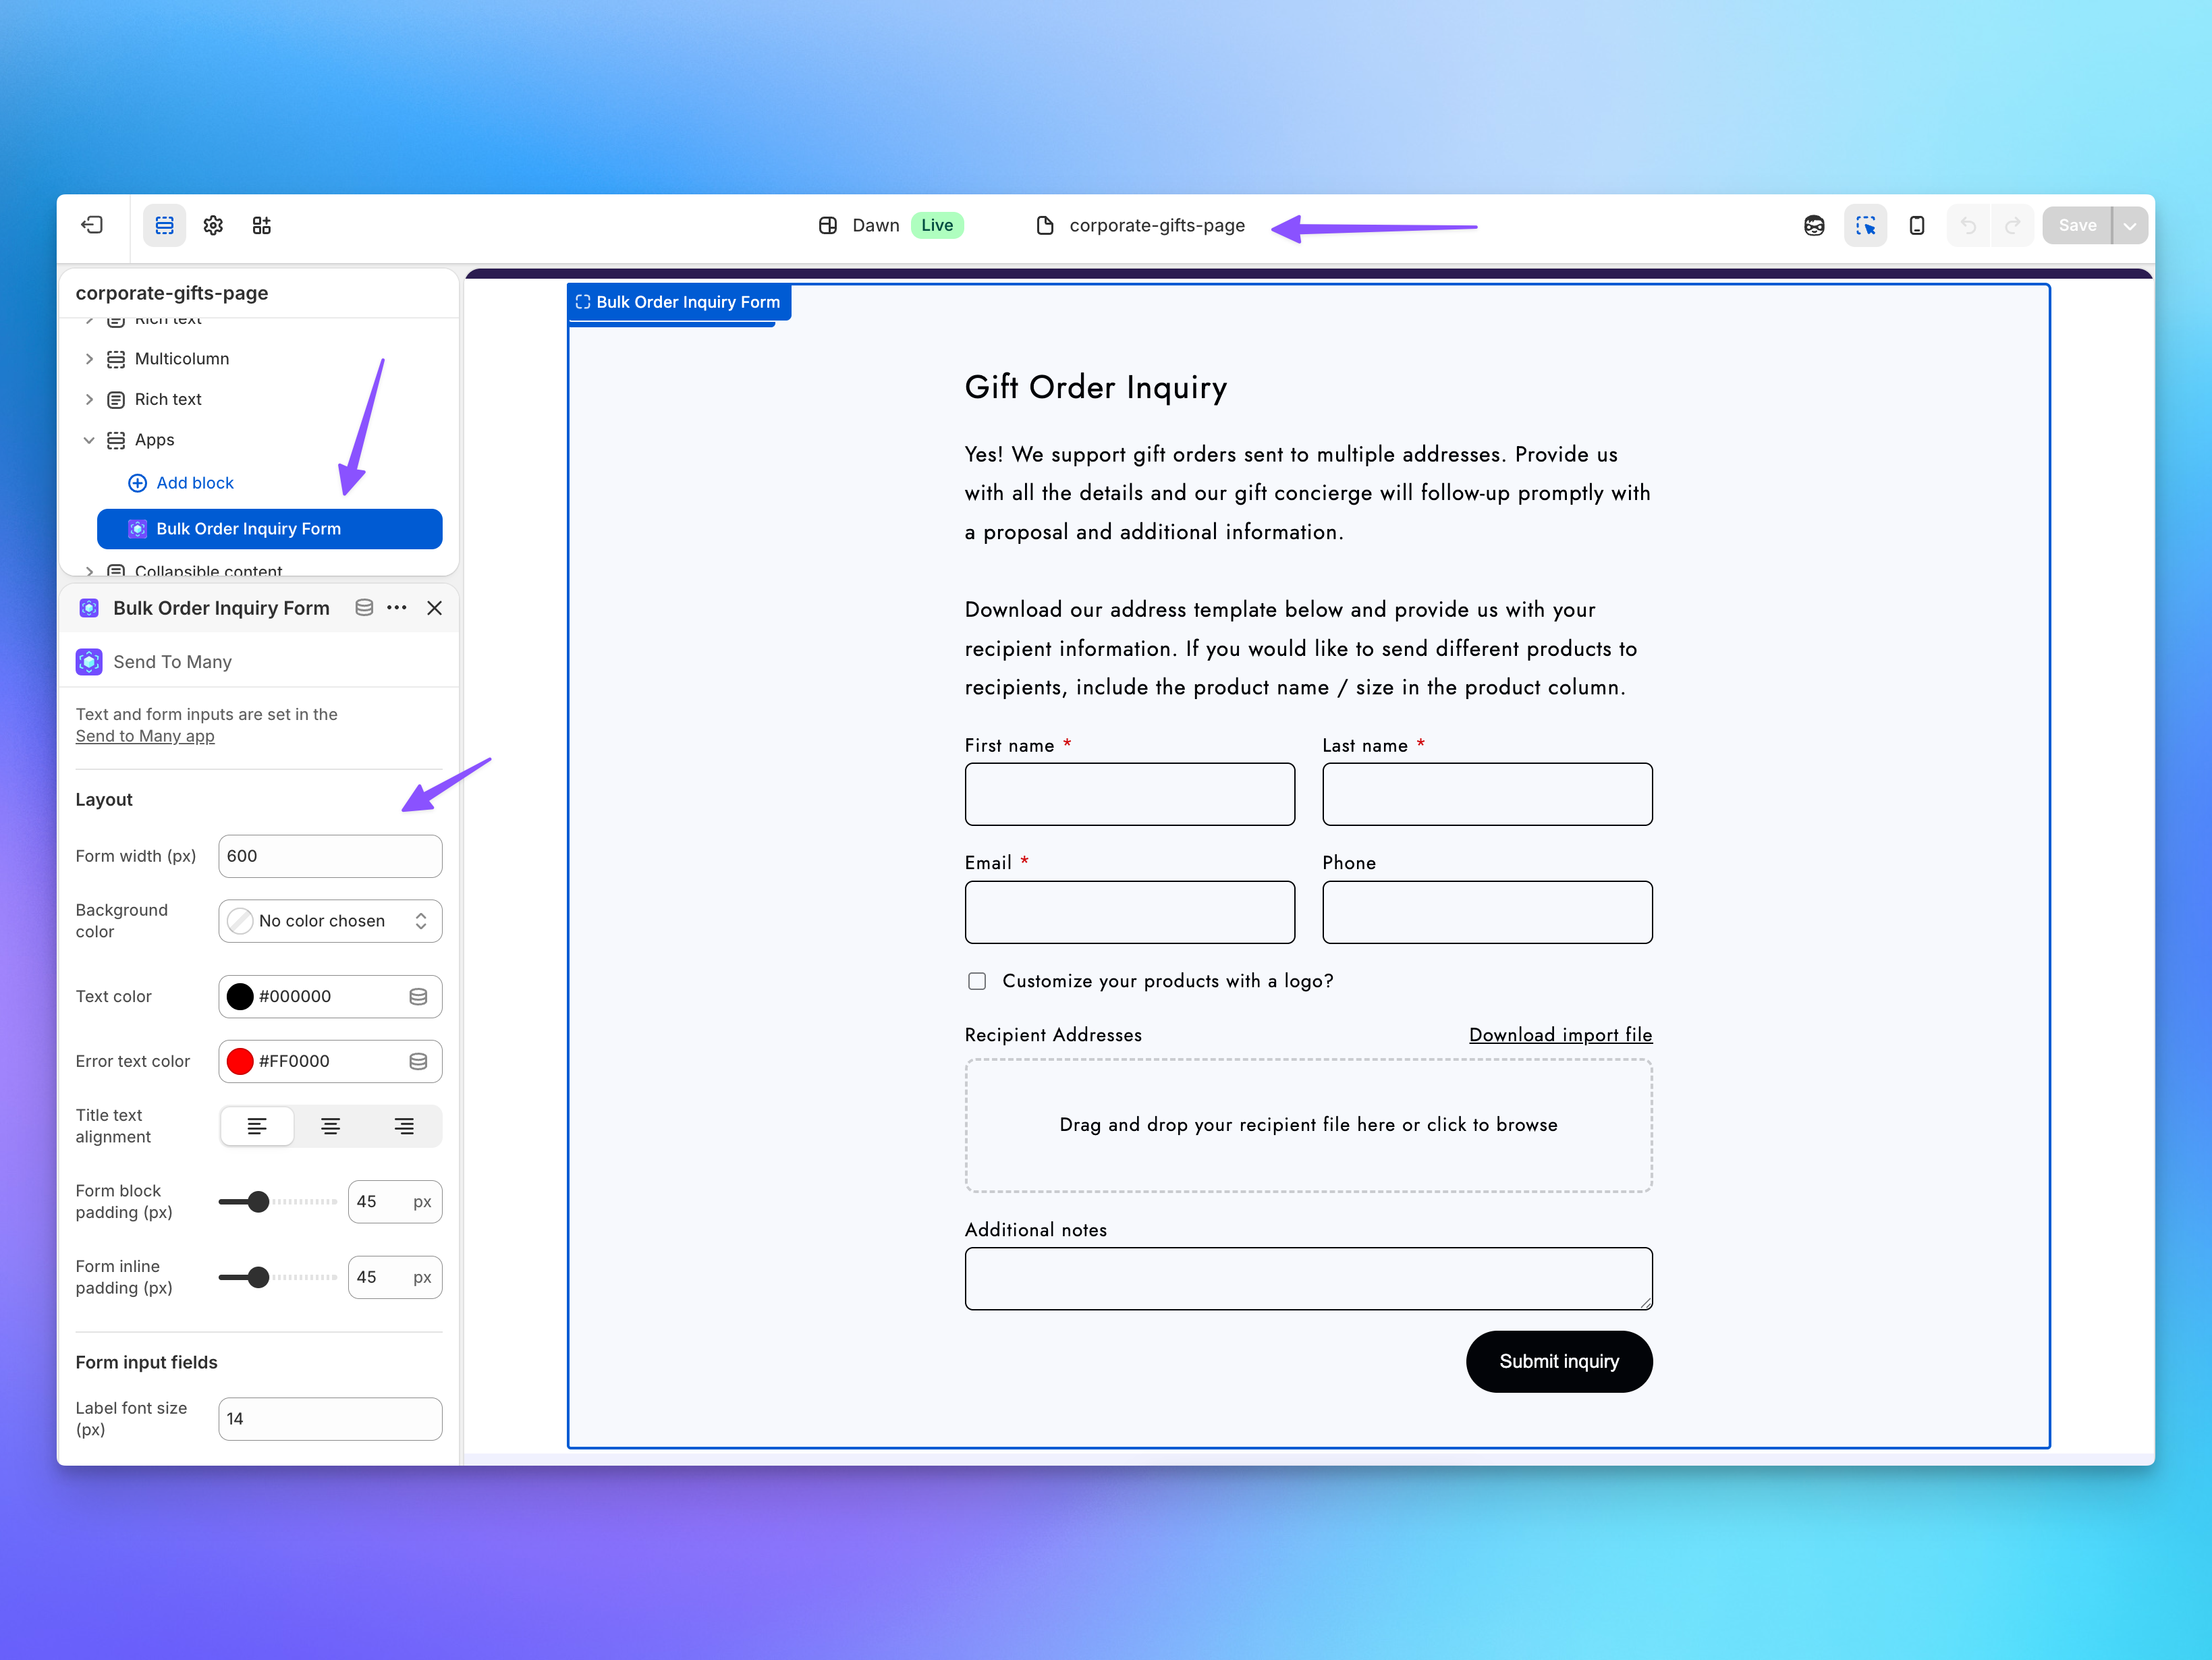
The inquiry form is deployed as a theme app extension section in Shopify's theme editor. This means you add it to any page template the same way you'd add any other section to your theme: no code required.
Adding the Form Section
- In your Shopify admin, go to Online Store > Themes.
- Click Customize on your active theme.
- Use the page template picker at the top to select the template where you want the form (e.g., your home page, a dedicated "Corporate Gifting" page, or any custom page template).
- Click Add section and search for Send To Many or Inquiry Form.
- Select the inquiry form section. It appears on the page with a live preview of your configured fields.
- Drag the section to position it where you want on the page.
- Click Save.
Choosing a Page
Most merchants place the inquiry form on one of these:
- A dedicated page (e.g., "Corporate Gifting" or "Bulk Orders"): Create a page in Shopify, assign it a template that includes the inquiry form section, and link to it from your navigation. This is the most common approach for B2B gifting programs.
- The home page: If corporate gifting is central to your business, adding the form directly to your home page template puts it front and center.
- A landing page: Use the form on campaign-specific pages you link to from emails, ads, or partner sites.
The form works on any page template. Choose the placement that makes sense for how customers discover your gifting services.
Placement Settings
In the Send To Many app's inquiry form settings, the Placement section at the top shows which template currently has the form and provides a quick link to open the theme editor directly.
Use the Select template dropdown to choose a page template, then click Preview in theme editor to jump straight to the theme editor with that template loaded.
Customizing Appearance
The form inherits your theme's typography, colors, and spacing by default. For finer control over the form's appearance, use the theme editor's section settings:
- Section padding and margins: Adjust spacing around the form.
- Background color: Match or contrast with your page design.
For more advanced styling, you can add custom CSS through your theme's code editor. The form section uses standard HTML elements and CSS classes that you can target.
Previewing the Form
The theme editor shows a live preview of the form as you configure it. Use this to verify:
- All your fields appear in the correct order.
- Conditional fields are hidden by default (they only show when the controlling checkbox is checked, so you won't see them in the static preview).
- The form title and description look right.
- File upload fields are visible and clearly labeled.
The preview in the theme editor is non-functional: you can't submit the form from the preview. To test the full submission flow, save your changes and visit the page on your live store (or use your theme's preview URL).
Next Steps
- Configuring the Inquiry Form: Adjust fields, conditional logic, import templates, and notifications.
- Managing Inquiries: What happens after customers start submitting.