Configure Inquiry Form Fields, Logic & Notifications
Customize form fields, collect customer addresses, set conditional logic, manage import formats, and configure notifications for your Shopify inquiry form.
The inquiry form settings page in Send To Many is where you define what your customers see when they submit a corporate gifting request. You control every field on the form, the order they appear, which are required, and what happens after submission.
To access these settings, open Send To Many in your Shopify admin and navigate to the Inquiry Form page.
Form Title and Description
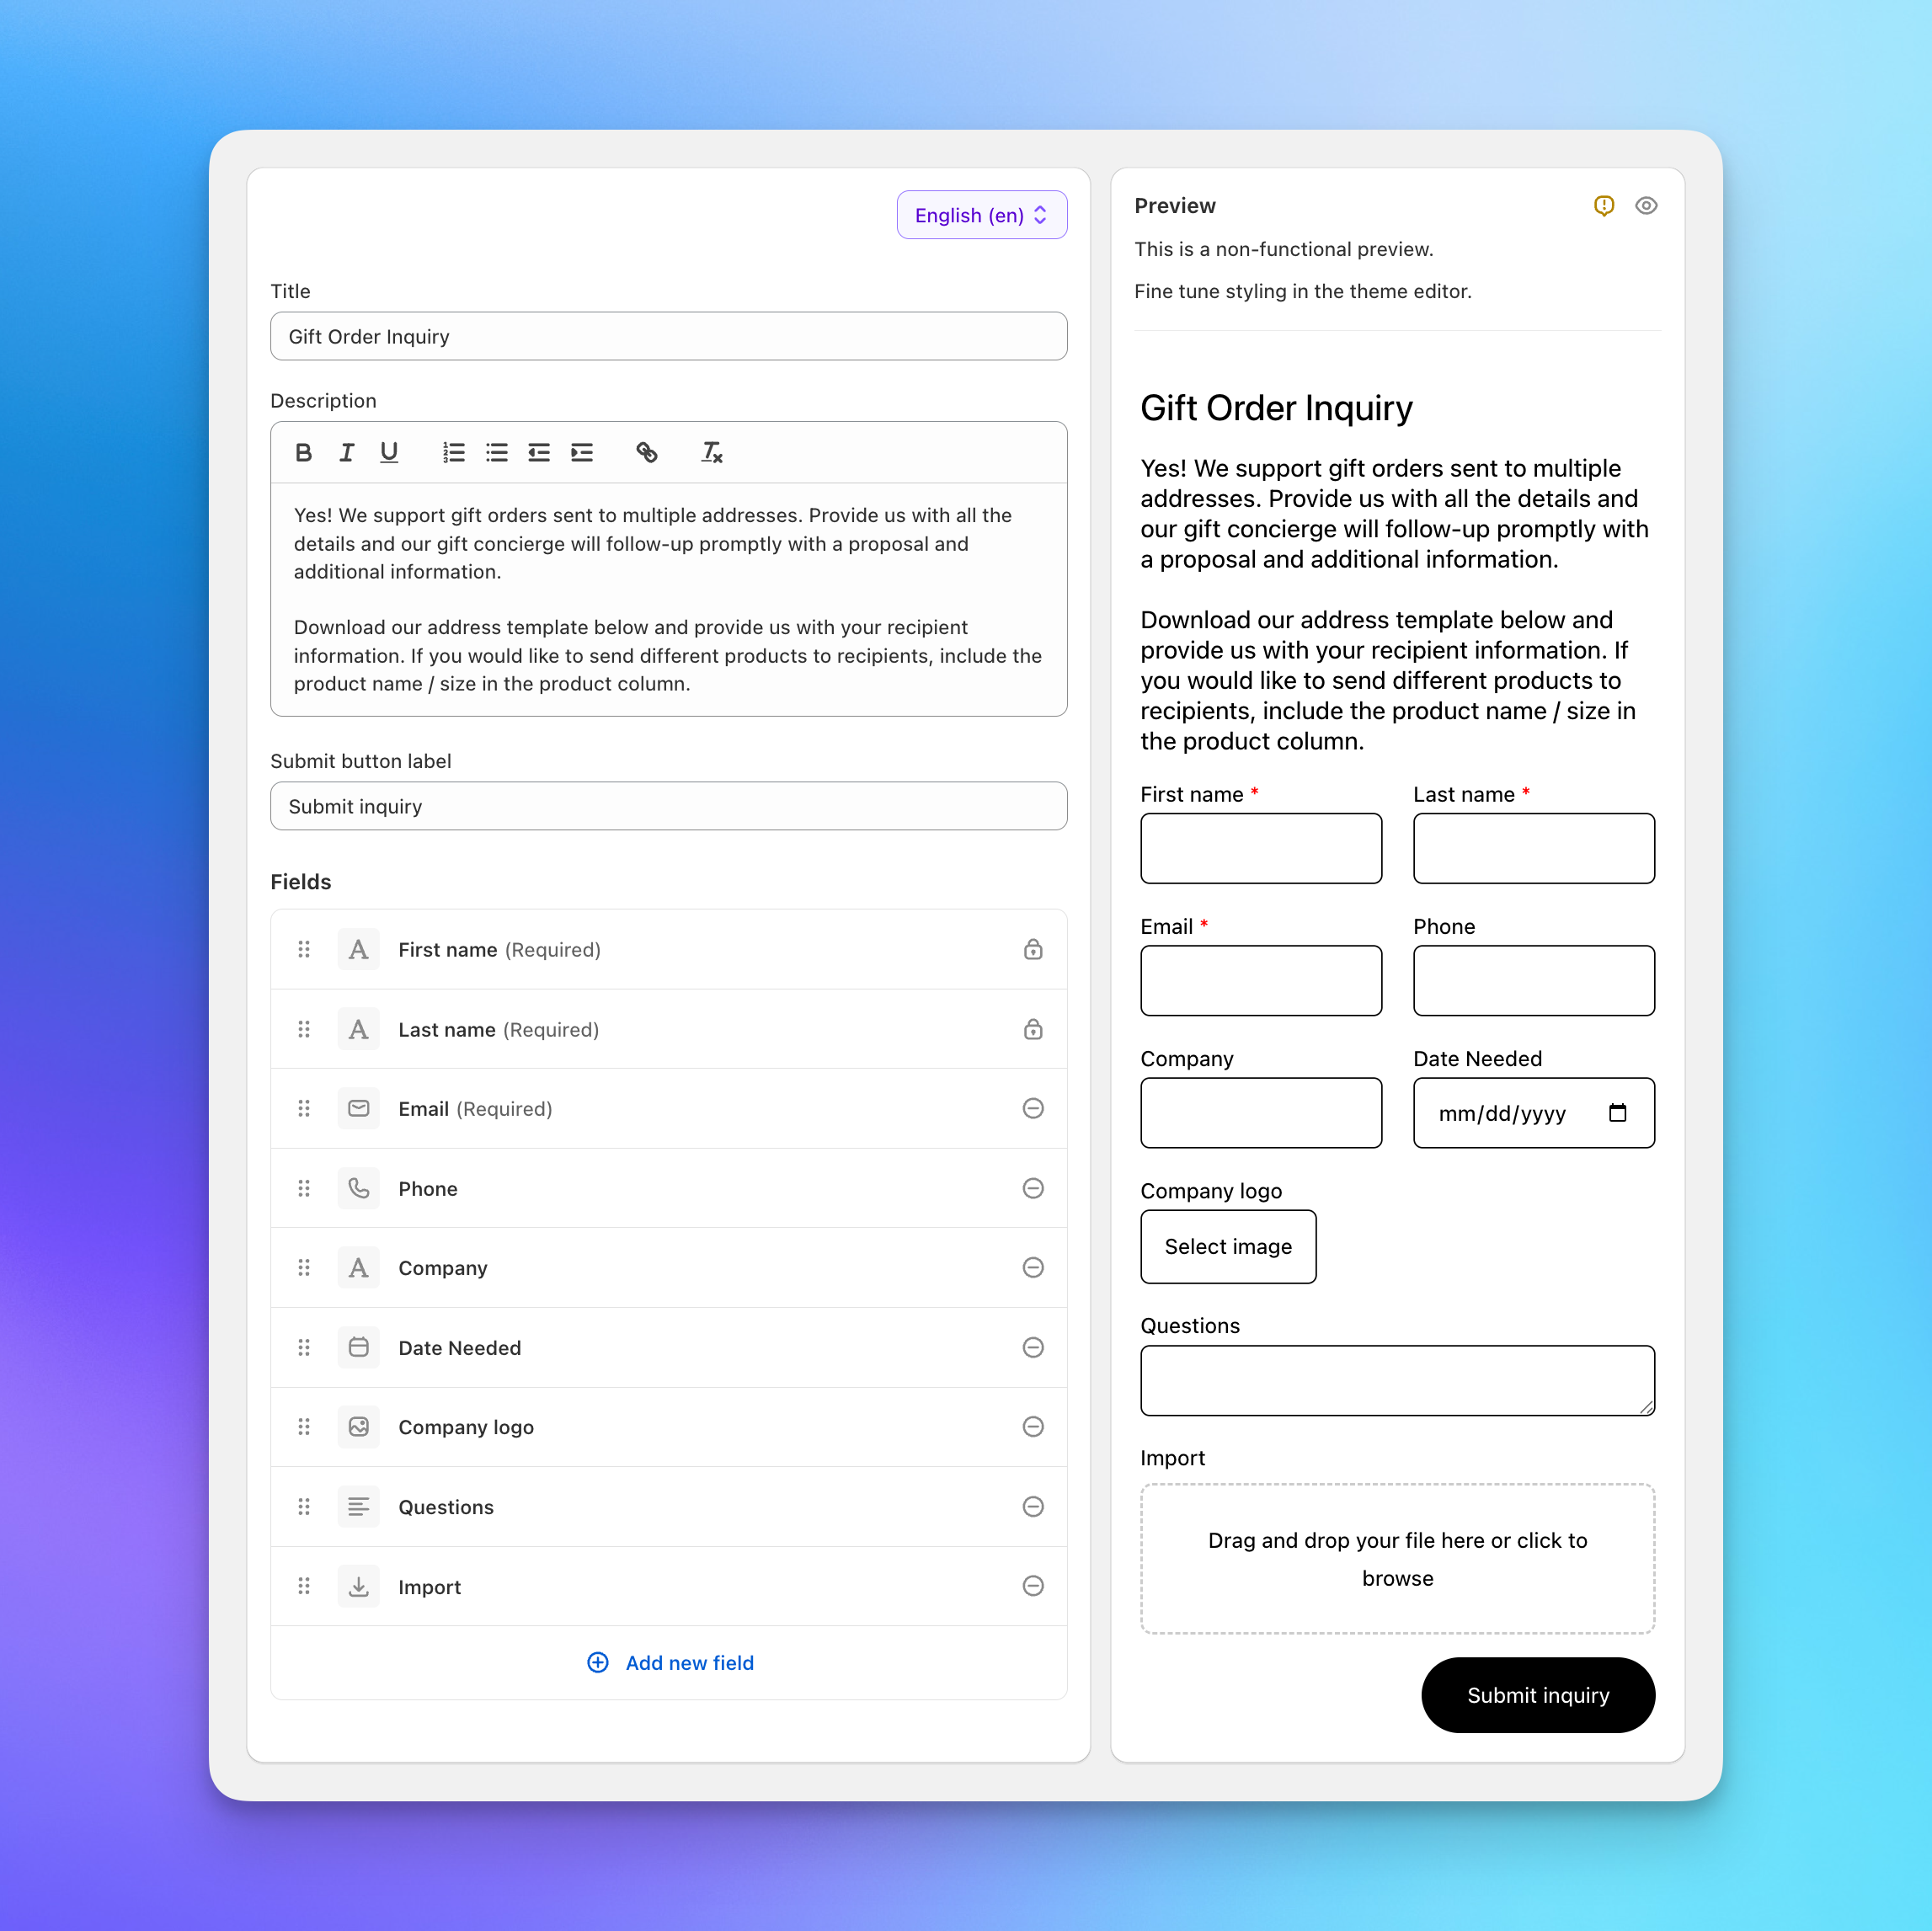
At the top of the settings page, set the Title and Description that appear above your form fields on the storefront. The description supports basic rich text formatting (bold, italic, links, lists) so you can include instructions or context for the customer. A live preview on the right shows how your form will look as you configure it.
Form Fields
The Fields section lists every field on your form. You can add, remove, reorder, and configure each one.
Default fields
When you first install the form, it comes pre-configured with a complete set of fields so it works out of the box: First Name, Last Name, Email, Phone, Company, Date Needed, Company logo, Questions, and an Import file field for recipient spreadsheets. Remove or reorder any of these to match your workflow.
First Name and Last Name are locked and always present, and Email is required by default. Send To Many uses these to create (or find) a Shopify customer when the form is submitted.
Adding and configuring fields
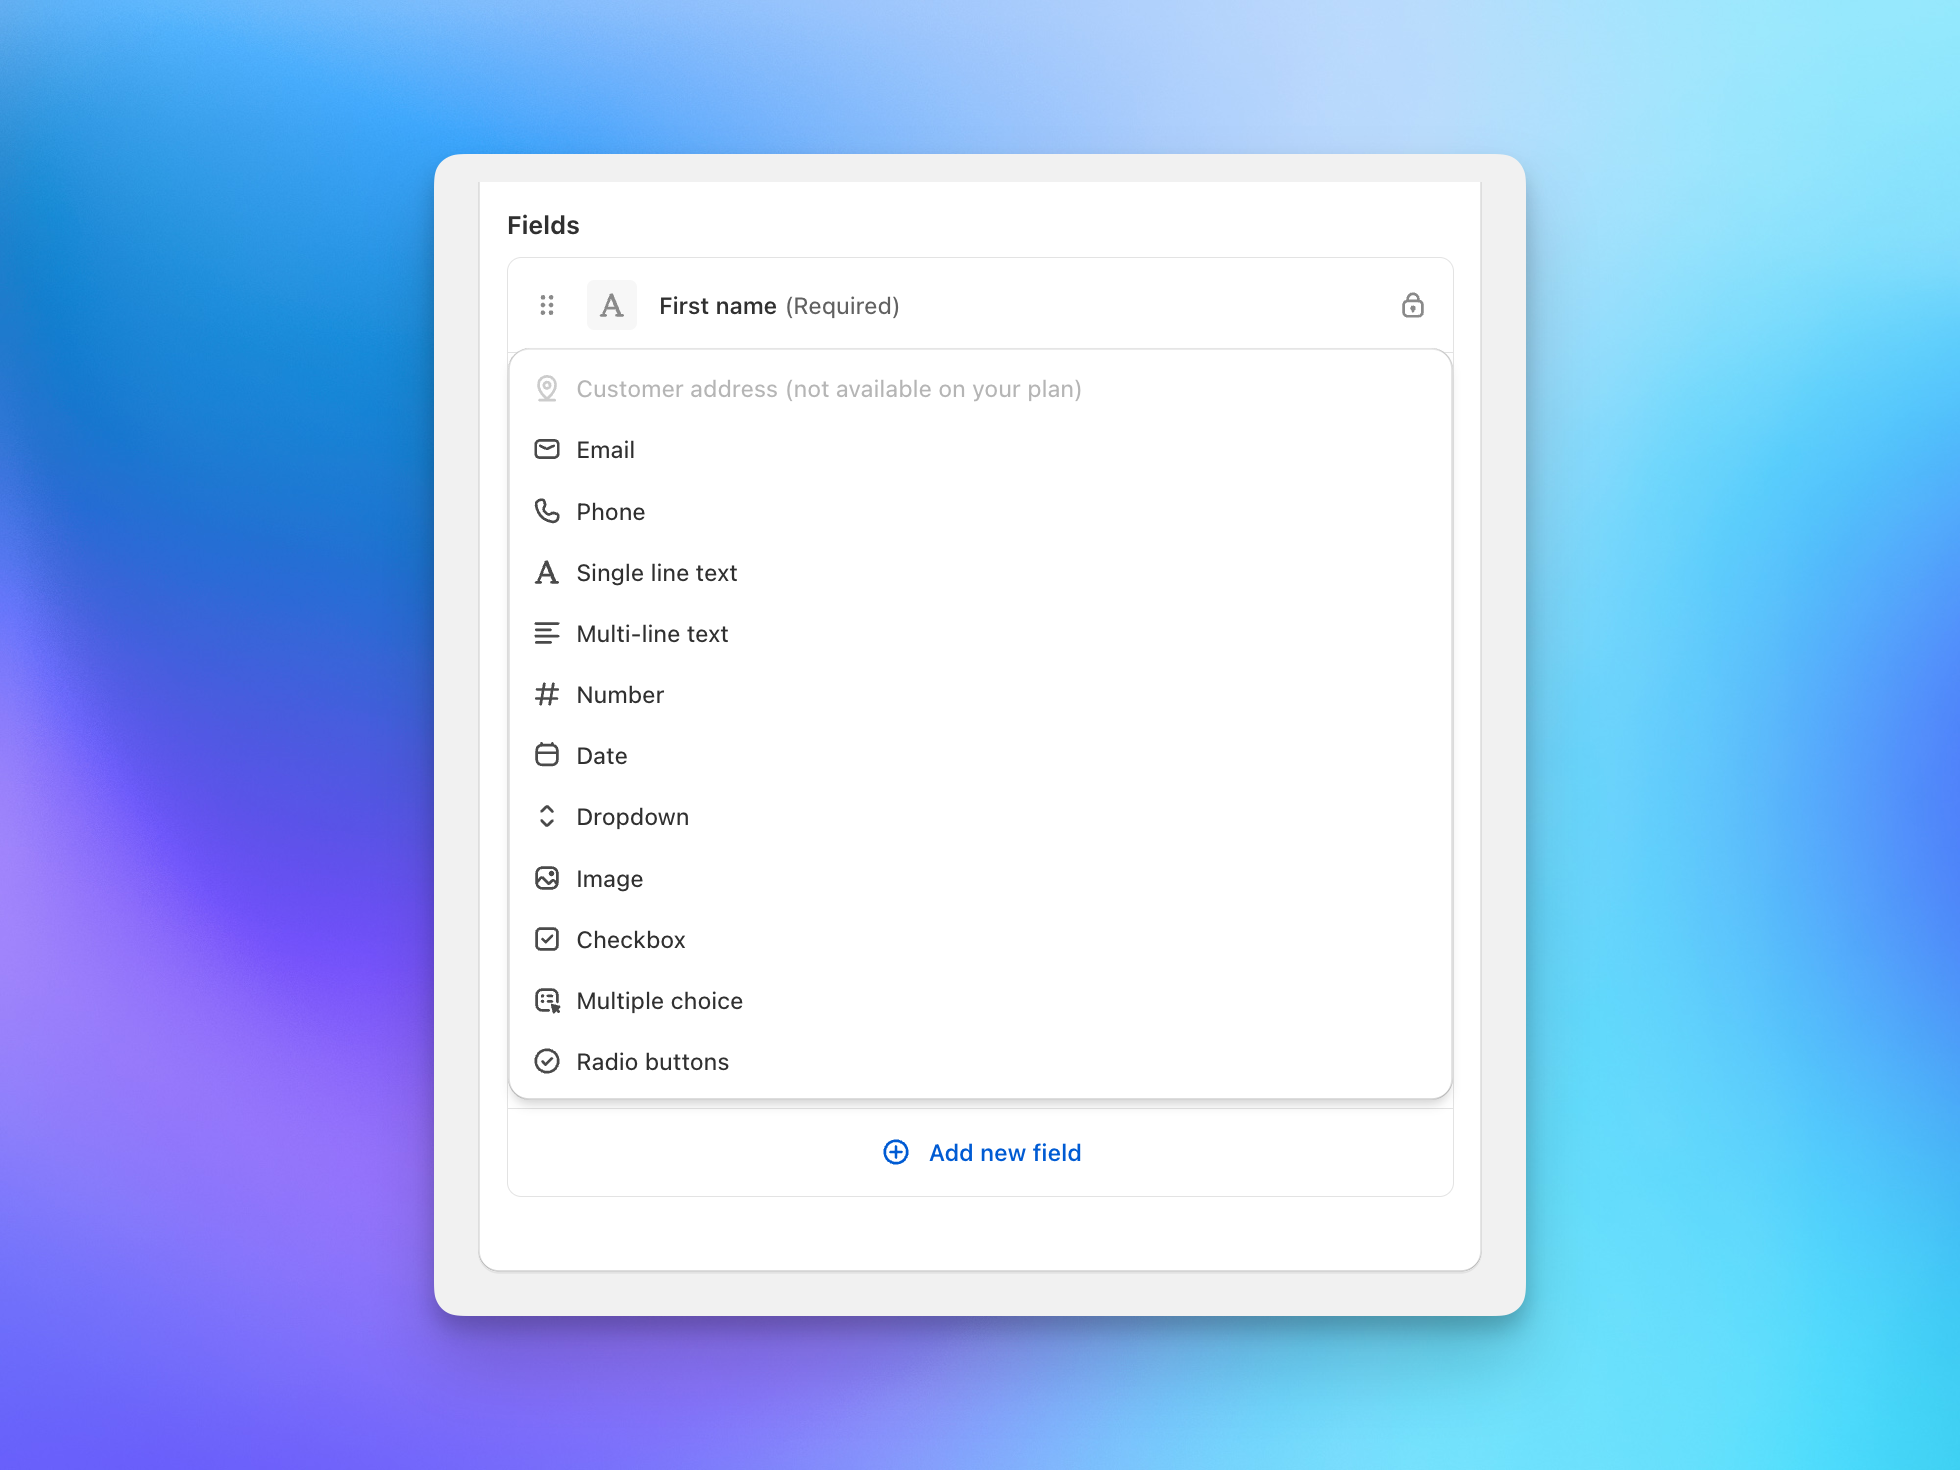
Click Add new field to add a field. Choose from these field types:
- Customer address: A structured address field that saves to the customer's default address in Shopify. Available on Pro and Enterprise plans. (See The customer address field below.)
- Email and Phone: Validated contact fields.
- Single line text: For company name, job title, or similar short answers.
- Multi-line text: For open-ended questions, special instructions, or notes.
- Number: For recipient counts, budgets, or other numeric answers.
- Date: Lets the customer select a date, such as a requested delivery date.
- Dropdown, Multiple choice, and Radio buttons: Structured choices for things like product interest or budget range.
- Image: For logos, brand assets, or other images.
- Checkbox: A yes/no toggle. Useful for opt-ins like "Customize your gift with a logo?"
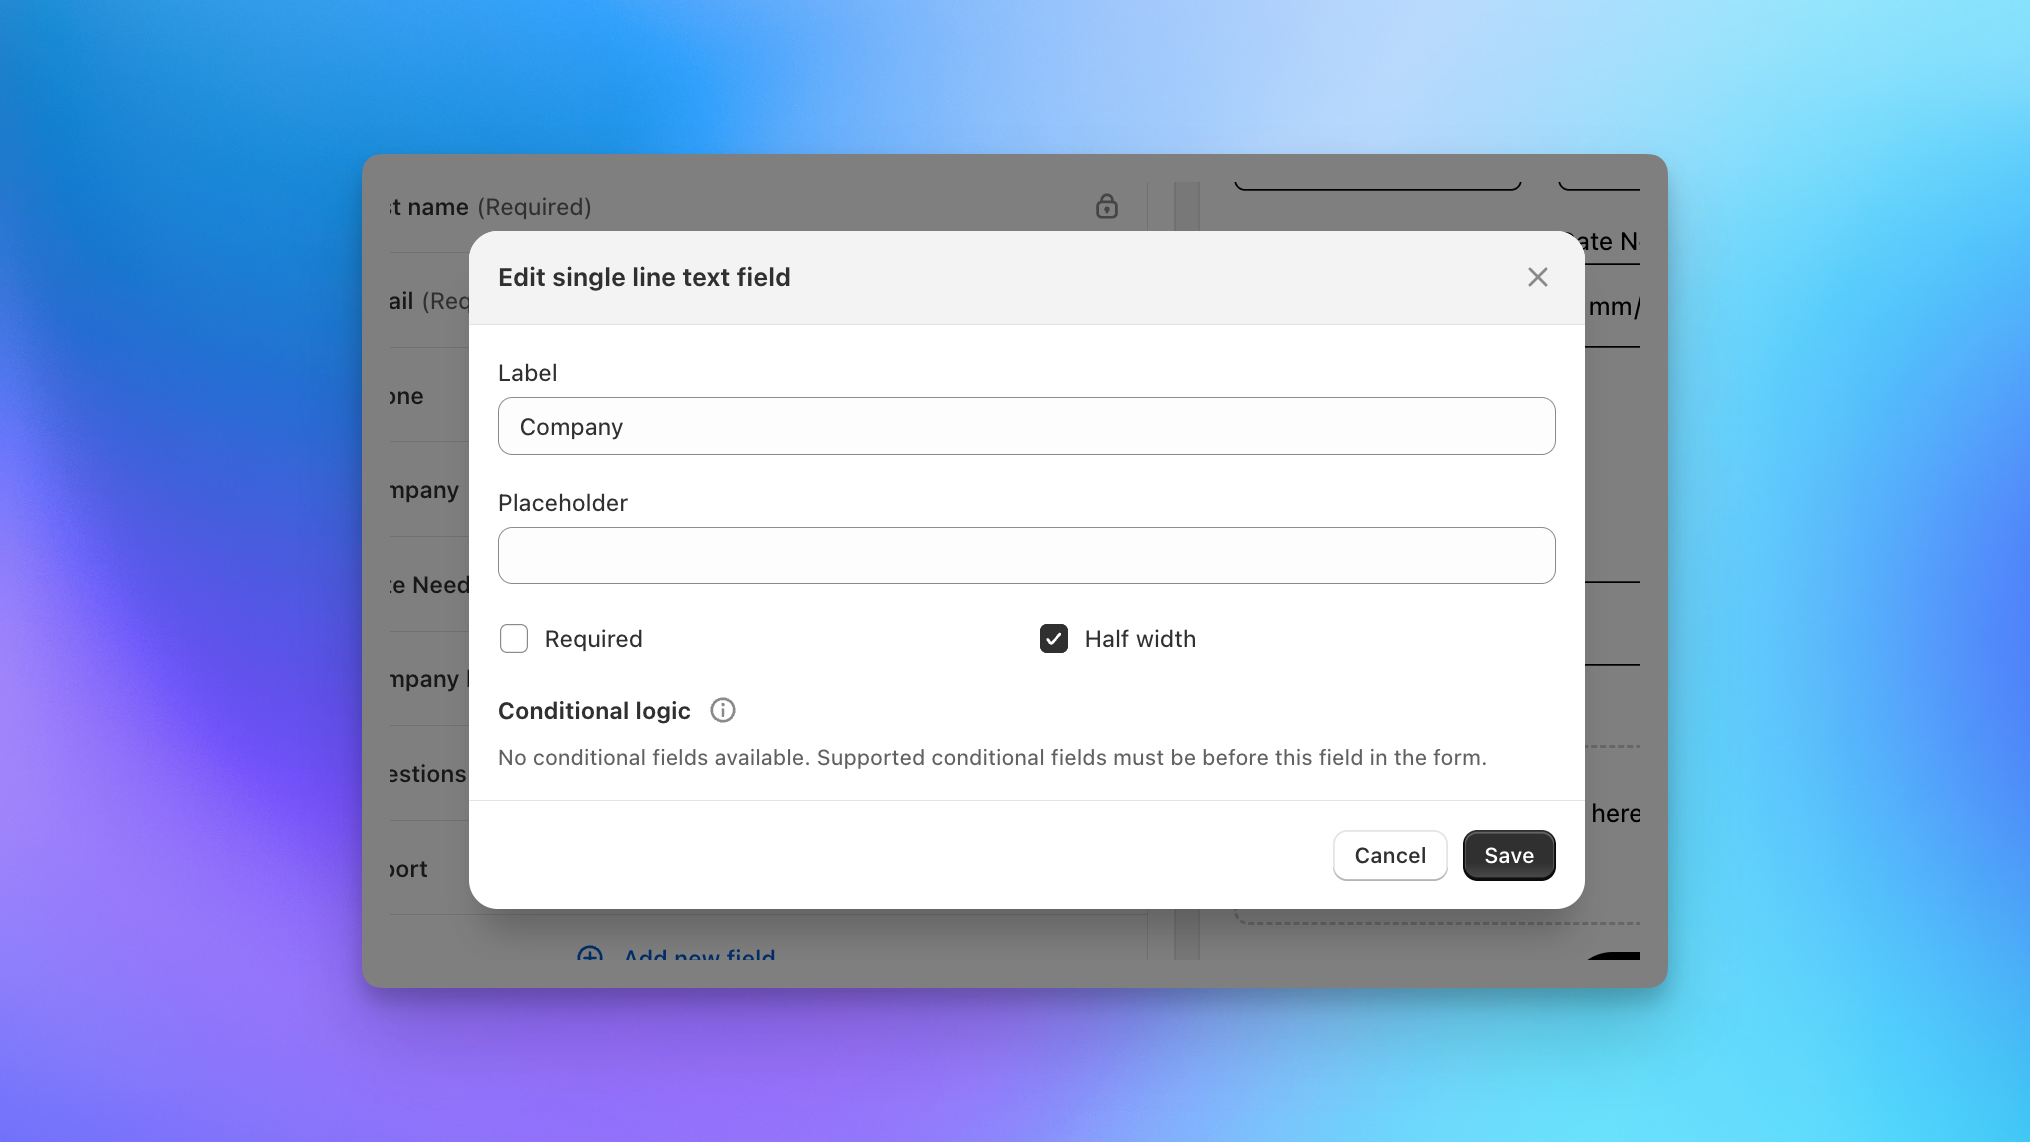
For each field, you can configure:
- Label: The field name customers see.
- Placeholder: The hint text shown inside the empty field. Every field's placeholder copy is editable.
- Required: Whether the field must be filled out to submit.
- Half width: Display the field at half width so two fields sit side by side.
Drag fields using the grip handle to reorder them. The order in the settings page matches the order on the storefront.
Conditional logic
Some fields only make sense in certain situations. Conditional logic lets you show or hide a field based on the value of a checkbox earlier in the form.
To set up a conditional field:
- Click the field you want to make conditional.
- In the field editor, find the Conditional logic section.
- Select the Form field (a checkbox) that controls visibility.
- Set the Value to "Is checked" or "Is not checked."
- Click Save.
The conditional field will only appear on the storefront when the controlling checkbox matches the value you set.
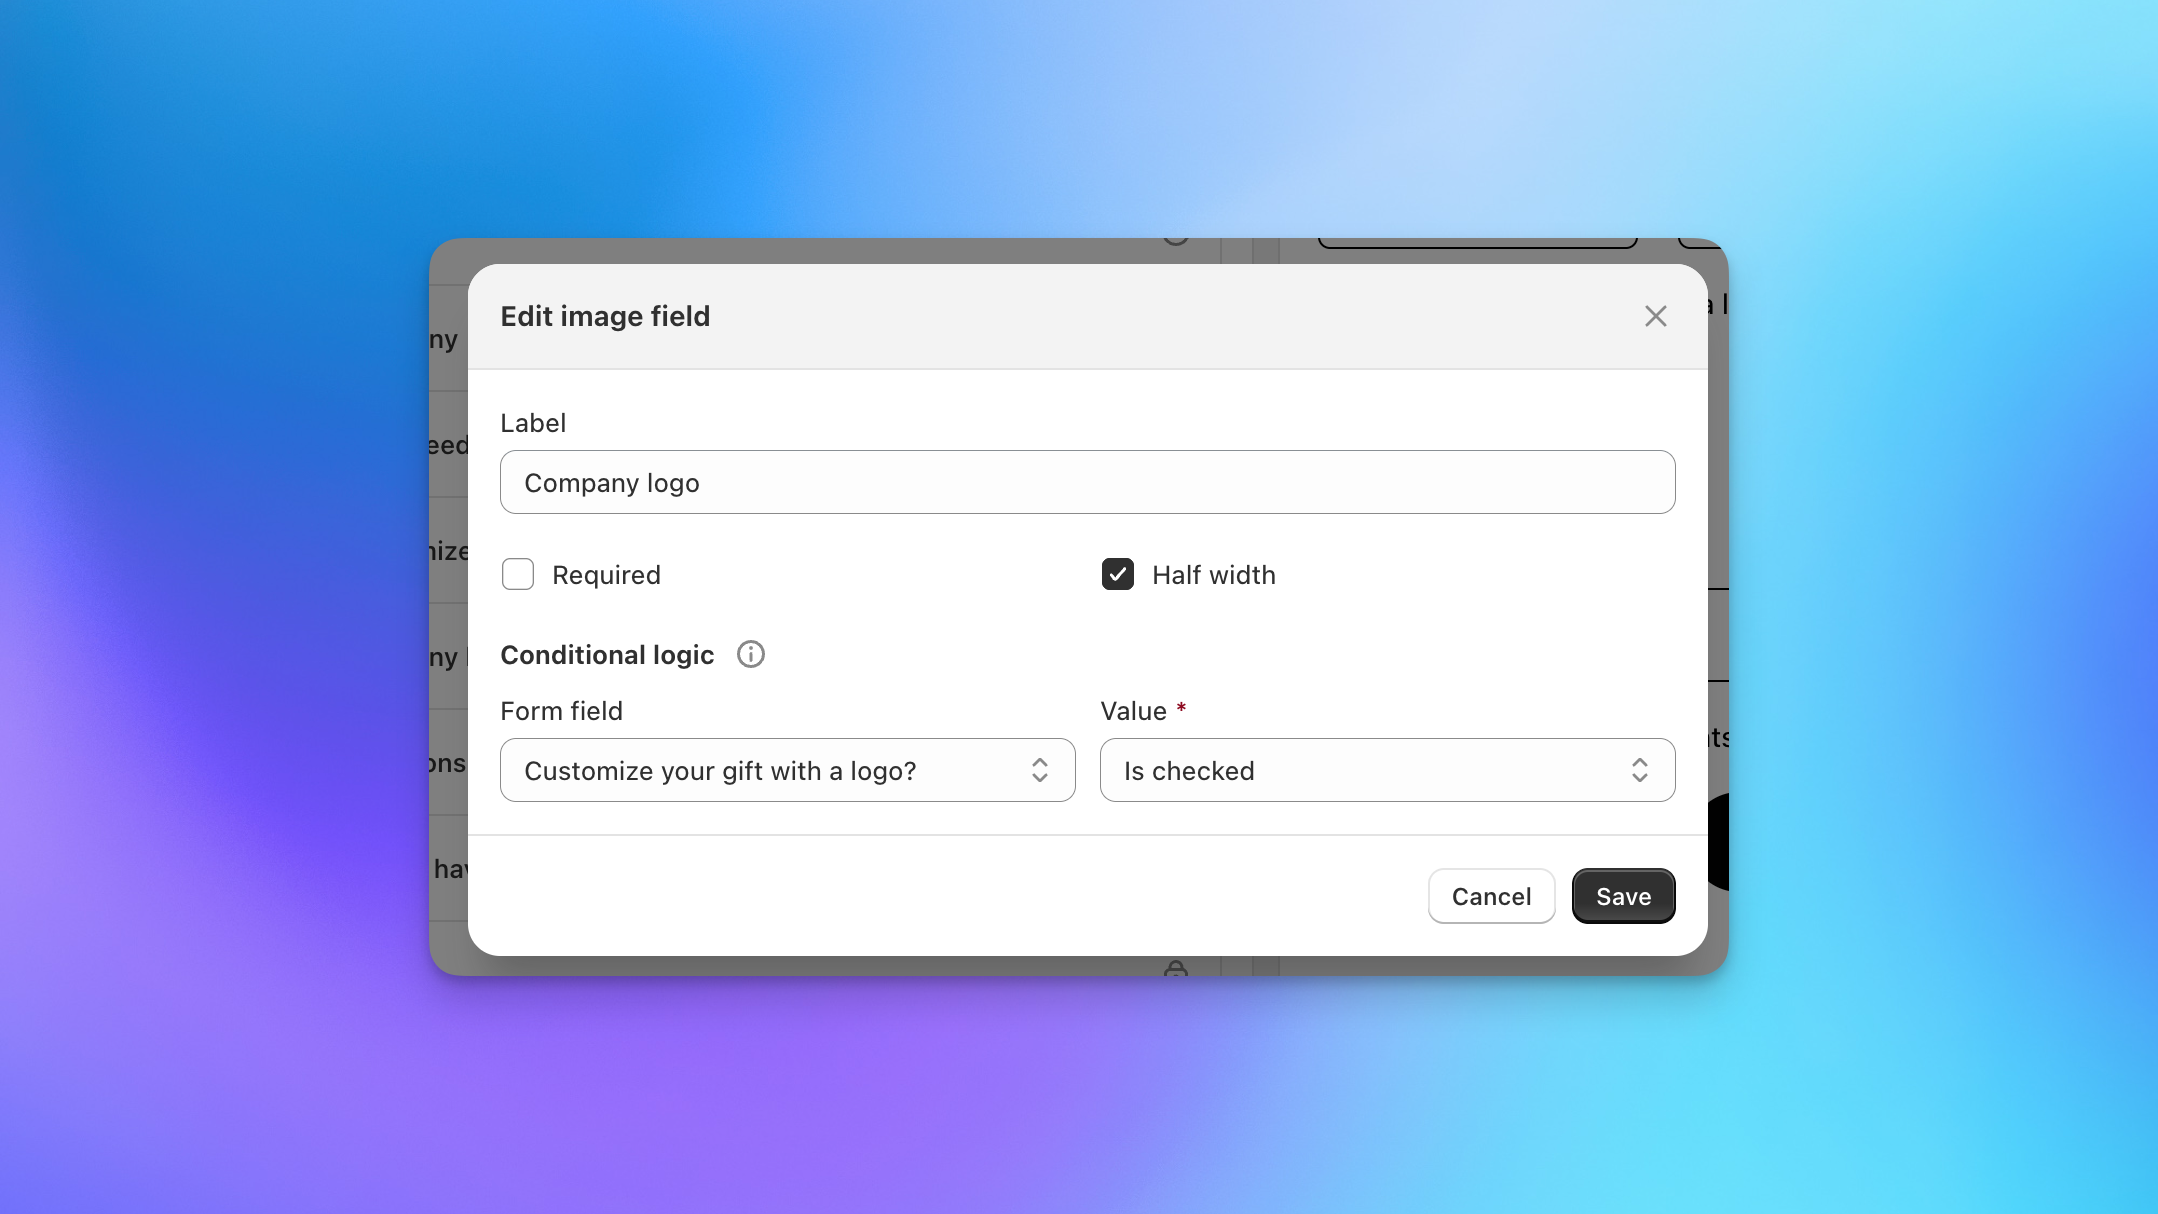
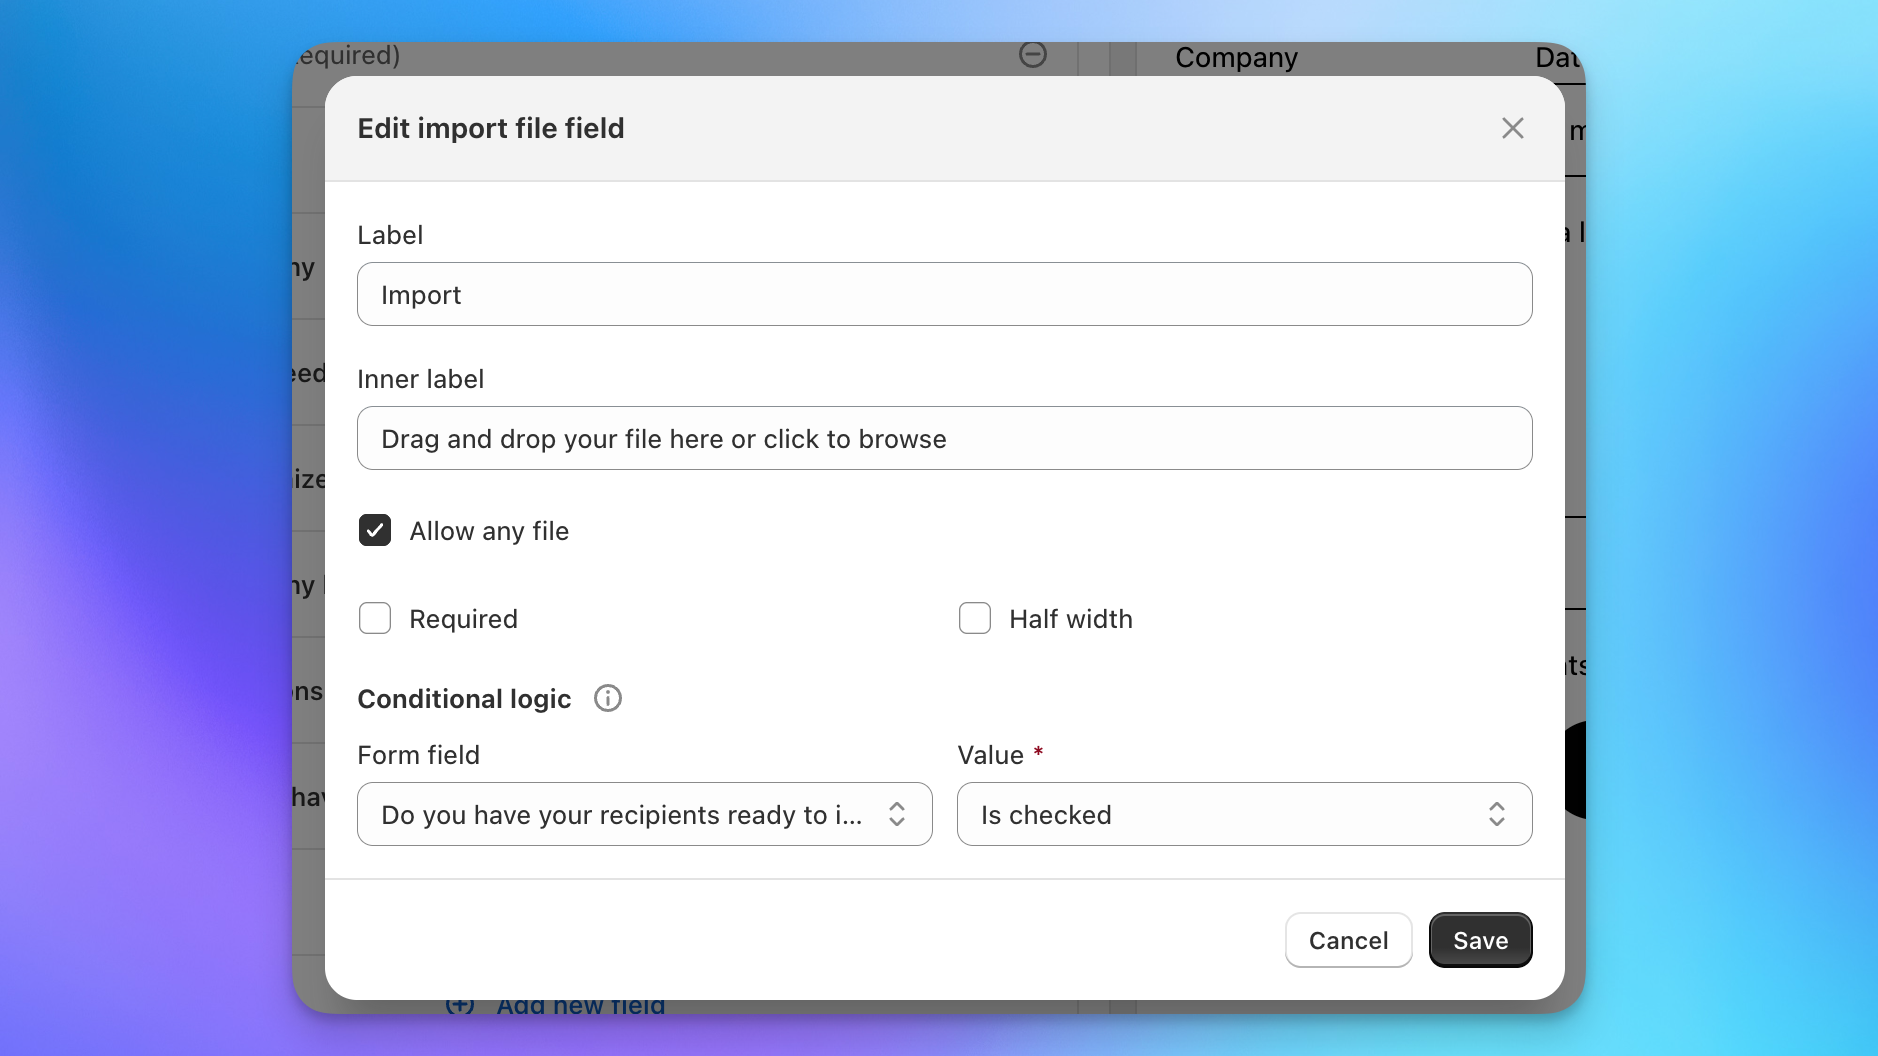
Example: Logo upload. Add a checkbox labeled "Customize your gift with a logo?" and an image field labeled "Company logo." Set the image field's conditional logic to show when "Customize your gift with a logo?" is checked. Customers only see the logo upload if they opt in.
Conditional fields must reference a checkbox that appears before them in the form. If you don't see a field in the conditional logic dropdown, move the controlling checkbox higher in the field order.
The Customer Address Field
The customer address field is available on Pro and Enterprise plans.
The customer address field is a structured address input with a direct line to your Shopify customer records. When an inquiry is submitted, Send To Many creates the customer in your store if they don't already exist (matched by email address), and the address entered in this field becomes the new customer's default address. It's a great way to collect a billing address for new inquiries and ensures you have accurate info on file right from the start of the process.
If the submitter matches an existing customer, their customer record is not changed. Instead, the address from the form is set as the billing address on the Send created from the inquiry.
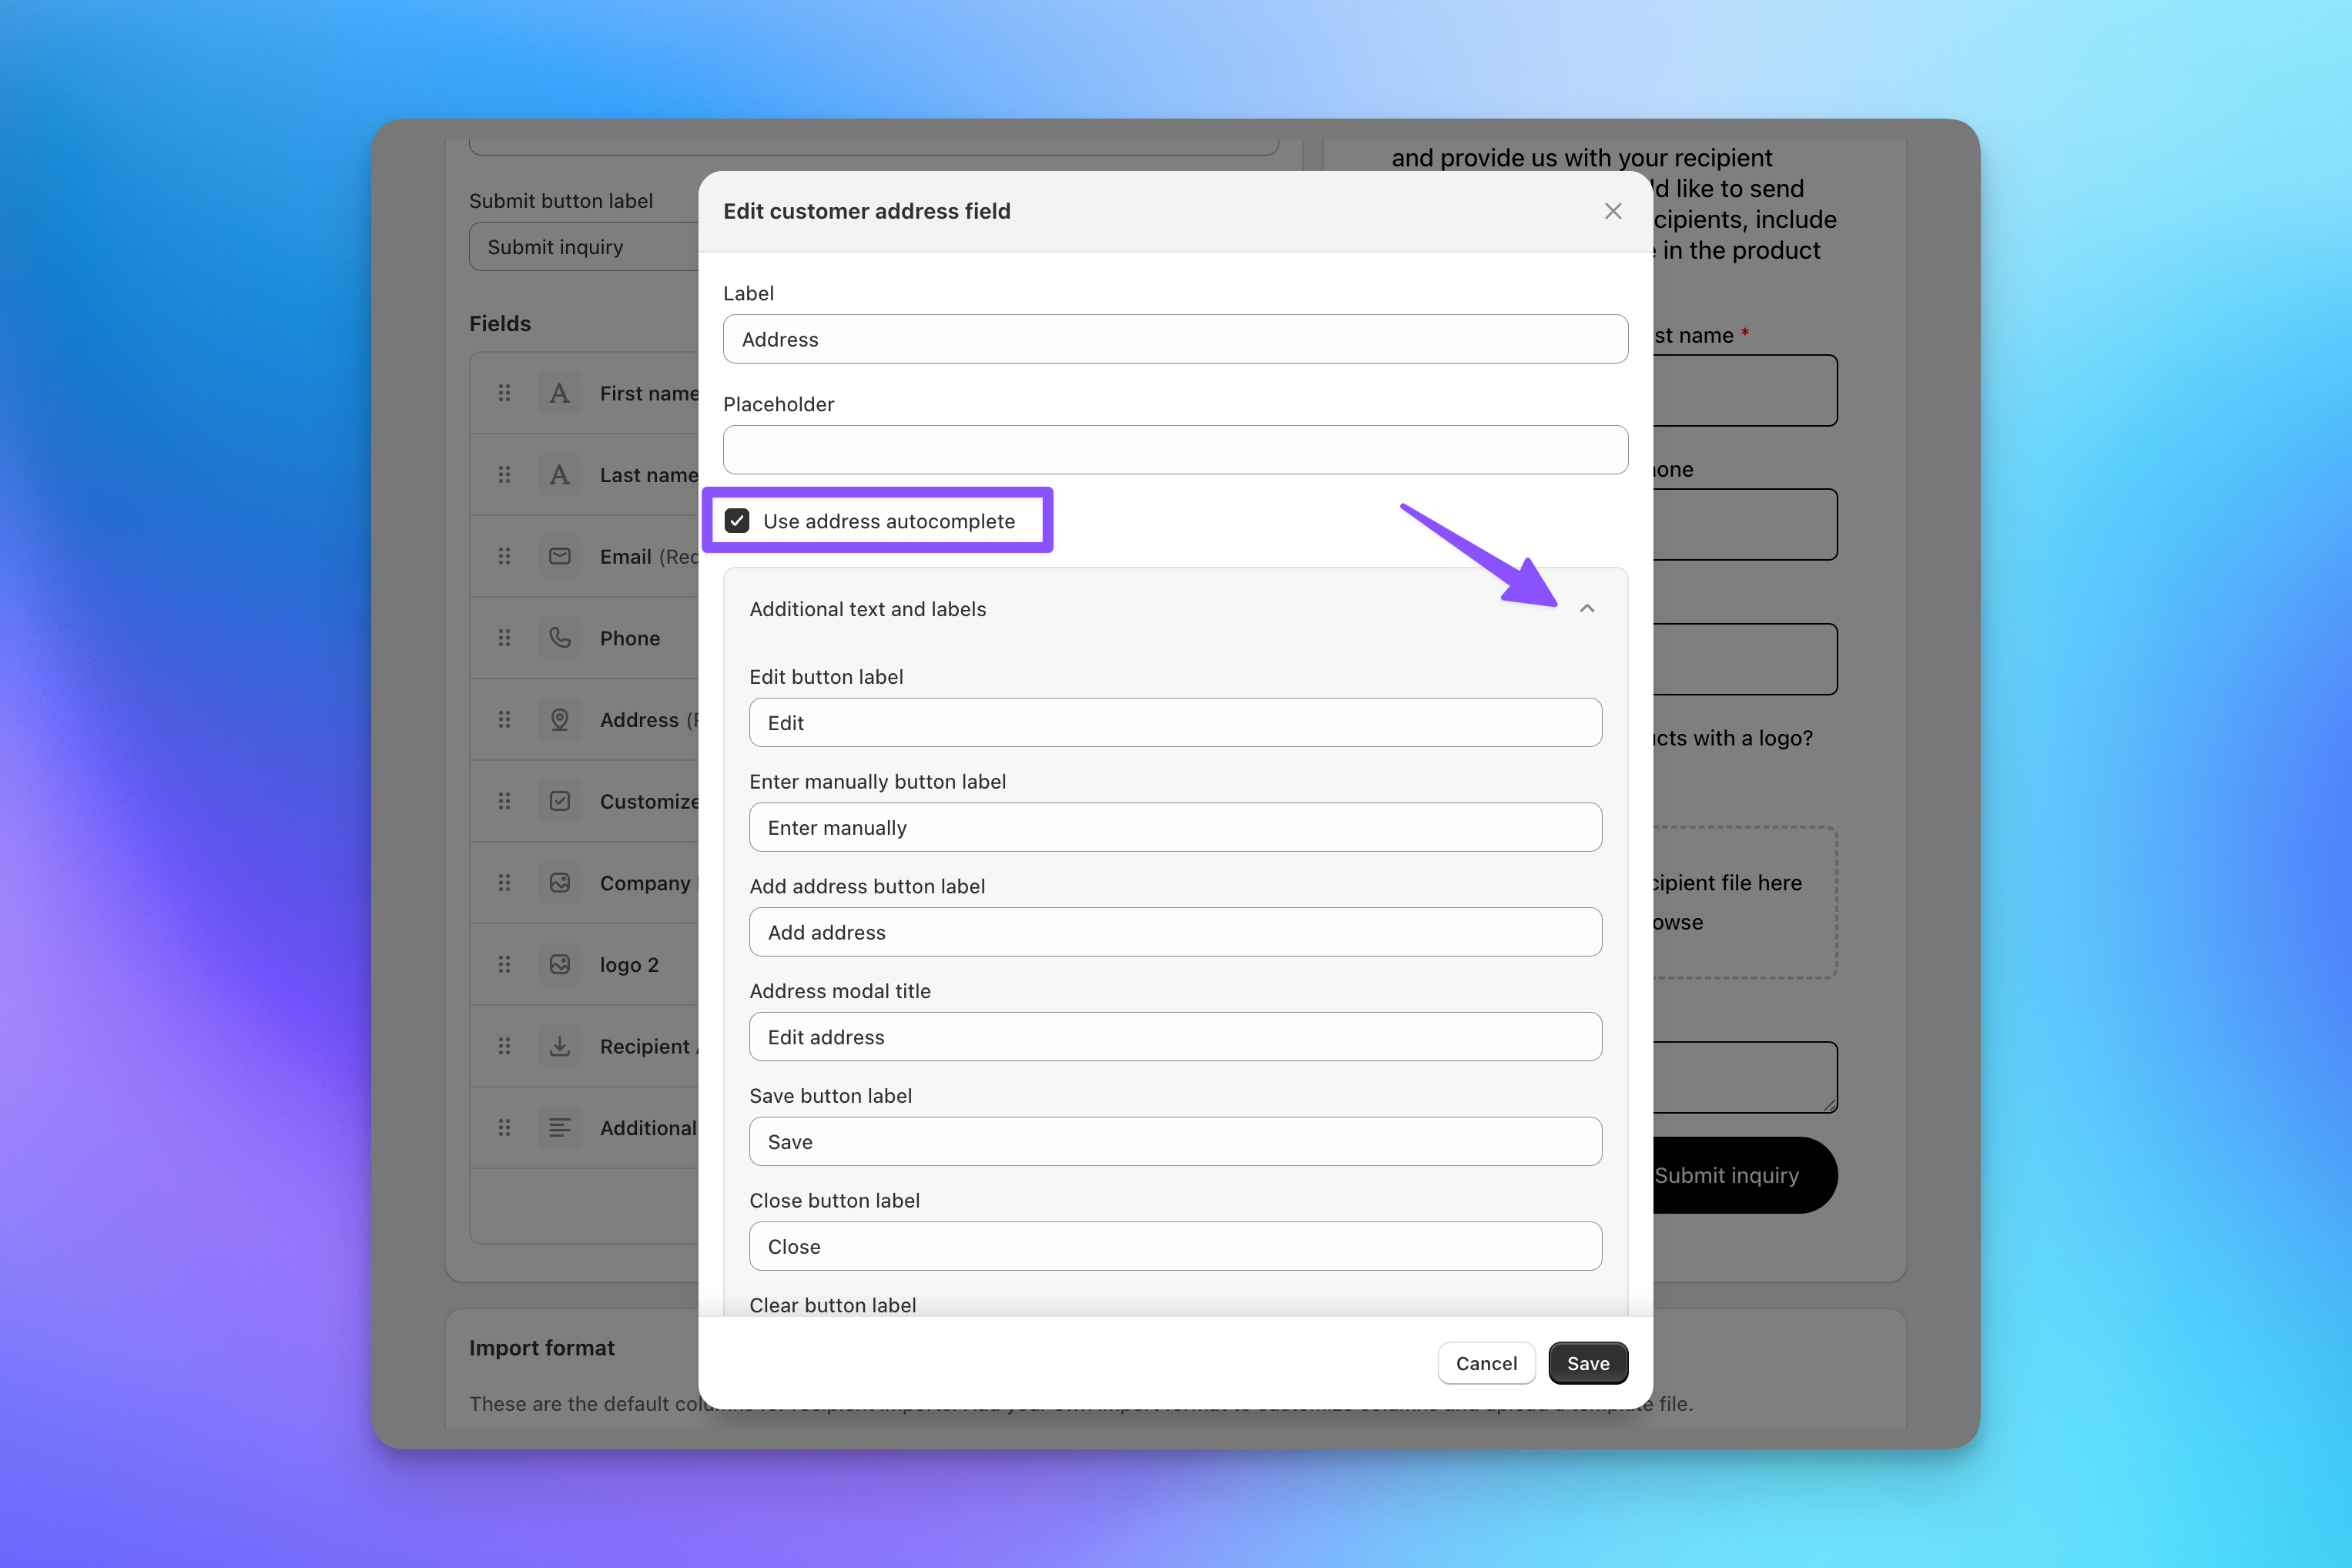
Configuration options:
- Use address autocomplete: An optional setting. When enabled, customers get address suggestions as they type, which reduces typos and produces cleaner data. Uncheck it if you prefer plain manual entry.
- Additional text and labels: Every piece of text in the address entry experience is editable, including the Edit, Enter manually, Add address, Save, Close, and Clear button labels and the address modal title. All of these are translatable too (see Translations below).
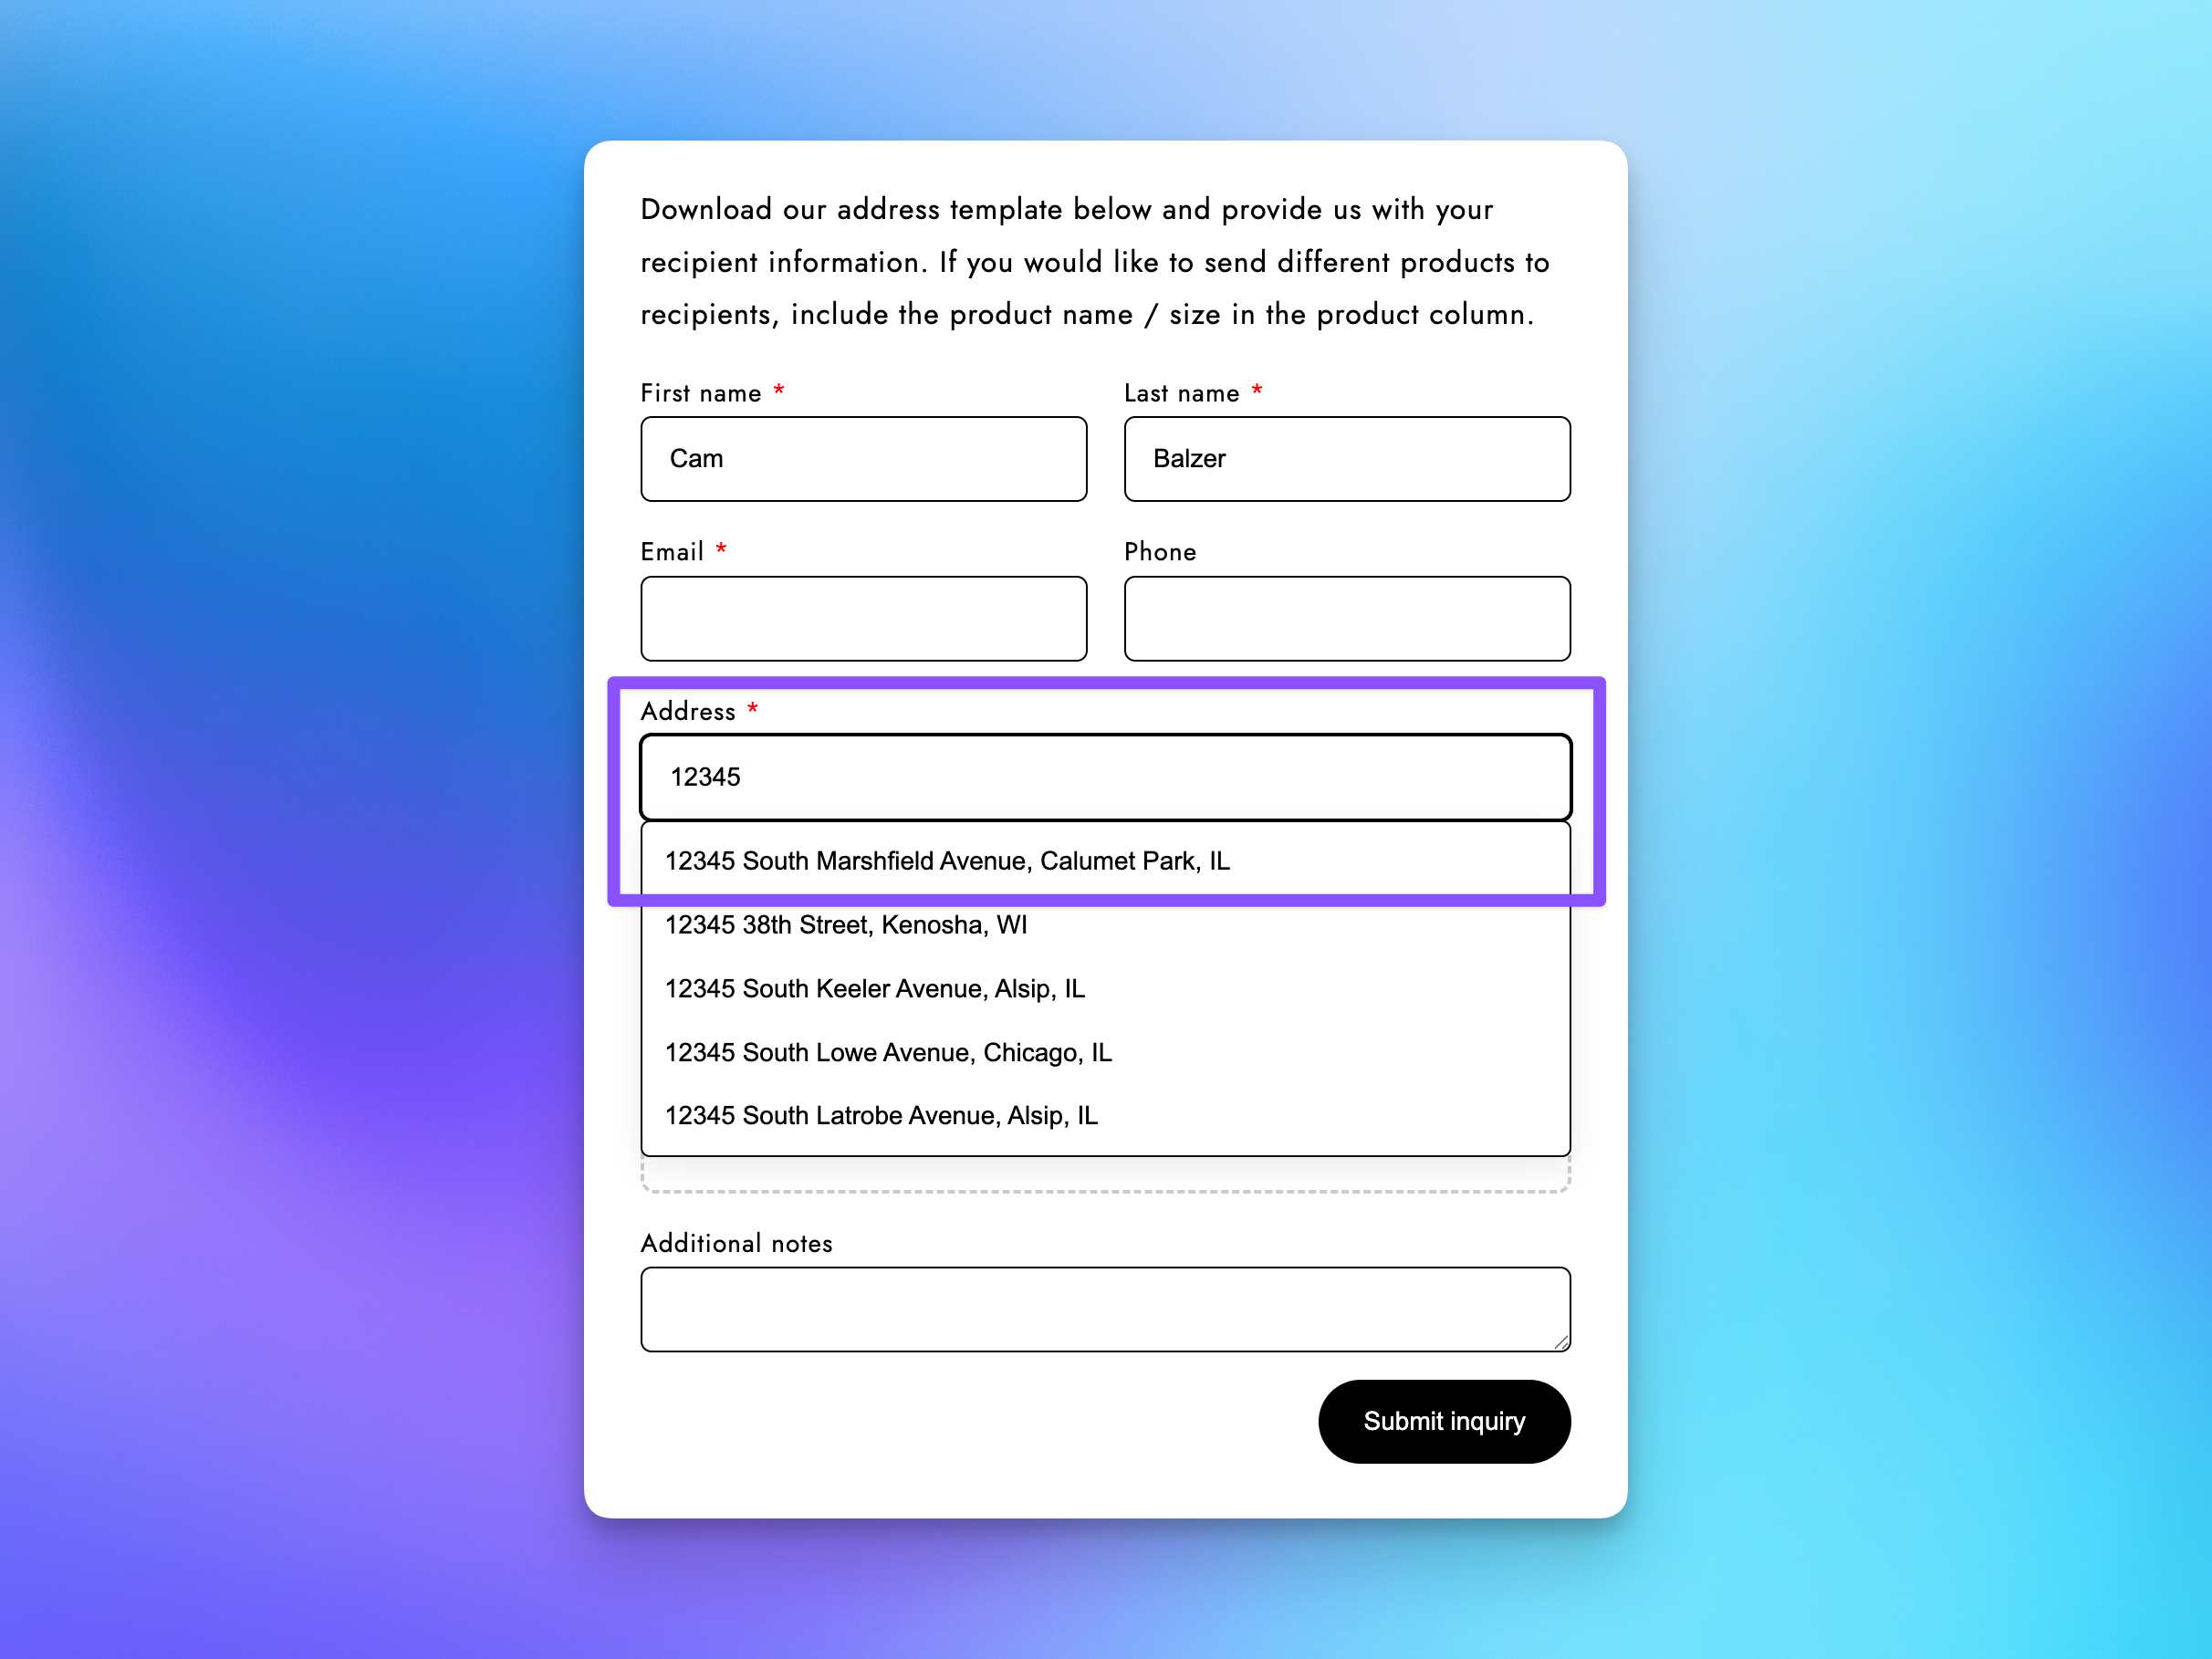
On other plans, you can still collect address information by adding individual text fields (Address 1, City, and so on) to the form. Those responses arrive with the inquiry, but they are not written to the Shopify customer record. You'd add them to the customer manually.
The Import File Field
The import file field is a special field type designed for recipient address spreadsheets. It accepts CSV, XLSX, XLS, and Numbers files. It's included on the form by default, and it's optional for customers to fill: someone without a spreadsheet ready can still submit their inquiry.
When a customer uploads a file through this field:
- The file is attached to the inquiry and ready to import when you open it in the admin.
- If you have a saved Import Format that matches the file's column headers, it applies automatically during import.
- You don't need to download and re-upload the file. It's already queued.
The Allow any file checkbox controls whether the field accepts any file type or only spreadsheet formats. When checked, customers can upload PDFs, images, or other documents alongside (or instead of) a structured spreadsheet.
Import Format
The form includes a default import format out of the box, with standard columns: name, email address, phone, street address 1 and 2, city, state, zip, country, product, quantity, and gift message. Customers can download the matching template right from the form, and files they upload with these columns map automatically. There's nothing you need to set up before the import file field works.
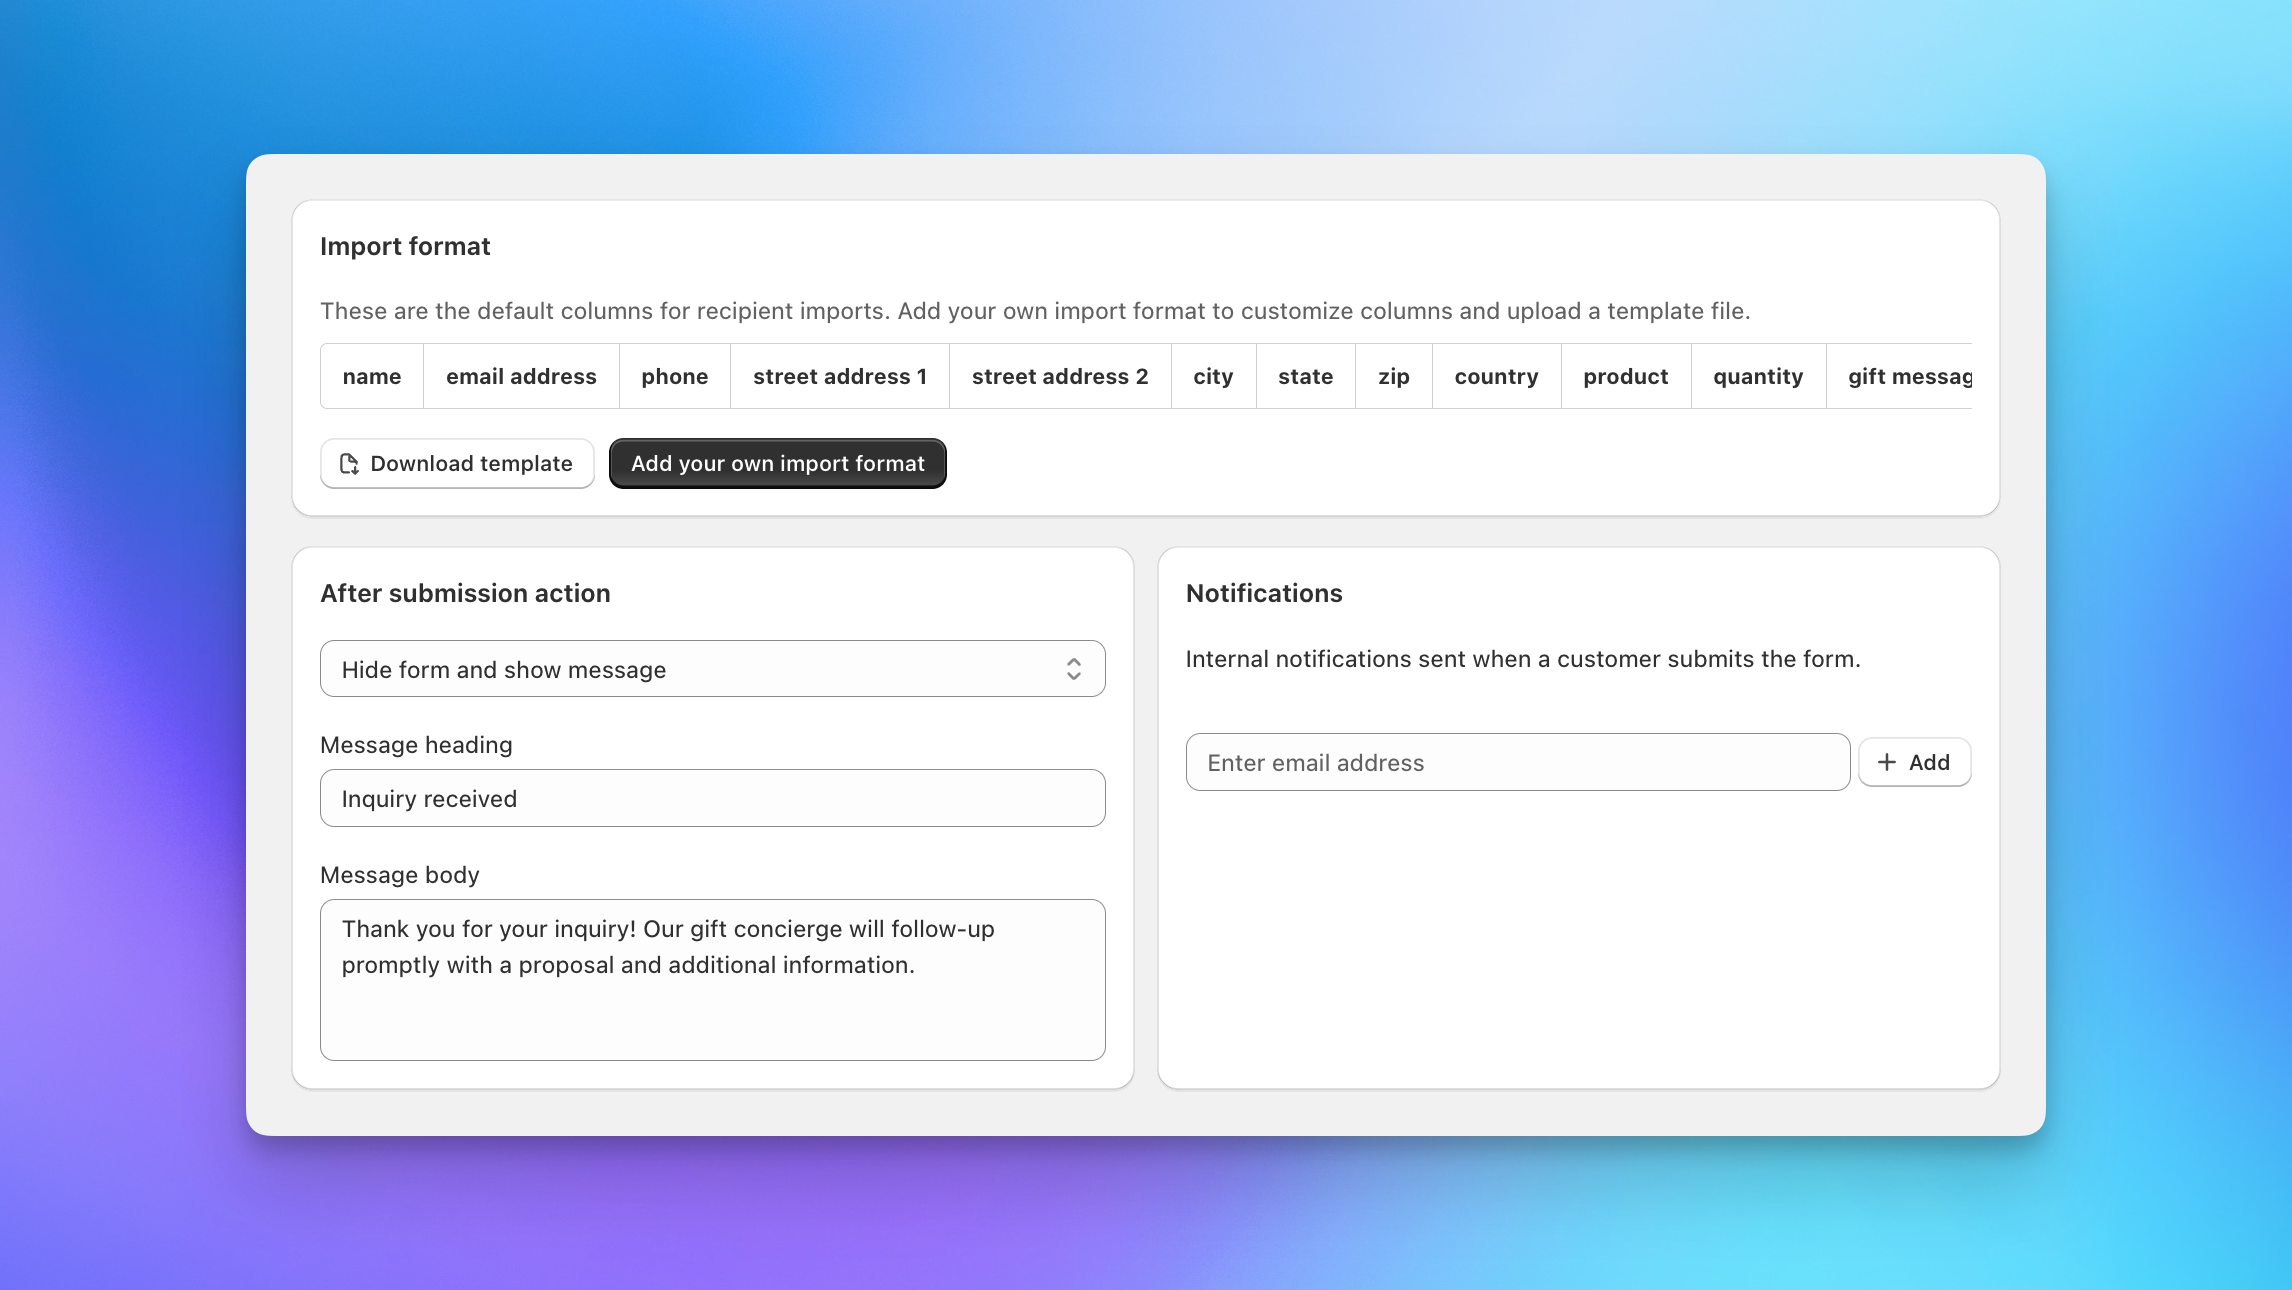
Adding your own import format
If you want different columns or your own template file, click Add your own import format. Upload your template, then map each column to the corresponding Send To Many field (Full name, Email, Address 1, etc.) on the column mapping screen.
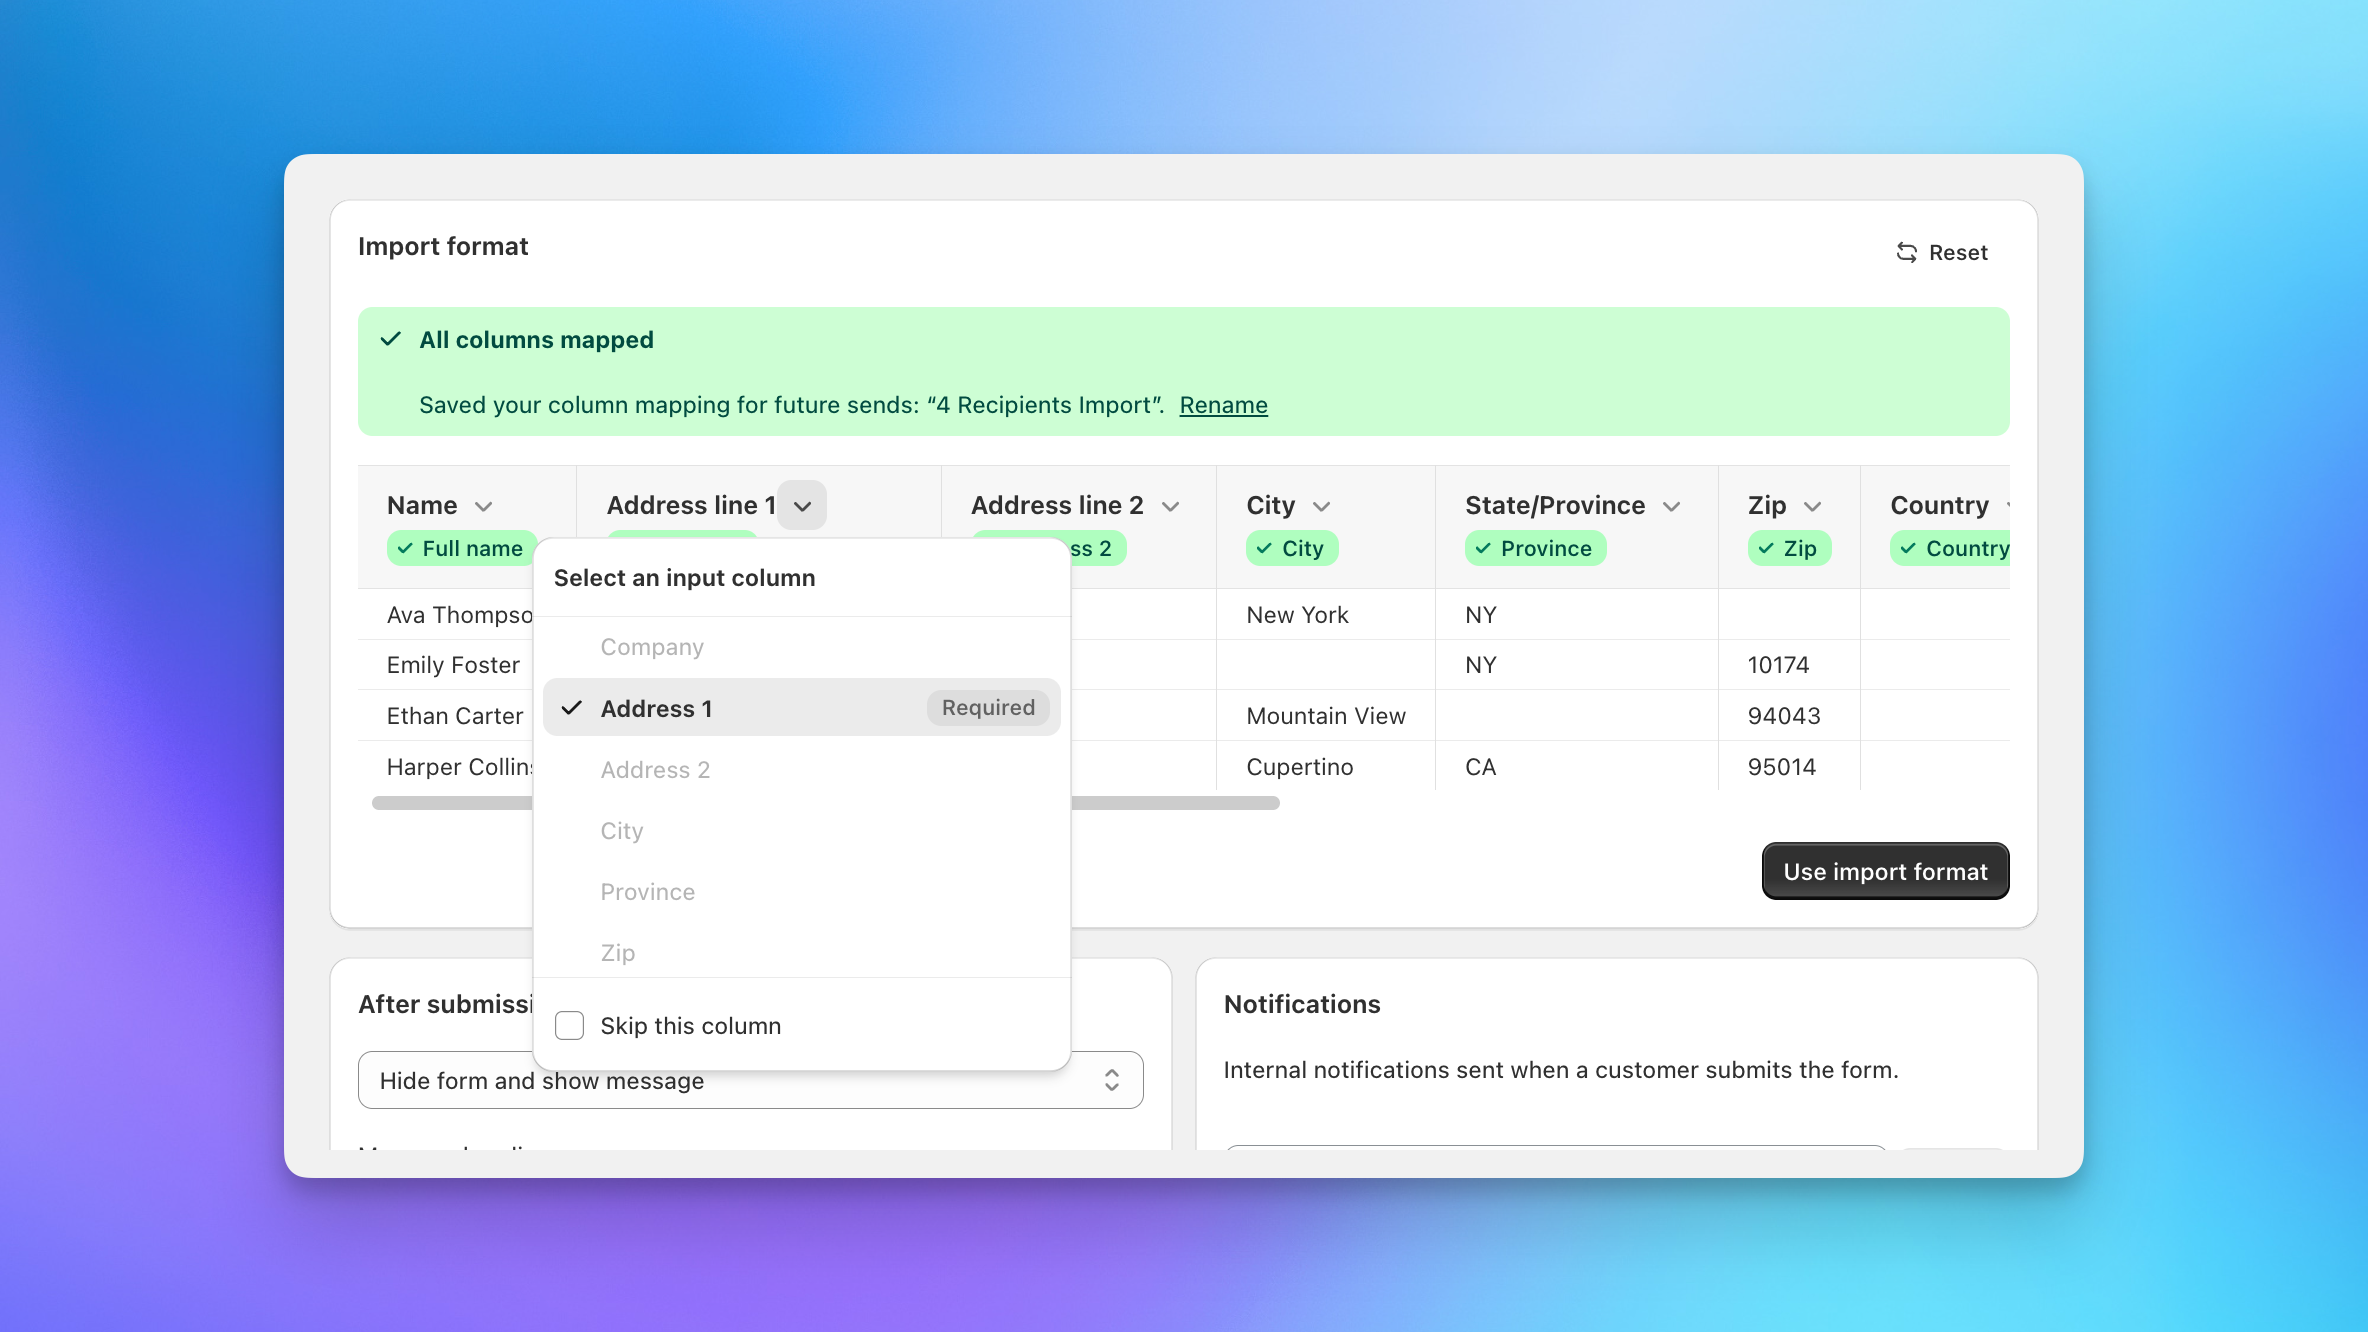
This saved mapping becomes the Import Format that applies automatically whenever a customer uploads a file with matching headers through the inquiry form (or when you upload a file with the same headers during a manual Send).
The template you upload is what customers receive when they click "Download import file" on the form. This is your chance to standardize the data you receive by giving customers a pre-formatted spreadsheet with the exact columns and instructions you need.
Do not include real customer information in your template. Any rows you include in the uploaded file will be visible to everyone who downloads it from your storefront.
We provide two sample templates you can use as starting points:
Basic CSV template: A simple CSV with standard columns (name, email, phone, address, product, quantity, gift message, shipping date). Works for most use cases and is easy for customers to fill out in any spreadsheet app.
Advanced XLSX template: An Excel file with product and shipping rate dropdown menus, a sample data row, column formatting hints, and space for your logo and instructions. Customize this with your own products, shipping options, and branding before uploading it as your template.
The advanced template includes a Data sheet where you define the dropdown options for the Product and Shipping Method columns. Replace the sample product and shipping names with your own, and the dropdowns on the Recipients sheet update automatically. You can also add your company logo to the header area and include any instructions or notes at the top of the sheet.
Multiple Form Configurations
Multiple form configurations are available on Pro and Enterprise plans.
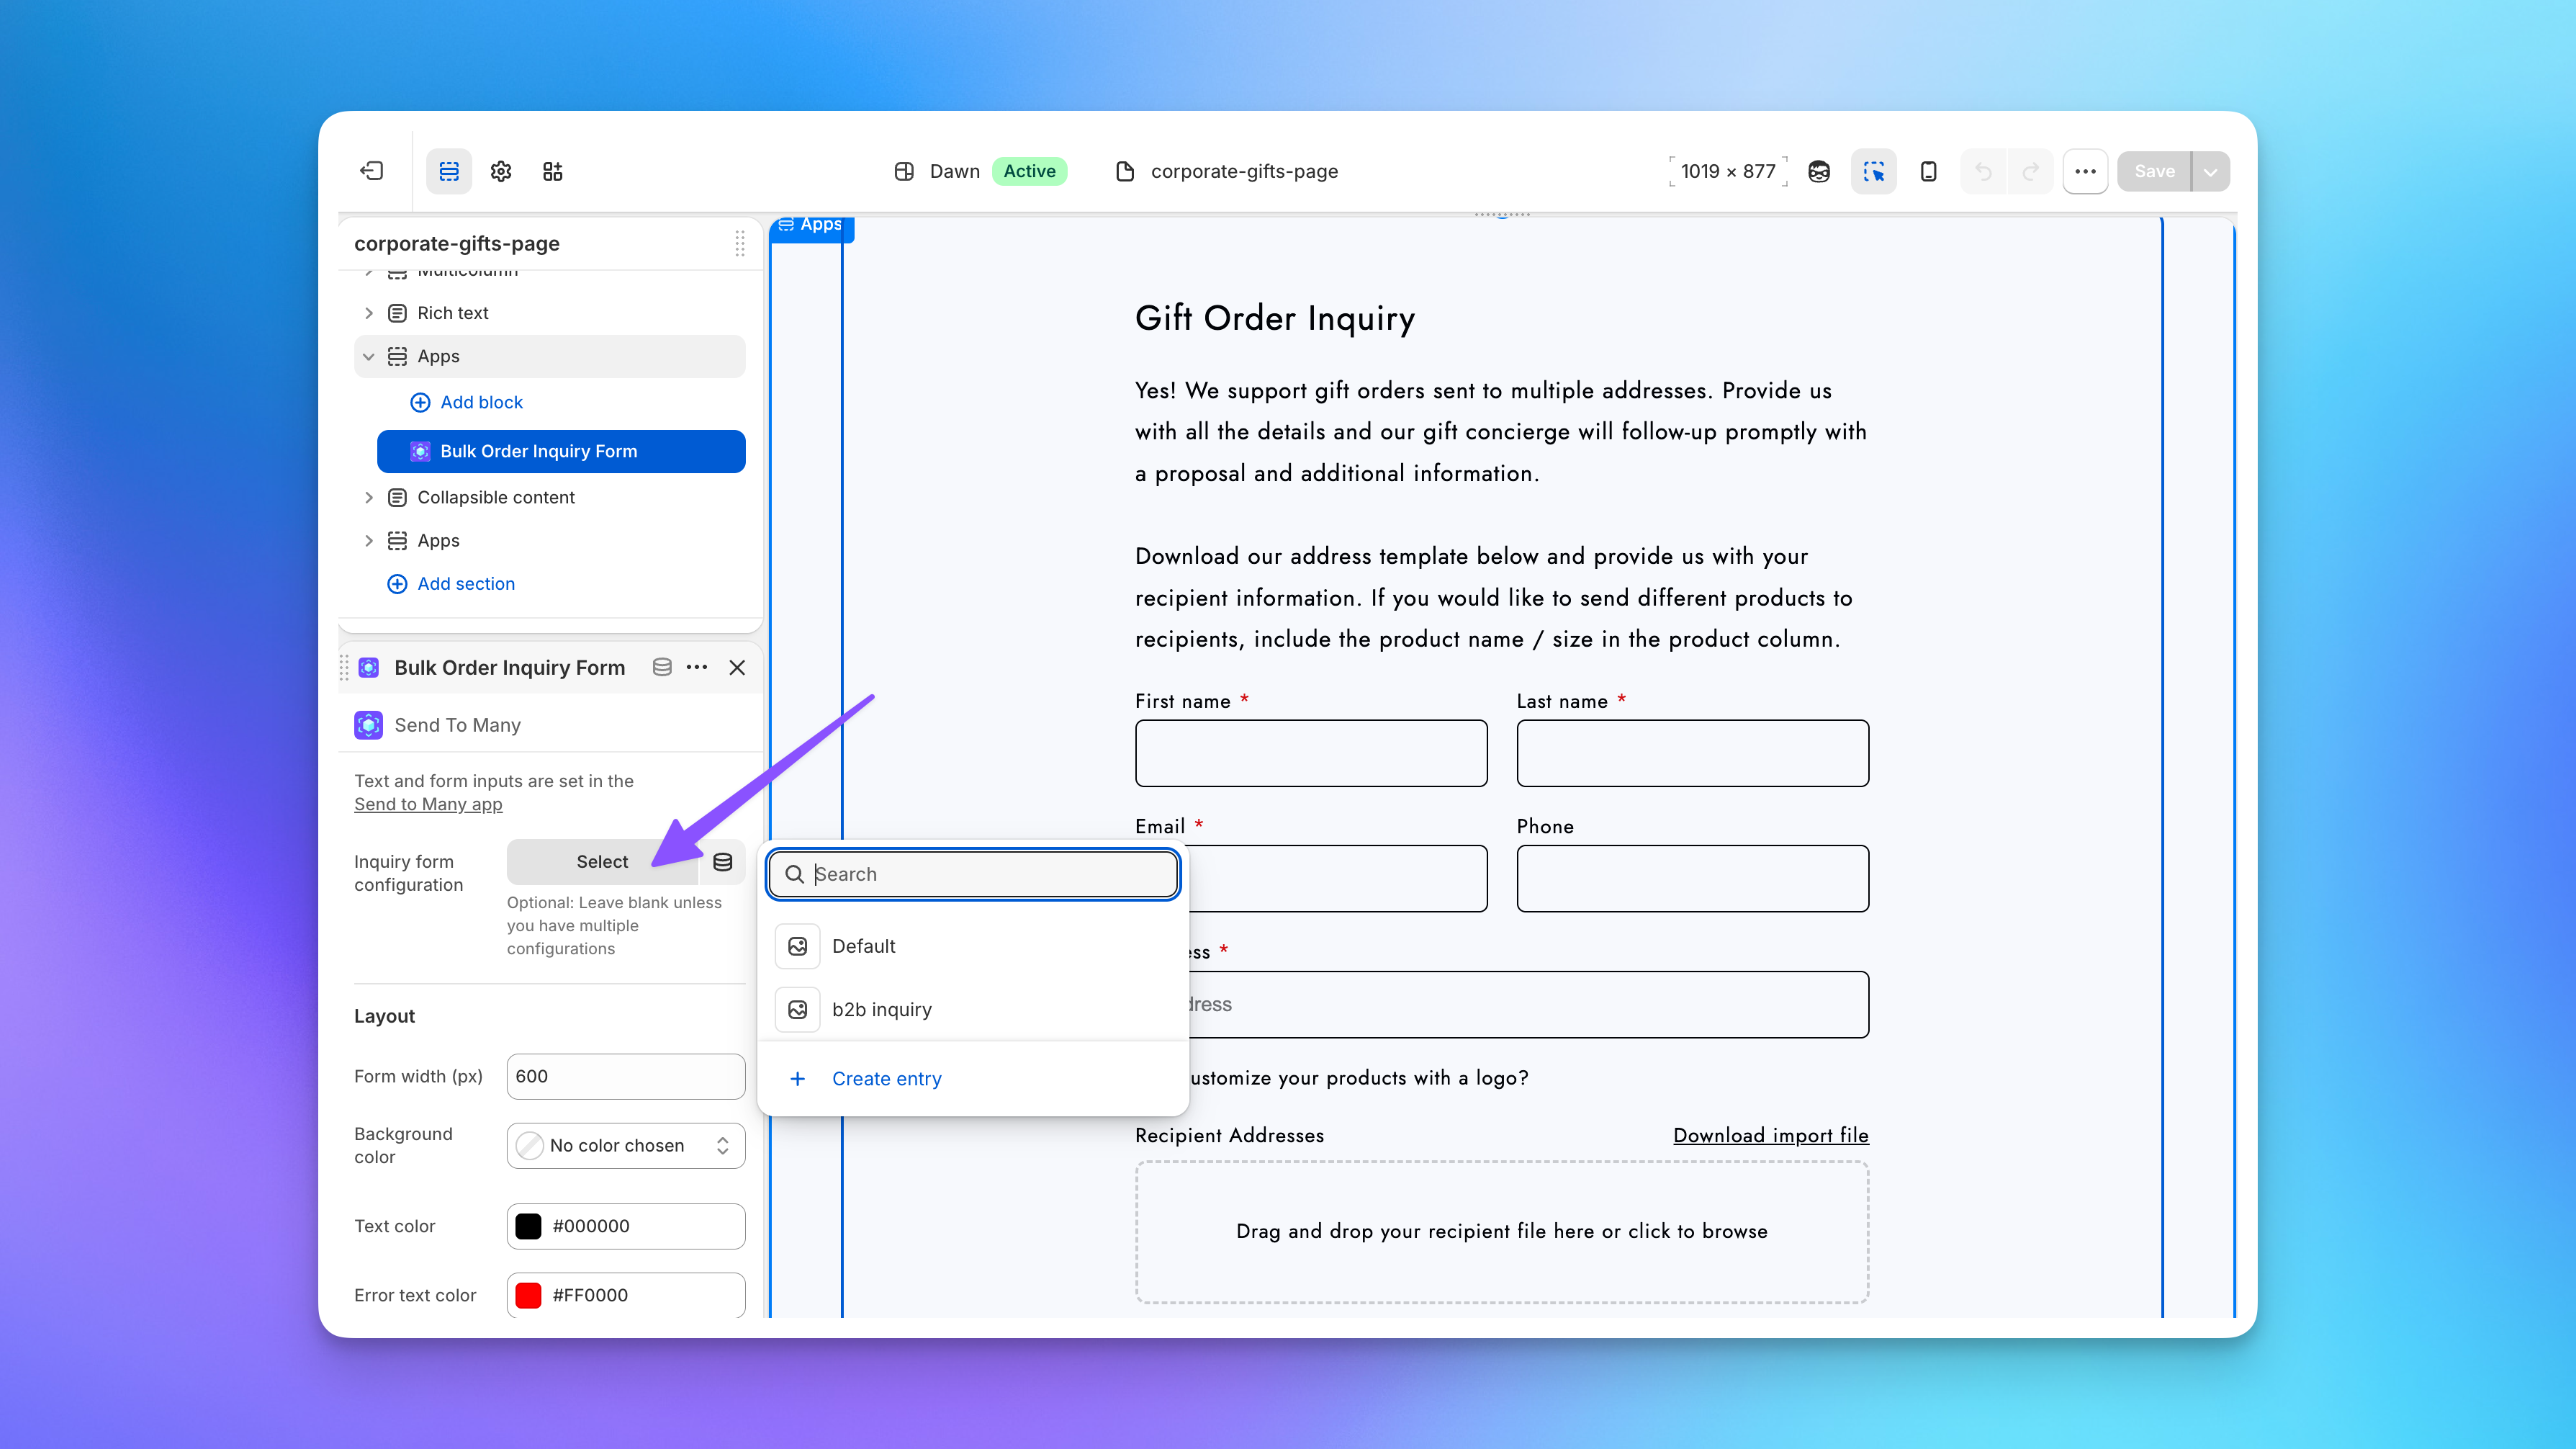
You can create more than one inquiry form configuration, each with its own fields, text, and settings. Run a corporate gifting form on one page and a B2B inquiry form on another, or build a dedicated form for a specific campaign or customer segment.
When adding the form block in the Shopify theme editor, use the Inquiry form configuration selector to choose which configuration that placement uses. Leave it blank if you only have one configuration.
Translations
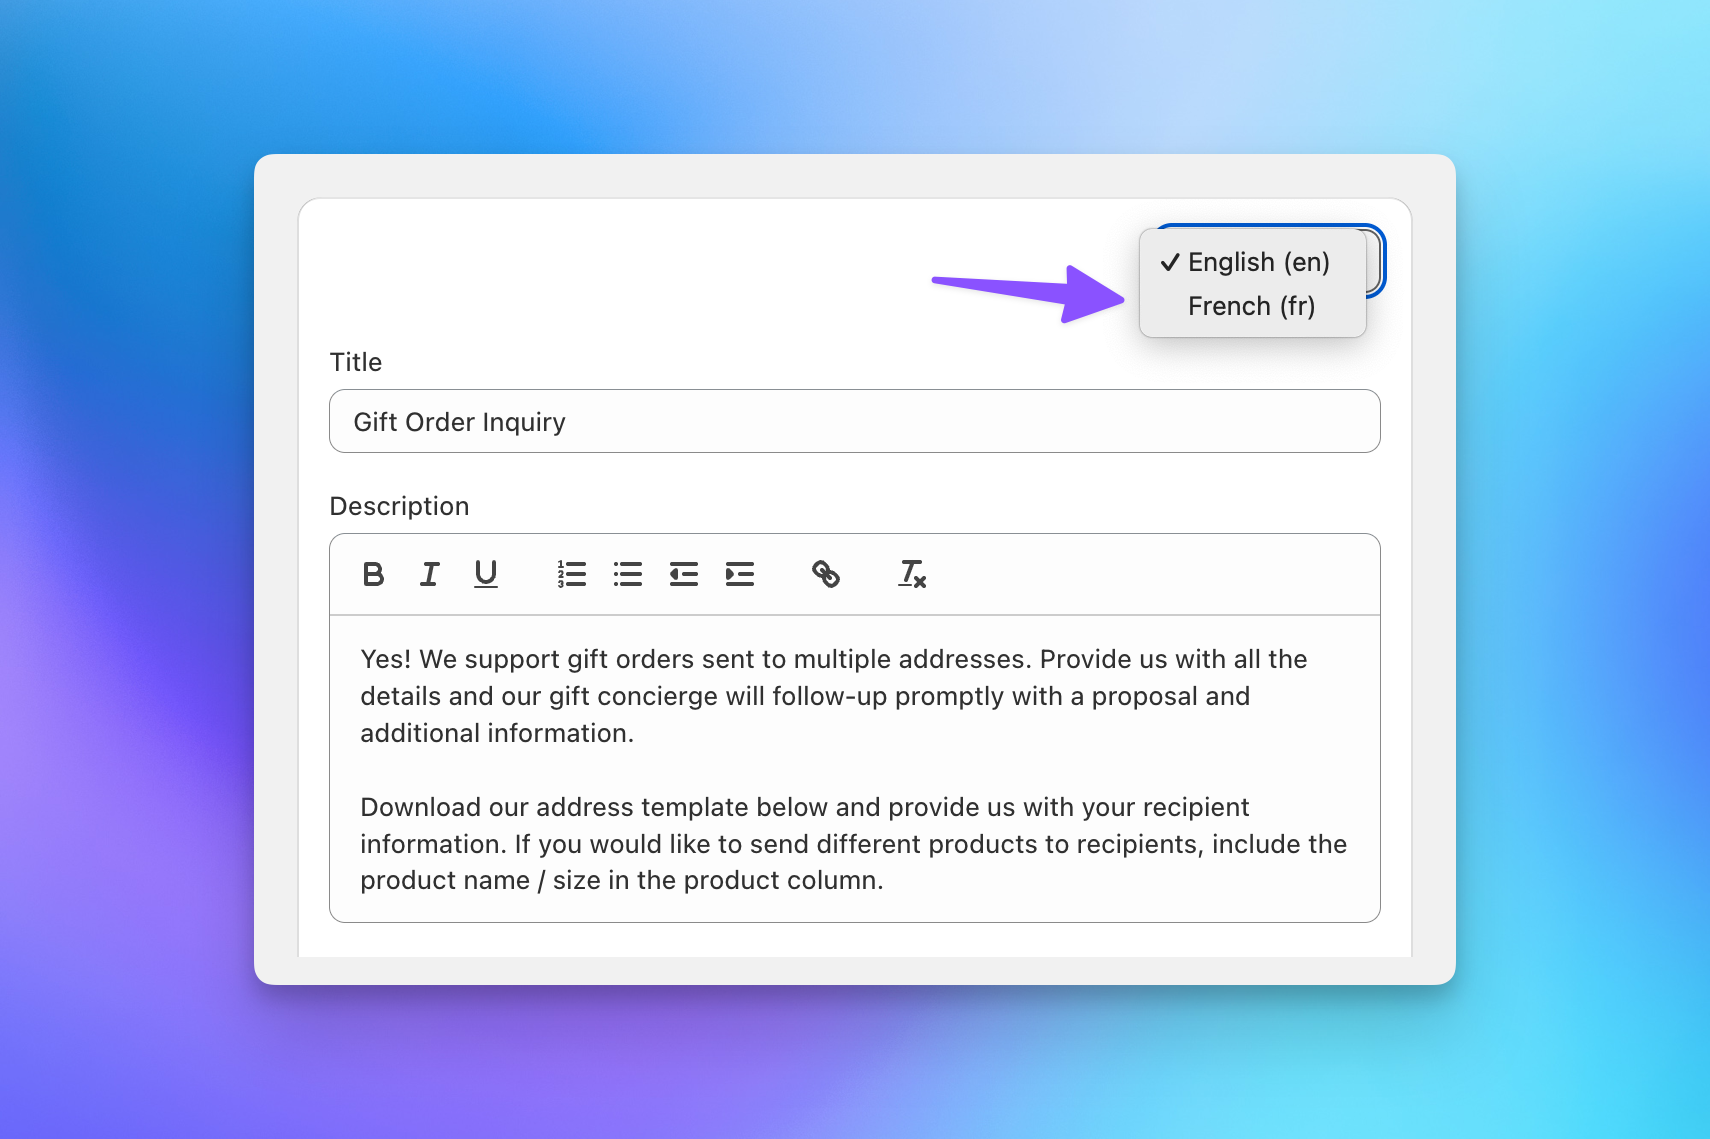
Inquiry form text supports translations. Use the language picker at the top of the settings page to switch languages and enter translated text for your titles, descriptions, field labels, placeholders, and button text. This includes all the text and labels in the customer address field's entry experience.
After Submission Settings
Configure what happens after a customer submits the form:
- After submission action: Choose between "Hide form and show message" or "Redirect to URL." Most merchants use the message option.
- Message heading: The heading shown after submission (e.g., "Inquiry received").
- Message body: The confirmation text (e.g., "Thank you for your inquiry! Our gift concierge will follow-up promptly with a proposal and additional information.").
Notifications
In the Notifications section, enter one or more email addresses that should receive an alert whenever a new inquiry is submitted. Click + Add after each address.
Notifications are sent immediately on submission and include the submitter's name, email, and company so your team can respond quickly.
Next Steps
- Adding Form to Your Theme: Place the configured form on a page in your Shopify theme.
- Managing Inquiries: The full workflow for turning inquiry submissions into Sends.
- Saved Import Formats: How column mappings work across uploads and inquiry submissions.