Adding Product Customization to Bulk Orders During Upload
Include engraving, monogramming, gift messages, and logo uploads as line item properties when importing multi-recipient orders from a spreadsheet in Shopify.
When you're uploading a spreadsheet to create a Send, you can include product customization data like engraving text, card messages, initials, or logos. Send To Many maps these values to line item properties on each recipient's order, so your customization data flows through to fulfillment exactly as if the shopper had personalized the product on your storefront.
This is especially useful when each recipient needs different personalization: a unique card message, a set of initials, or a specific company logo.
Adding customization columns to your spreadsheet
Add a column to your spreadsheet for each customization value you want to include. Name the columns whatever makes sense for your data: "Card Message", "Initials", "Logo URL", "Engraving Text", etc.
Each row can have a different value per column, so every recipient can get their own personalization. If a customization is the same for all recipients, you can still include it in the spreadsheet, or you can add it manually on the Products step instead.
Mapping columns to line item properties
During the column mapping step (Step 1), select Line item property as the destination for each customization column.
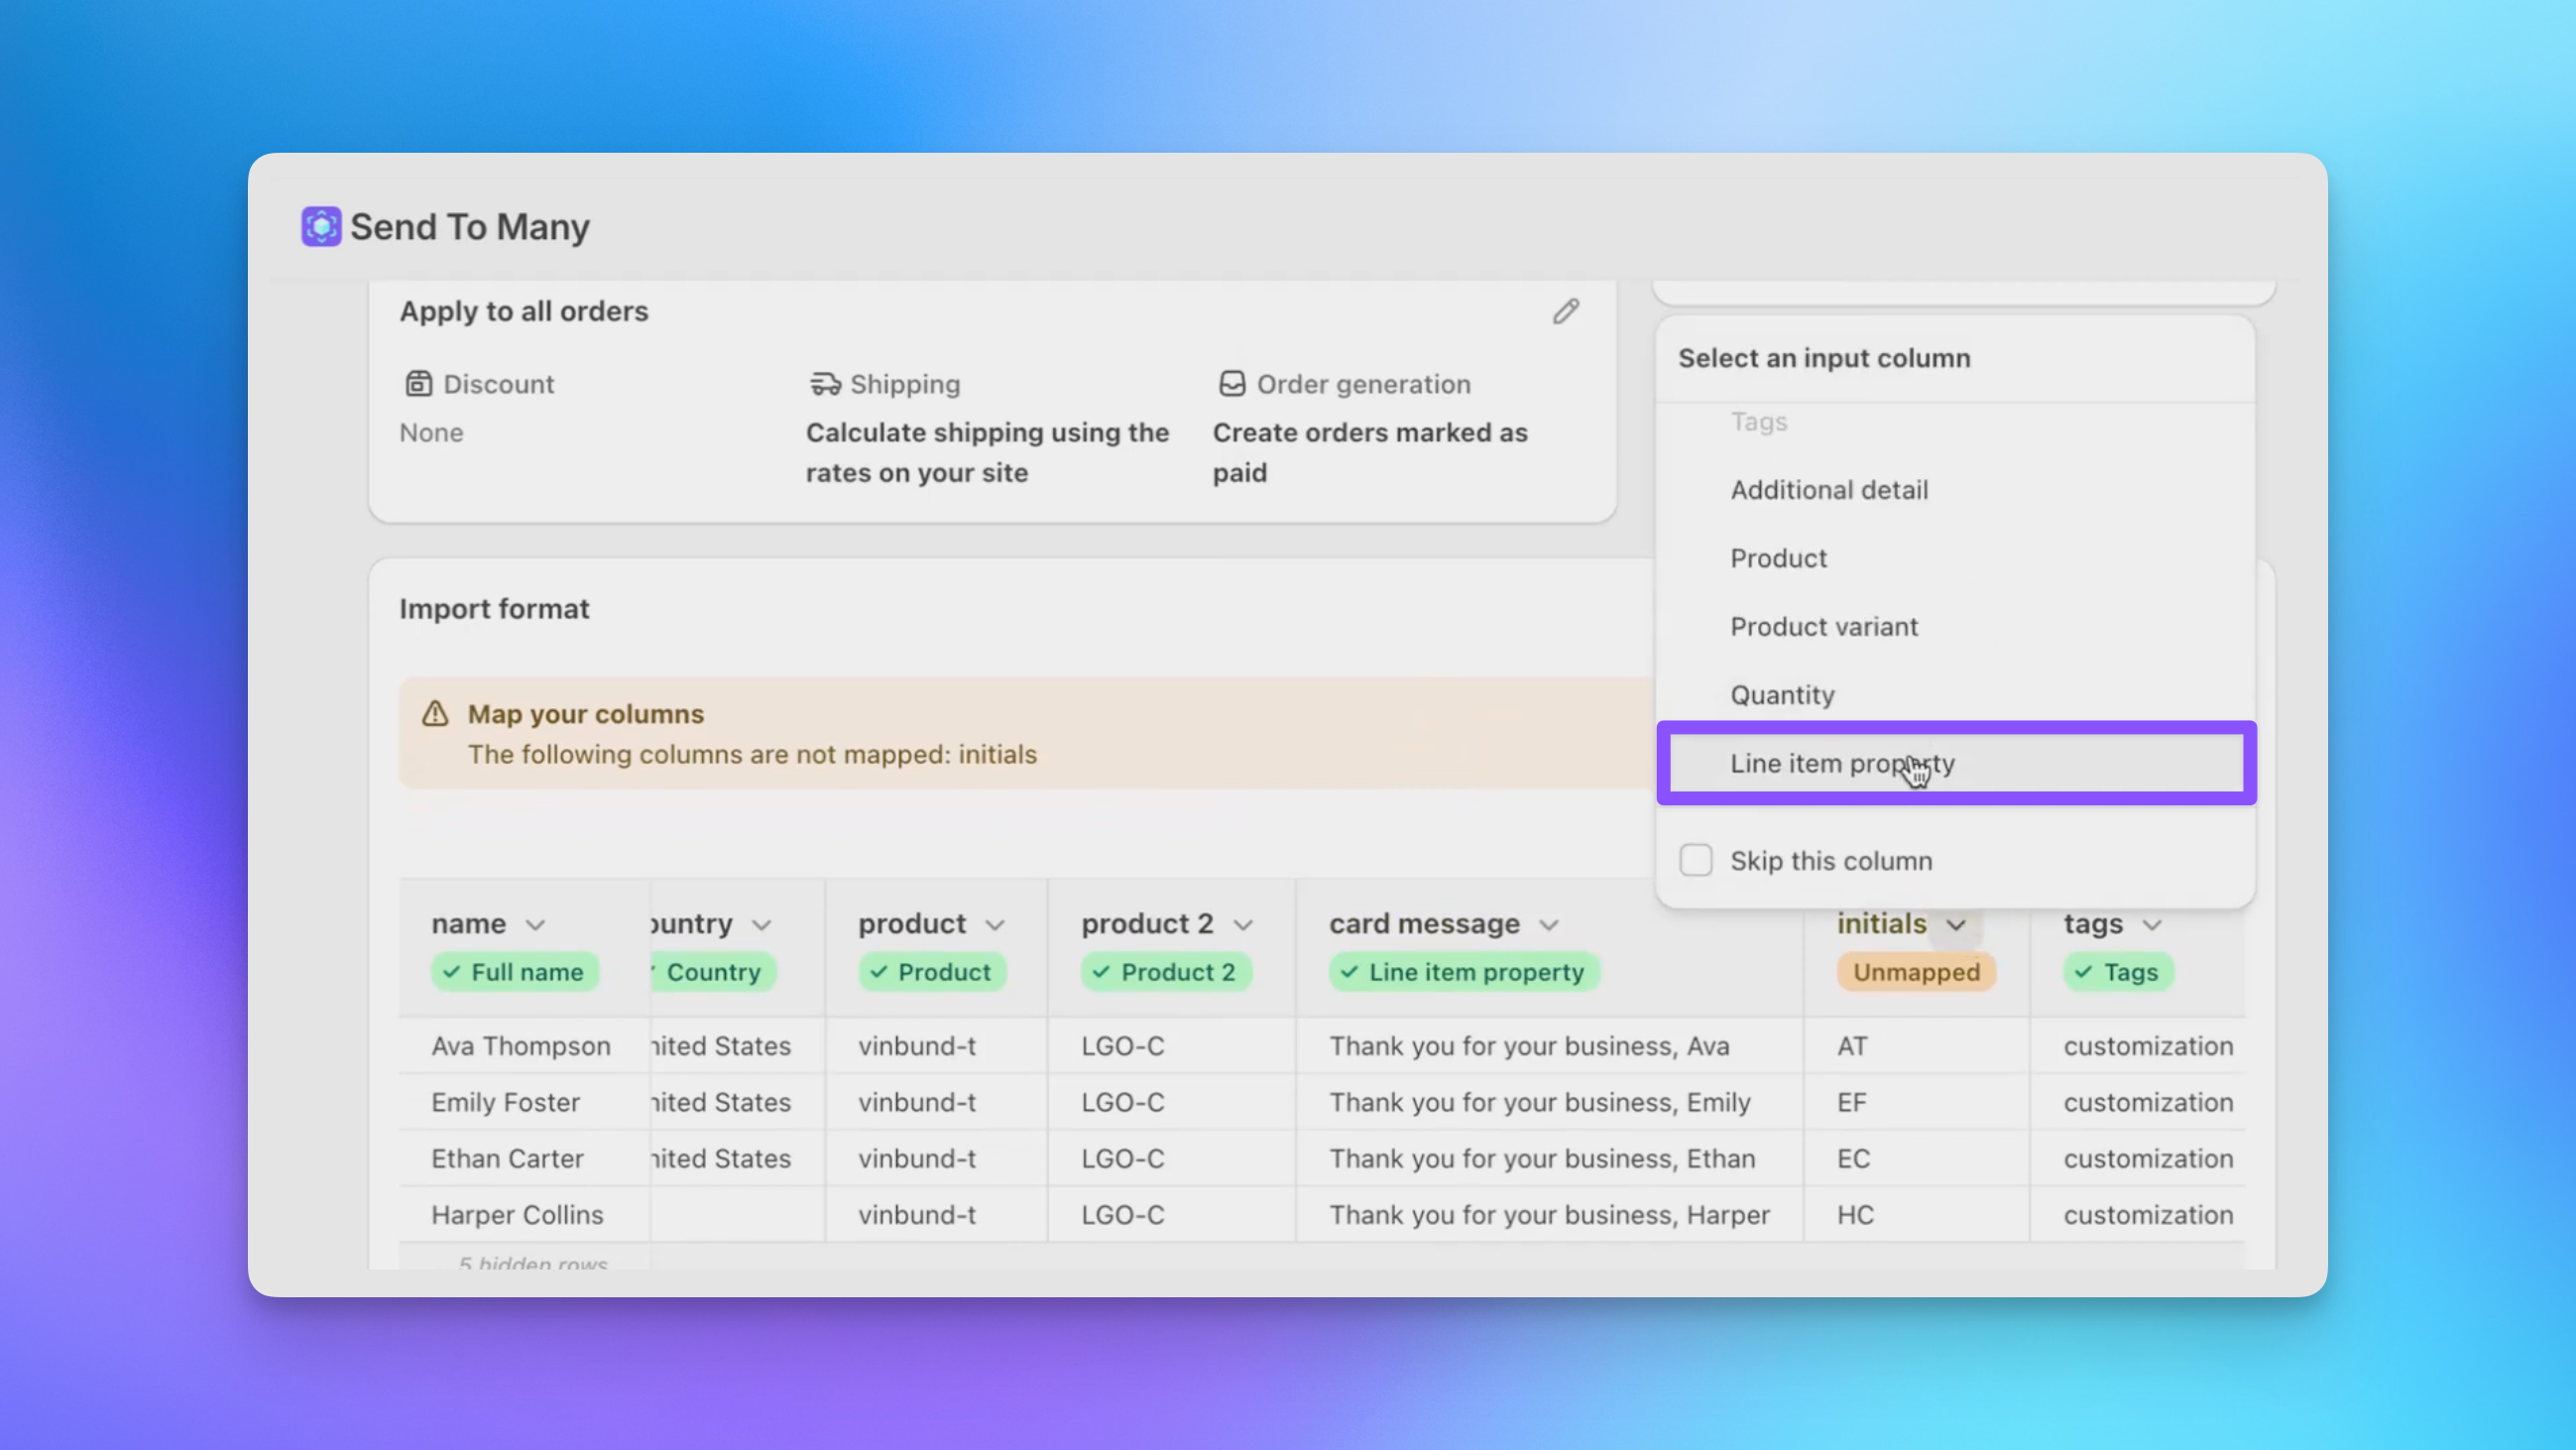
The column header from your spreadsheet becomes the property name by default. If you need a different name (for example, to match what a fulfillment app or customization app expects), you can rename it after mapping.
You can map as many columns as you need to line item properties. Each one becomes a separate property on the recipient's order line item.
Assigning properties to products
On the Products step (Step 2), click the edit icon on any product to open the line item editor. From here you can add customization properties in two ways:
Using values from your spreadsheet
Click Add property from import to see the line item property columns you mapped in Step 1. Select one to attach it to the product. The value for each recipient will be pulled from their row in the spreadsheet.
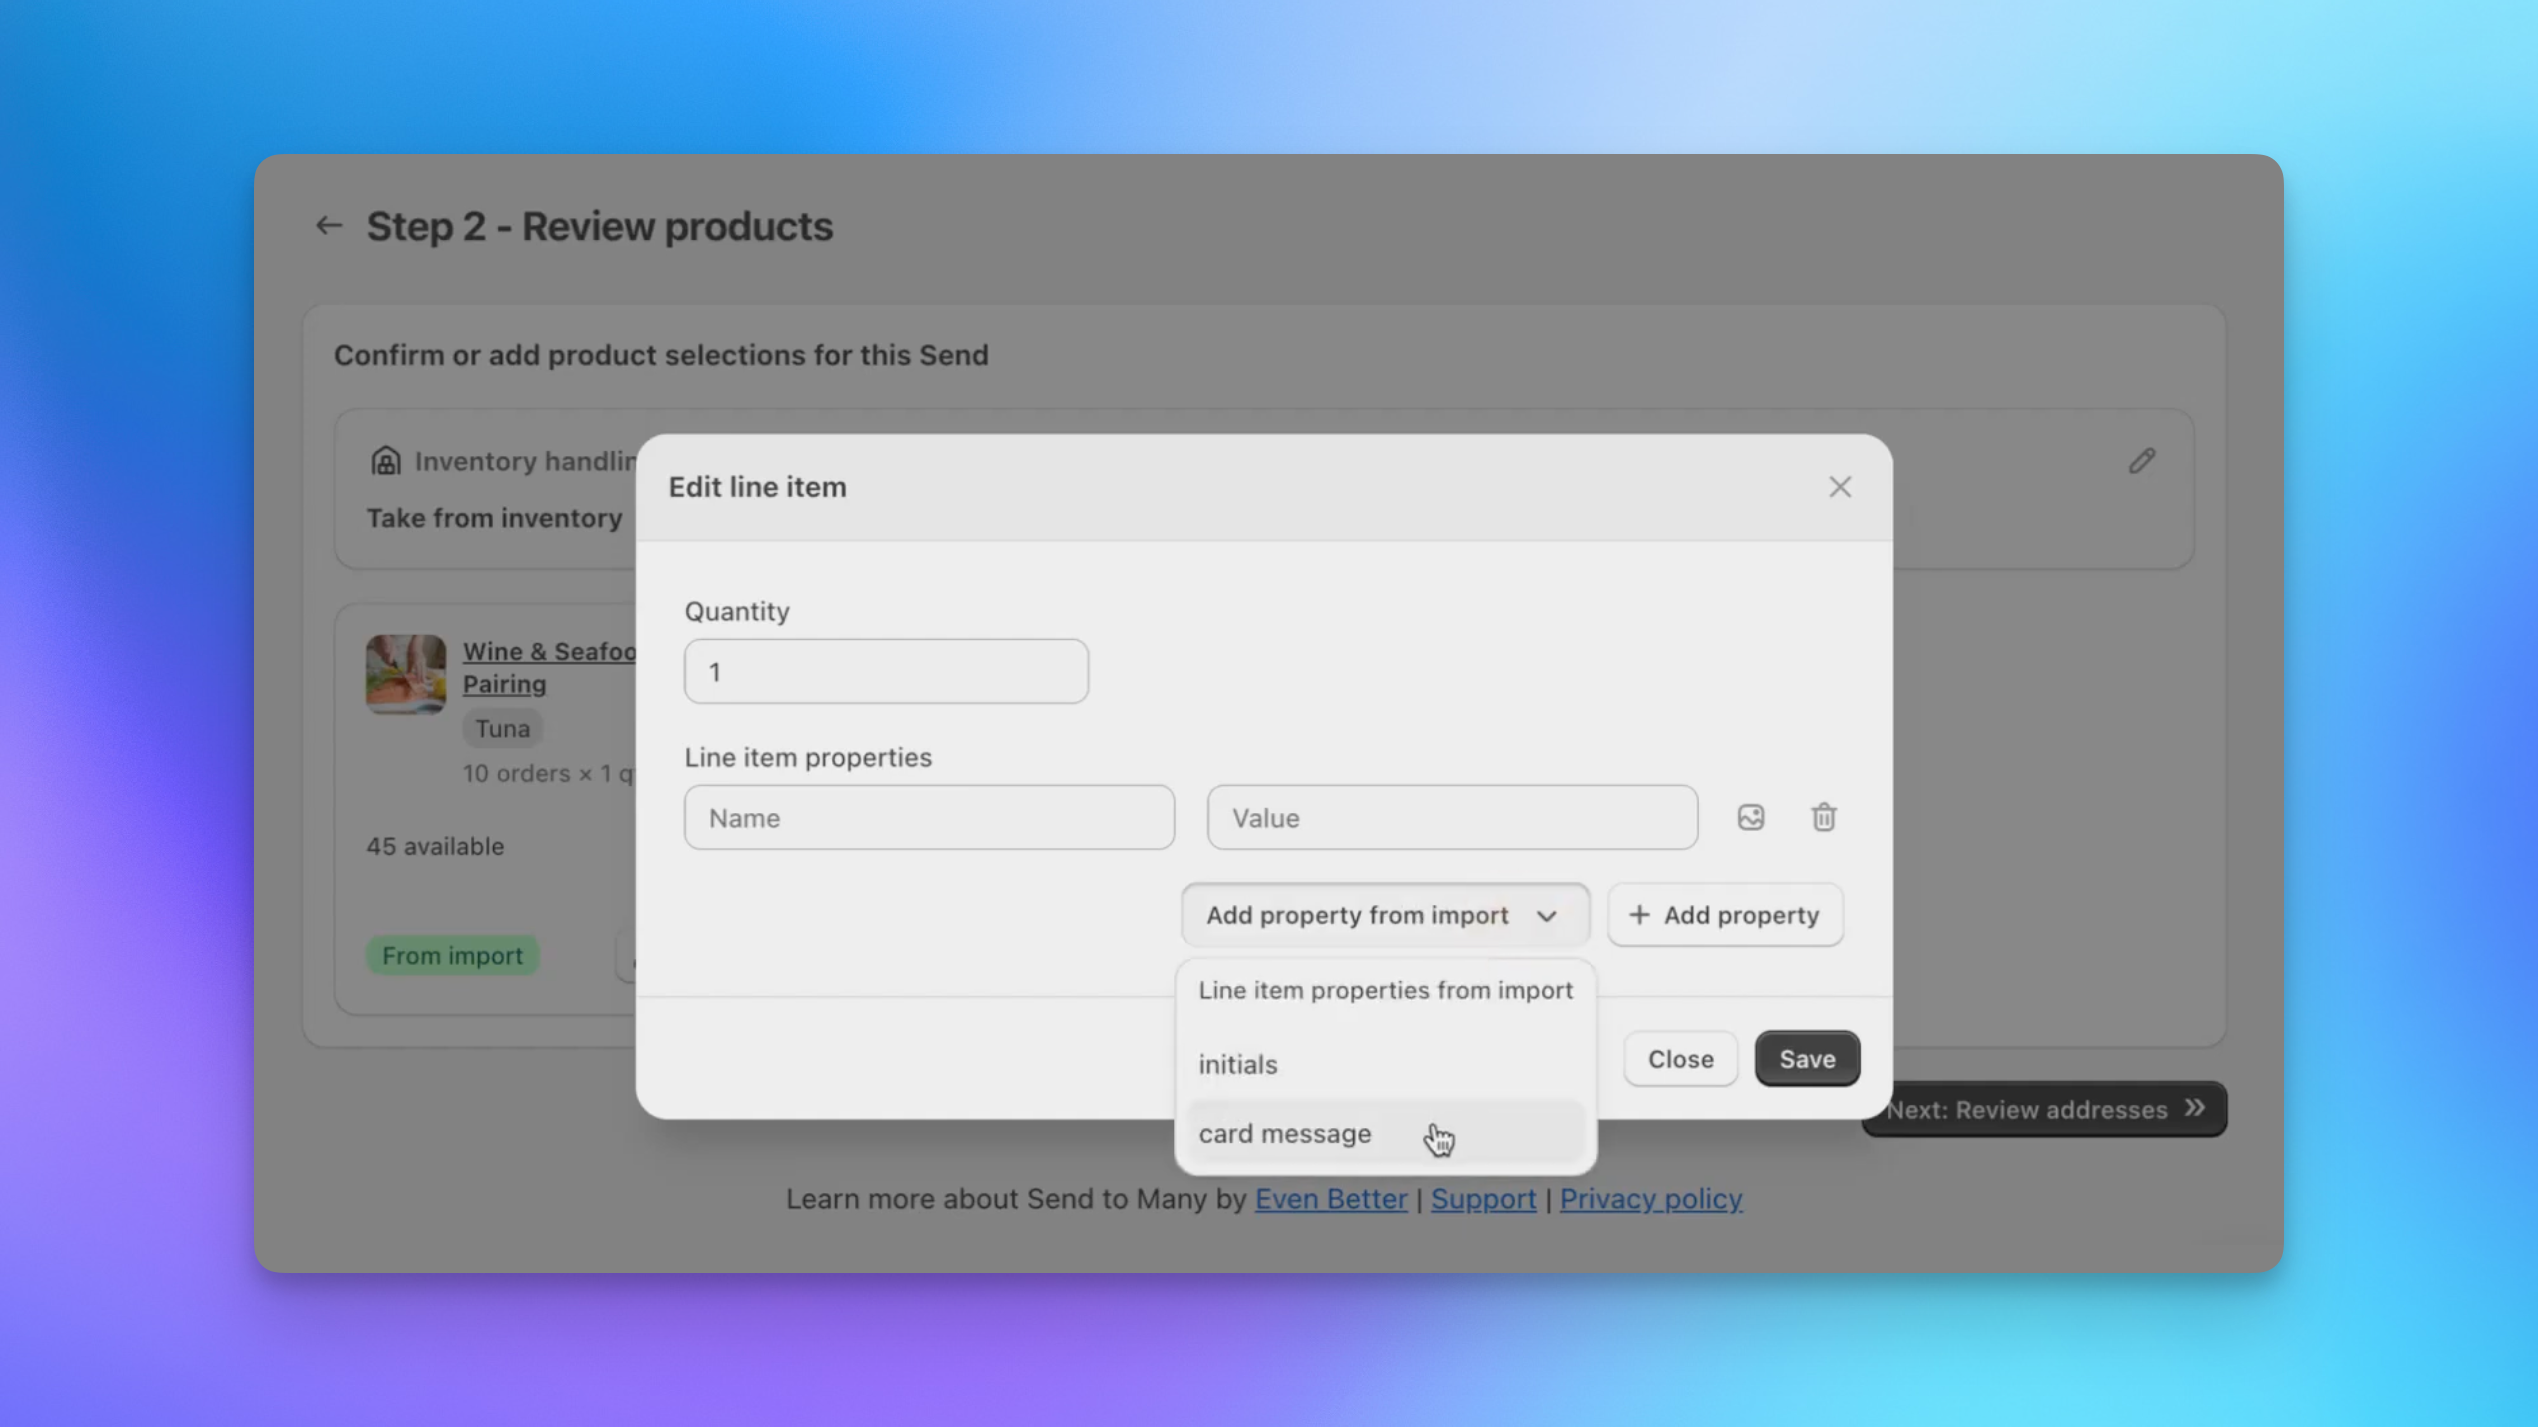
You can add multiple imported properties to the same product. Each one appears as a row in the line item properties section, with the values automatically populated from your spreadsheet data.
Uploading an image as a property value
Some customizations require an image file: a company logo, a custom design, or a photo. To attach an image to a line item property, click the image upload icon next to any property row. This opens a file picker where you can select an image from your computer.
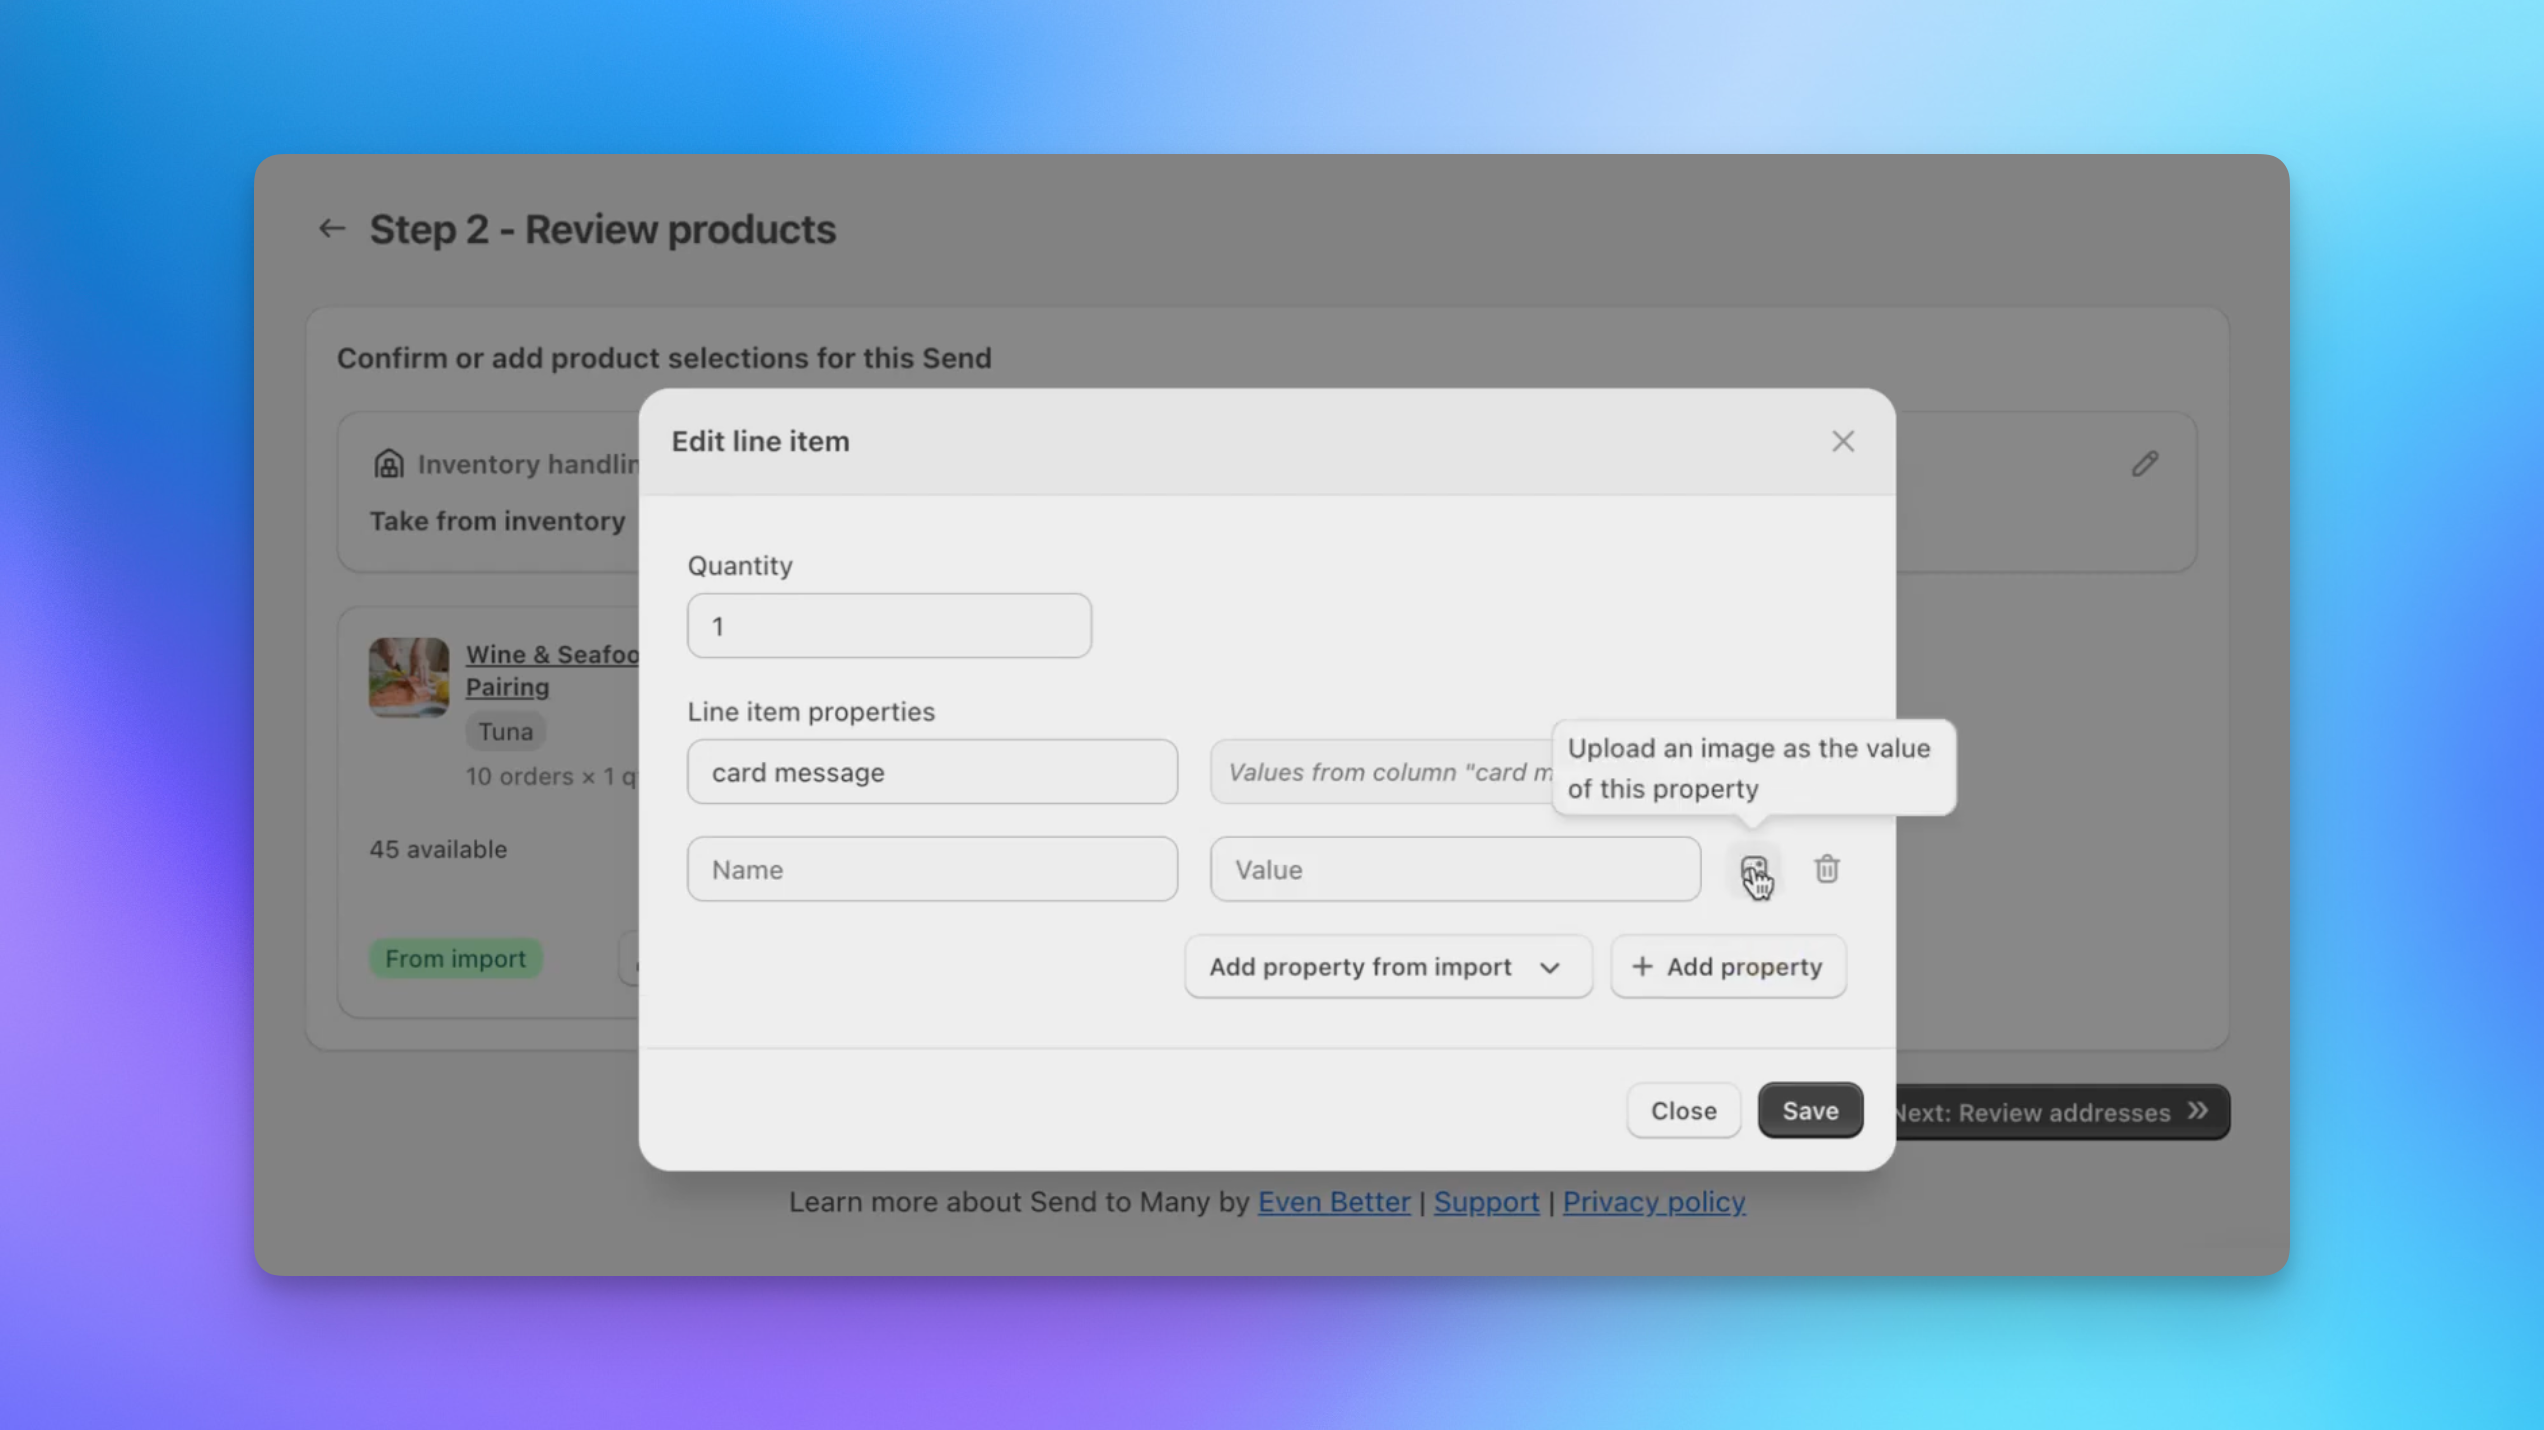
The uploaded image is stored and passed through as the property value on each recipient's order. This is useful when every recipient gets the same logo or design. If each recipient needs a different image, include image URLs in your spreadsheet and map that column as a line item property instead.
Adding properties manually
You can also type in a property name and value directly using the + Add property button. This is helpful when you want to add a customization that applies to all recipients and isn't in your spreadsheet. For example, adding a "Gift Wrap" property with a value of "Yes" to every order.
Inquiry form submissions
If you use the inquiry form, customers can submit customization details along with their recipient list. When you create a Send from an inquiry, the customization data (including uploaded images like logos) is pulled in automatically. You can then assign those values as line item properties on the appropriate products during the Products step.
What to verify
Before running a large Send with customized products, we recommend a quick test:
- Create a test Send with 2-3 recipients and your customization product.
- Include your customization columns in the test spreadsheet.
- Check the generated recipient orders in Shopify admin.
- Confirm that each order's line items include the correct properties with the right per-recipient values.
If the properties appear correctly, your customization setup is working as expected.
Next steps
- Formatting Your Upload File for column formatting and mapping details
- Import Formats to save your column mapping for future uploads
- Product Customization Apps with Bulk Orders for how customization apps work with Send To Many checkout