Configure Multi-Recipient Checkout: Order Processing, Recipient Fields & Shipping
Set up order processing, recipient fields, shipping rates, and delivery dates for multi-recipient checkout on your Shopify store. Core settings for revenue handling, notifications, inventory, and date pickers.
The multi-recipient checkout settings page in Send To Many controls how orders are created, what information shoppers provide, and how shipping works. You'll find these settings under Multi-recipient checkout in your app settings, organized into tabs along the left side.
This article covers the core settings most merchants configure first: order processing, recipient fields, and shipping and delivery options. For form fields, upsell discounts, shipping rate filters, and advanced settings, see Additional settings.
For a step-by-step walkthrough of configuring and deploying checkout for the first time, see the Setting up multi-recipient checkout tutorial.
Order Processing
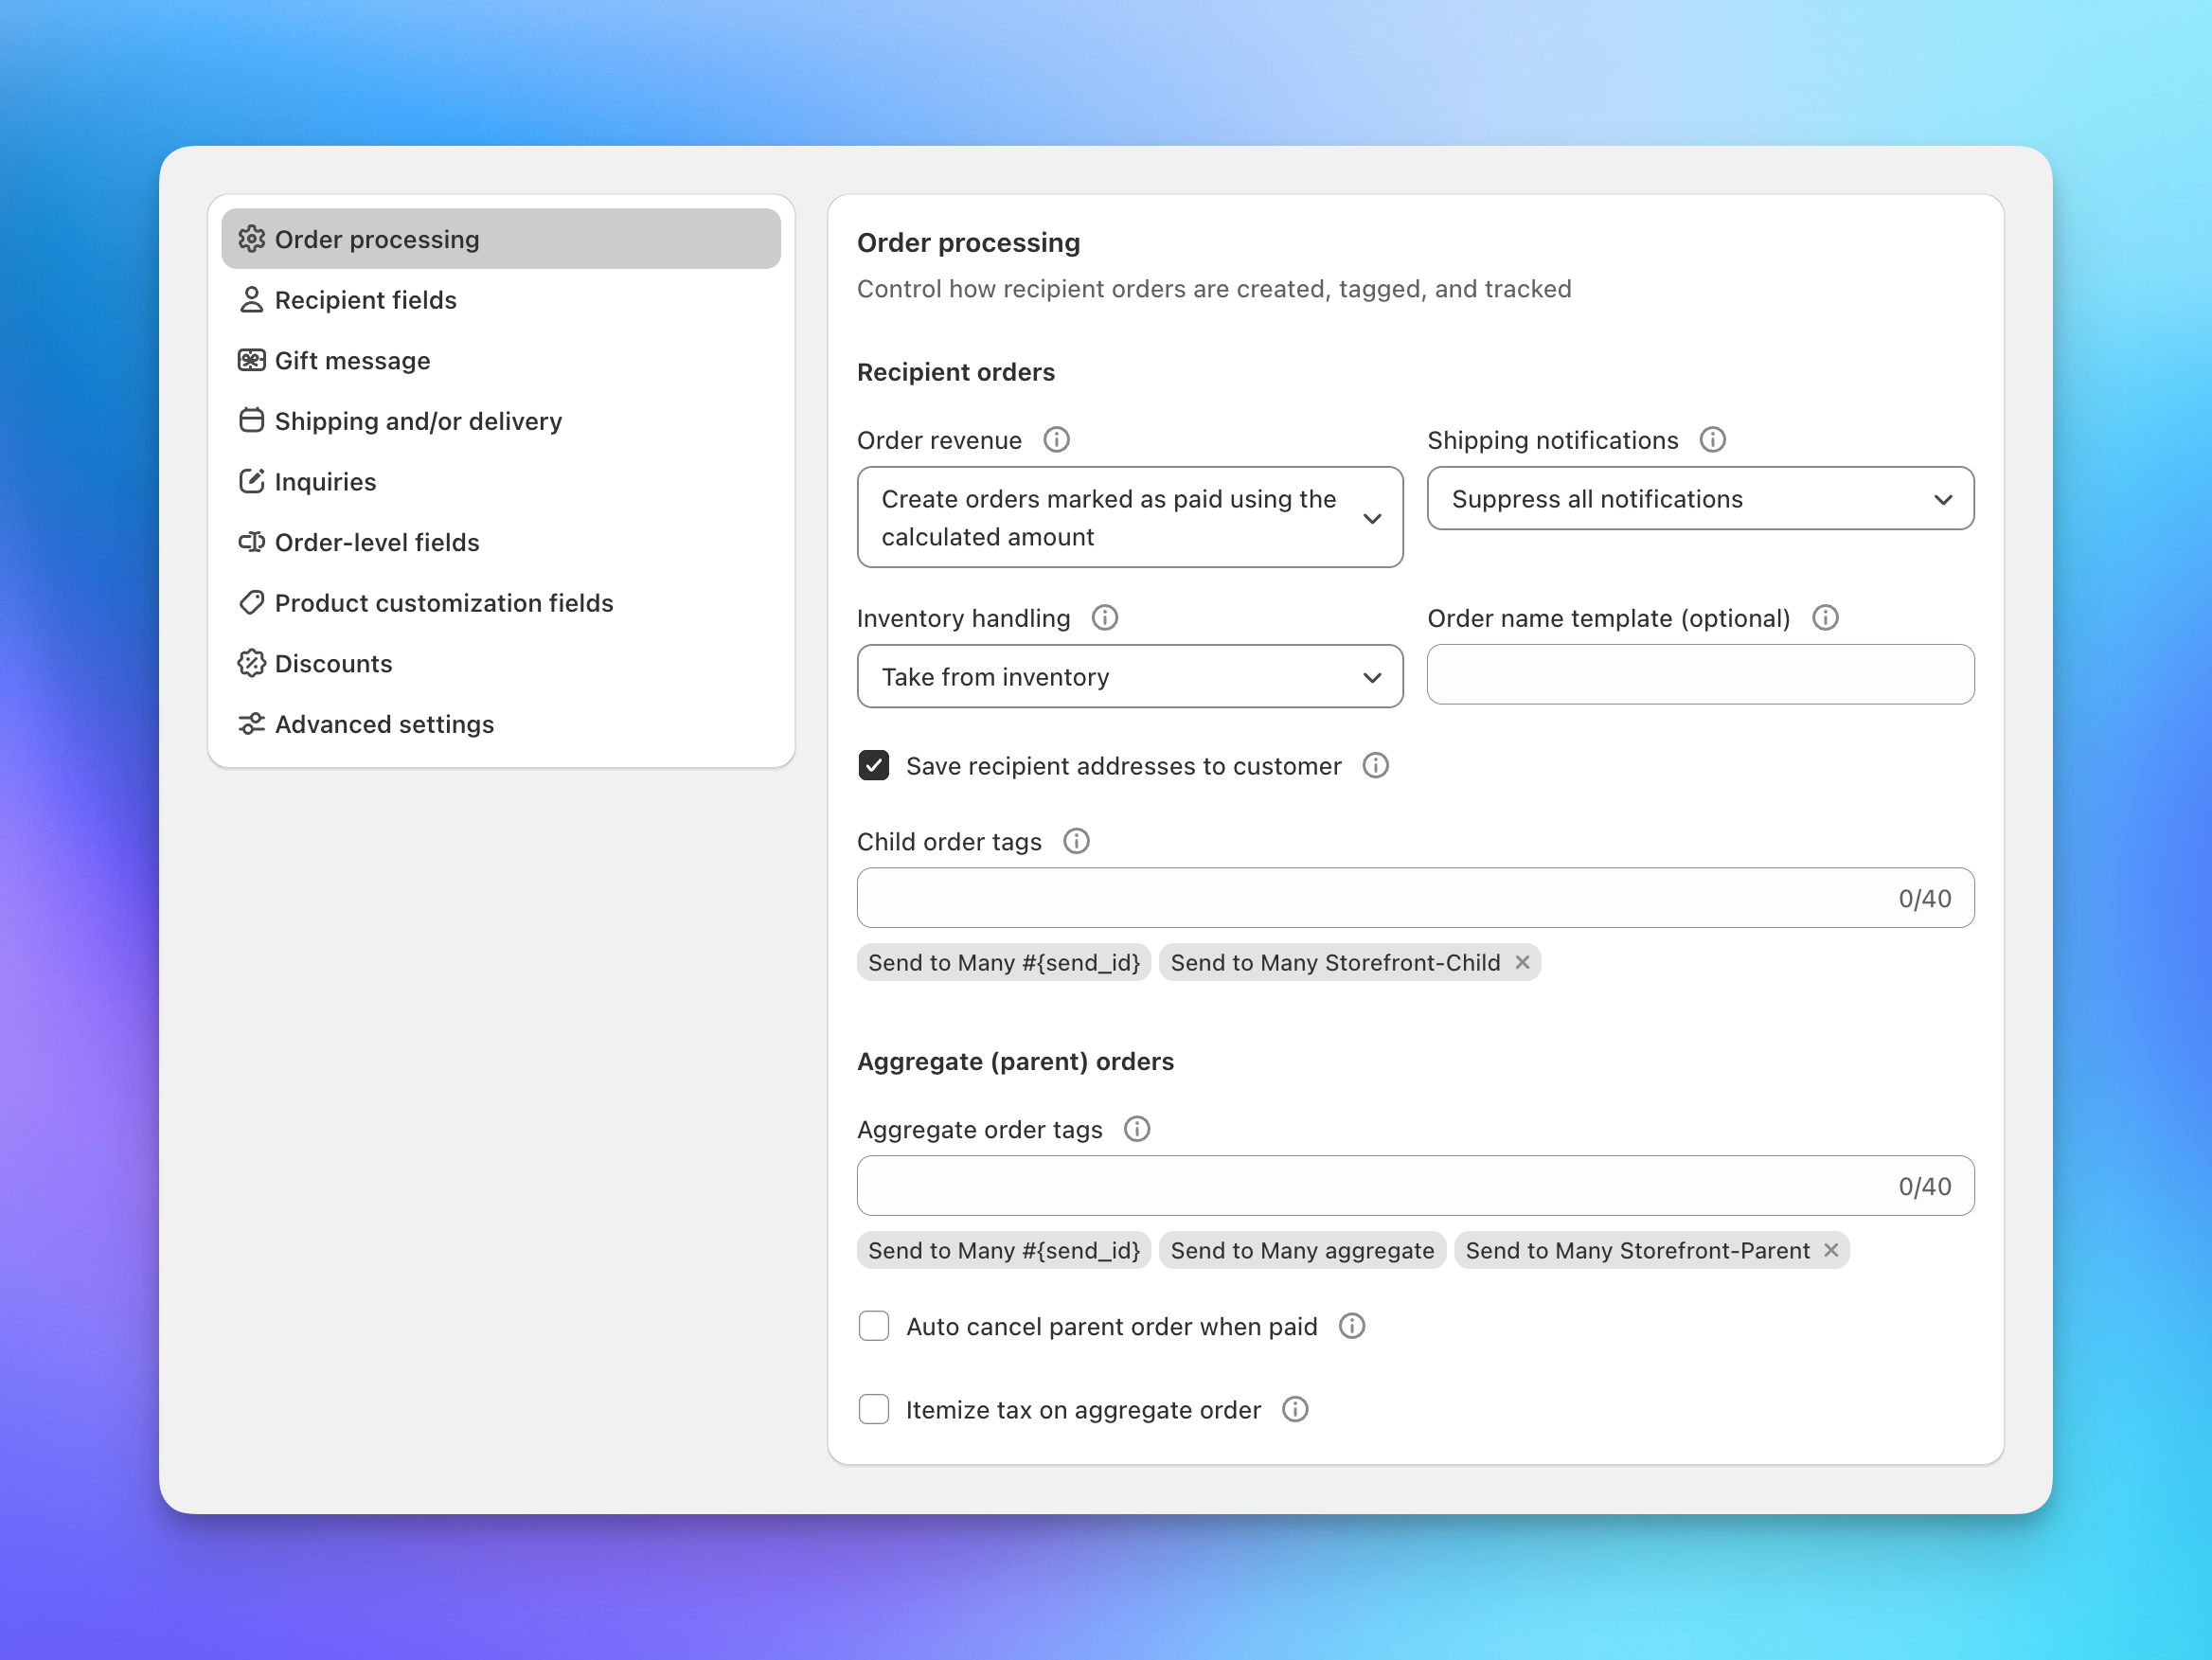
The order processing tab controls how recipient orders are created in Shopify after a shopper completes checkout.
Order Revenue
Choose how revenue appears on recipient orders:
- Create orders marked as paid using the calculated amount: Each recipient order shows the full calculated price, tax, and shipping. Use this when you need per-order revenue detail for accounting or tax reporting.
- Create orders marked as paid with $0 amounts: Recipient orders are created at $0. All revenue is captured on the parent order only. This avoids double-counting revenue in Shopify reports.
This is the most important configuration choice for checkout. If you use calculated amounts, revenue appears on both the parent order and each recipient order, which means Shopify reports will double-count unless you filter by order tags. If you use $0 amounts, revenue is only on the parent order, but you won't see per-recipient pricing detail on recipient orders. We recommend discussing this with your accounting team before going live.
Recipient Order Notifications
These settings control notifications on the recipient orders that Send To Many generates after checkout. They do not affect the billing customer's order confirmation from Shopify, which is always sent for the parent order.
- Suppress notifications: No emails are sent for recipient orders. Orders use a blackhole email address so Shopify's automatic notifications go nowhere. This is the right choice for most gifting use cases where you don't want recipients getting order confirmation emails.
- Send to recipients: Shopify sends order and shipping notifications for each recipient order directly to the recipient's email address.
- Send to customer: Notifications for each recipient order go to the gifter (the person who placed the order).
If you choose to send notifications to the customer, the gifter receives shipping emails for each recipient in the order. For a 50-recipient send, that can mean hundreds of emails.
Send order confirmation email: An additional toggle that controls whether Shopify's order confirmation email is sent for each recipient order (separate from delivery/shipping notifications).
The billing customer always receives a standard Shopify order confirmation for their parent (aggregate) order. The settings above only control what happens with the individual recipient orders. If you want to make the order history experience clearer for returning customers, see Customer account extensions for Send history banners and order status blocks.
Inventory Handling
- Take from inventory: Deducts inventory for each recipient order. Standard for most use cases.
- Don't take from inventory: Skips inventory deduction on recipient orders. Use this if you're managing inventory manually or through another system.
Save Recipient Addresses to Customer
When enabled, each recipient's shipping address is added to the gifter's Shopify customer record, making addresses available for future orders. Disable this if your gifters regularly send to large recipient lists, since it can result in many addresses on a single customer profile.
Order Name Template
Customize how recipient orders are named in Shopify. Leave blank to use Shopify's default sequential naming. You can use dynamic variables to make the relationship between parent and recipient orders clearer or to make recipient names searchable in the Shopify admin.
Examples:
{order_name}.{row_index}— produces names like#1042.1,#1042.2,#1042.3, making it easy to see which recipient orders belong to the same parent.{send_id}-{first_name}-{last_name}— produces names like284-Jane-Smith, making individual recipient orders searchable by name.
Order Tags
Apply Shopify tags to recipient orders and parent orders respectively. Tags are useful for filtering orders in Shopify, triggering Shopify Flow automations, and routing orders to fulfillment services.
Send To Many automatically adds tags to every order: "Send to Many #[ID]" on all recipient and parent orders, and "Send to Many aggregate" on all parent orders. You can add your own custom tags alongside them.
Additional Options
- Max recipients: Set the maximum number of recipients a shopper can add to a single multi-recipient order. Leave blank for no limit. This is useful for capping order size when you have inventory or fulfillment constraints.
- Auto cancel parent order when paid: Automatically cancels the parent order after payment is collected and recipient orders are generated.
Cancelling the parent order creates confusion for customers who see a cancelled order in their account and may contact your support team. Only enable this if your ERP or fulfillment system requires it to prevent the parent order from entering the fulfillment queue.
- Show tax breakdown on aggregate tax line item: Displays a detailed tax breakdown on the parent order's aggregate tax line item instead of a single lump sum.
Recipient Fields
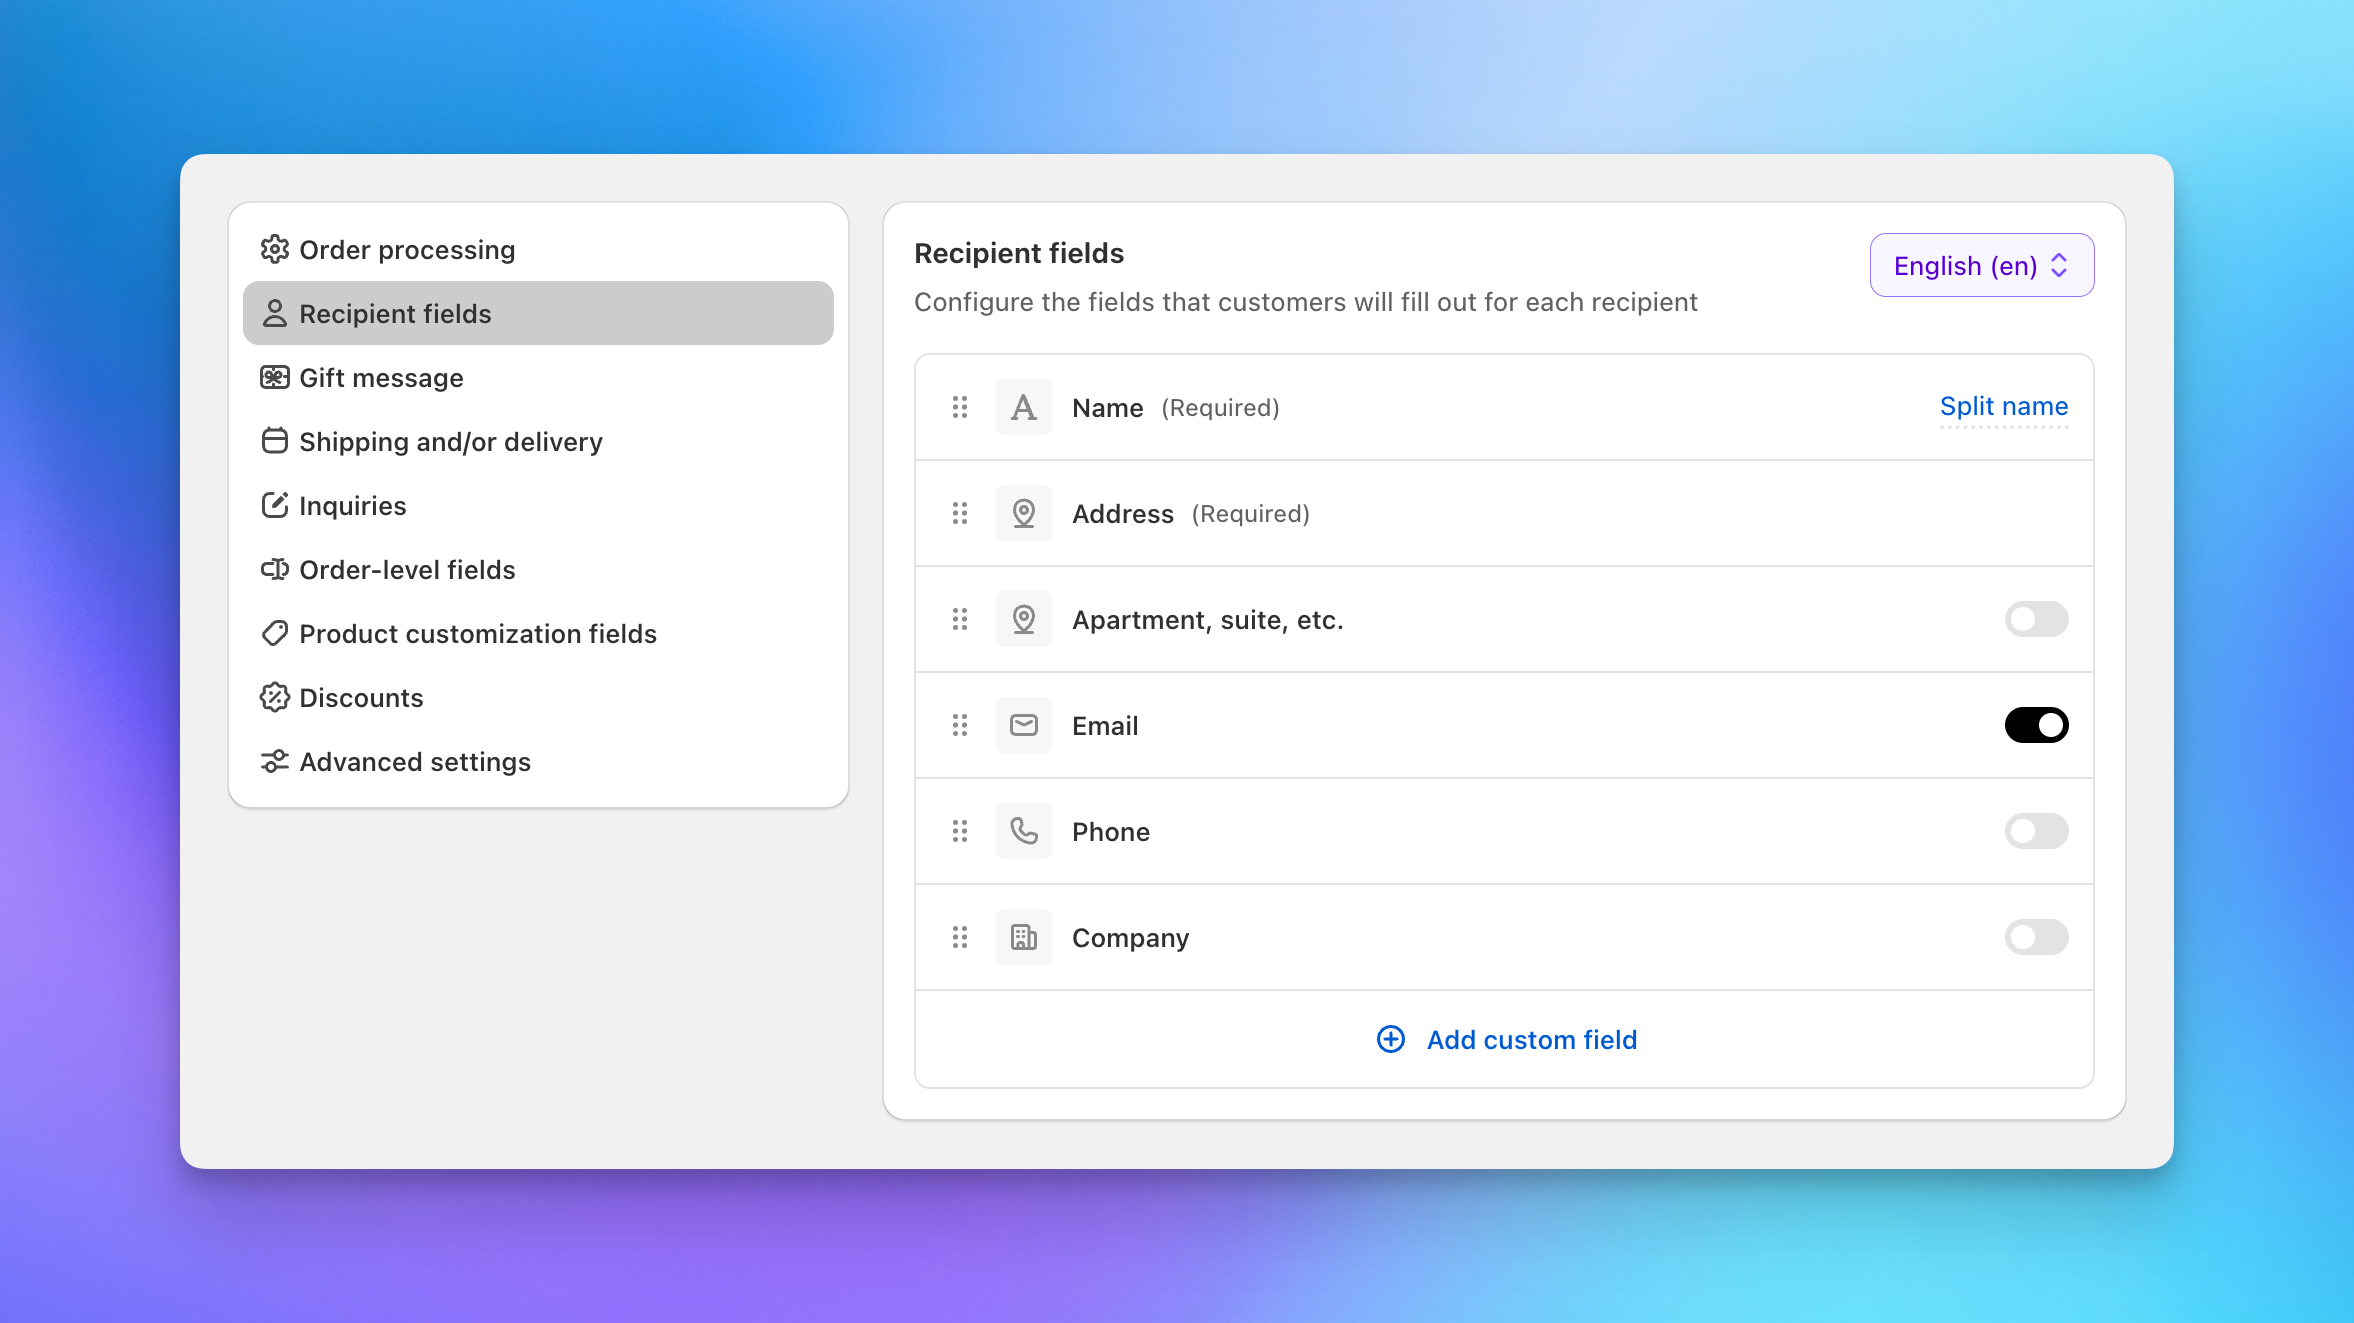
Recipient fields control what information shoppers provide for each person they're sending to. You can toggle fields on or off, reorder them by dragging, and configure each field's behavior. For a walkthrough of setting up recipient fields for the first time, see the checkout setup tutorial.
Default Fields
These fields are always available (some are always required):
- Name fields: Always required. Choose between a single full name field or separate first and last name fields.
- Company: Optional. Toggle on to show a company name field.
- Address: Always required. Uses Google address autocomplete for fast, accurate entry.
- Email: Optional. Toggle on to collect recipient email addresses with validation.
- Phone: Optional. Toggle on to collect recipient phone numbers with locale-based validation.
Custom Fields
Click Add custom field to create additional per-recipient fields beyond the defaults. Available types include text, number, date, dropdown, checkbox, and multi-select. For each field you configure the label, placeholder text, whether it's required, whether it supports fill-down, and where the value is stored on the order.
For detailed instructions on adding and configuring recipient fields, see the recipient fields section of the setup tutorial.
Language Support
If you have added another language in the Text and Translations settings, a language dropdown appears (top right) to configure field labels for each language.
Gift Message
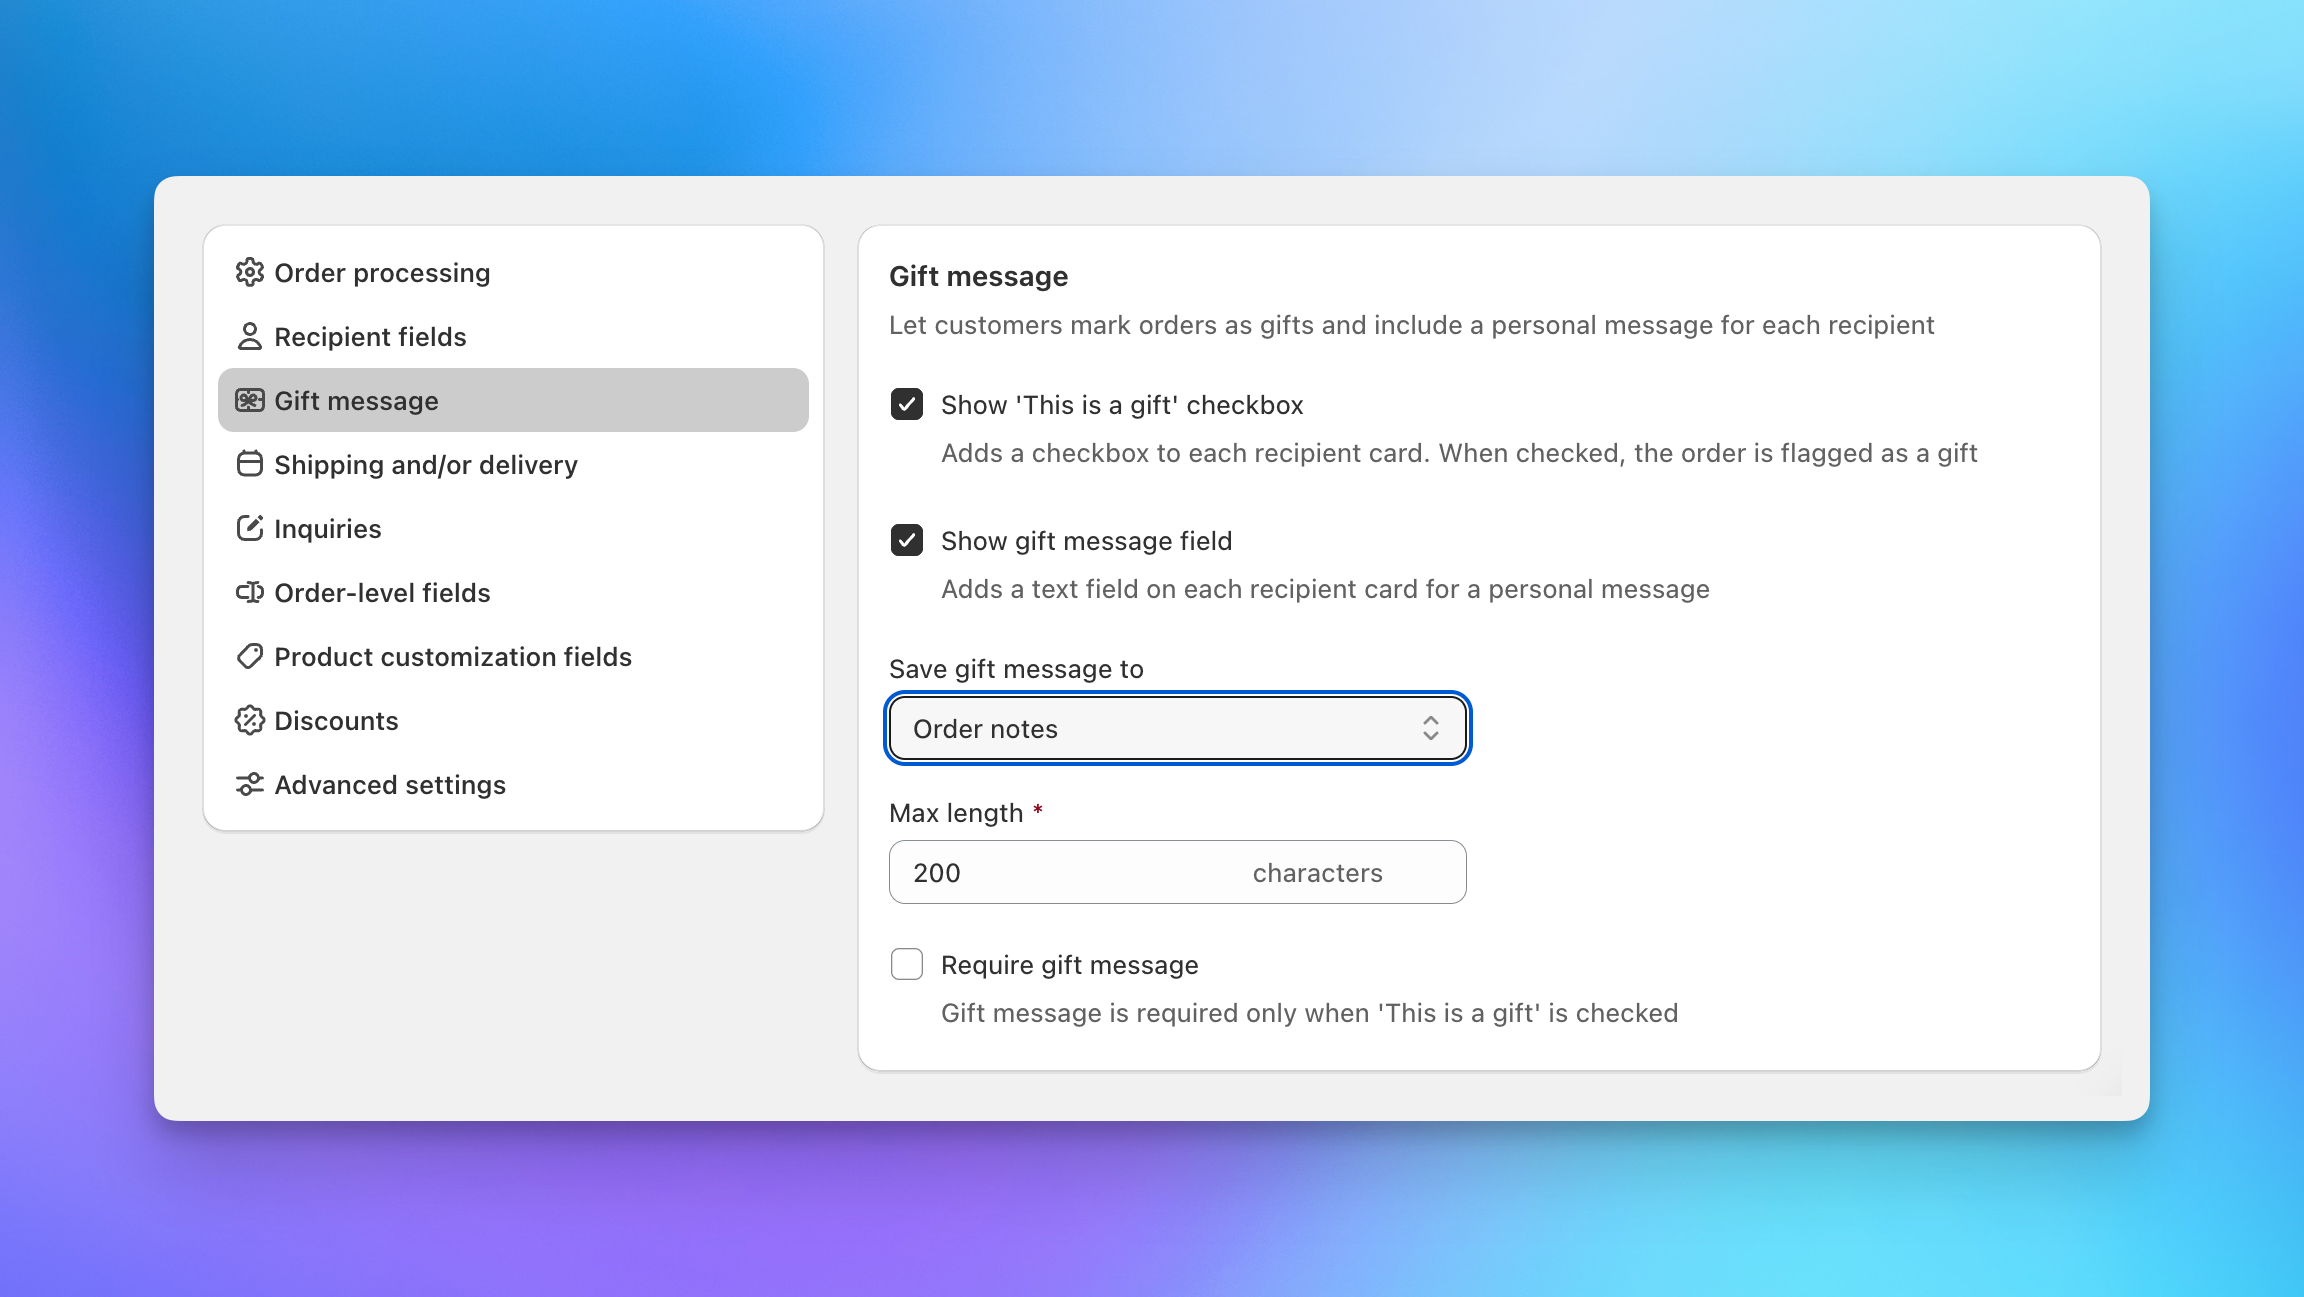
The Gift message tab controls whether shoppers can mark orders as gifts and include a personal message for each recipient. This is a dedicated settings section, separate from recipient fields.
Two options are available (you can enable either or both):
- Show "This is a gift" checkbox: Adds a checkbox to each recipient card. When checked, the order is flagged as a gift in Shopify.
- Show gift message field: Adds a text field on each recipient card for a personal message.
When the gift message field is enabled, you can also configure:
- Save gift message to: Where the message is stored on the order. Options include Order notes, Order additional details, Line item attributes, and Order metafields. For most stores, Order notes is the simplest option since your fulfillment team can see the message directly on the Shopify order page.
- Max length: Character limit for the message (e.g., 200 characters).
- Require gift message: When enabled, shoppers must enter a message before proceeding. This only applies when "This is a gift" is checked.
Shipping and Delivery Options
Send To Many calculates shipping separately for each recipient based on their location and the products they're receiving. You configure the shipping behavior in the Shipping / delivery tab and, for rate sources, on the Shipping & delivery rates page in your main app settings.
Shipping Rate Sources
Choose how shipping rates are determined for each recipient order:
- Calculate shipping / delivery rates: Uses your configured rate source (Shopify shipping settings, Bird, Zapiet, or a custom integration) to calculate per-recipient rates. Shoppers see available rates and select one during checkout.
- Include local rates from Shopify: An additional toggle available when using calculated rates. Enables local delivery and pickup rates alongside standard shipping.
- Free shipping: Sets a $0 shipping line on all recipient orders. No rate selection shown to shoppers.
- Fixed shipping rate: Applies a custom flat rate to each recipient order.
Shipping Schedule
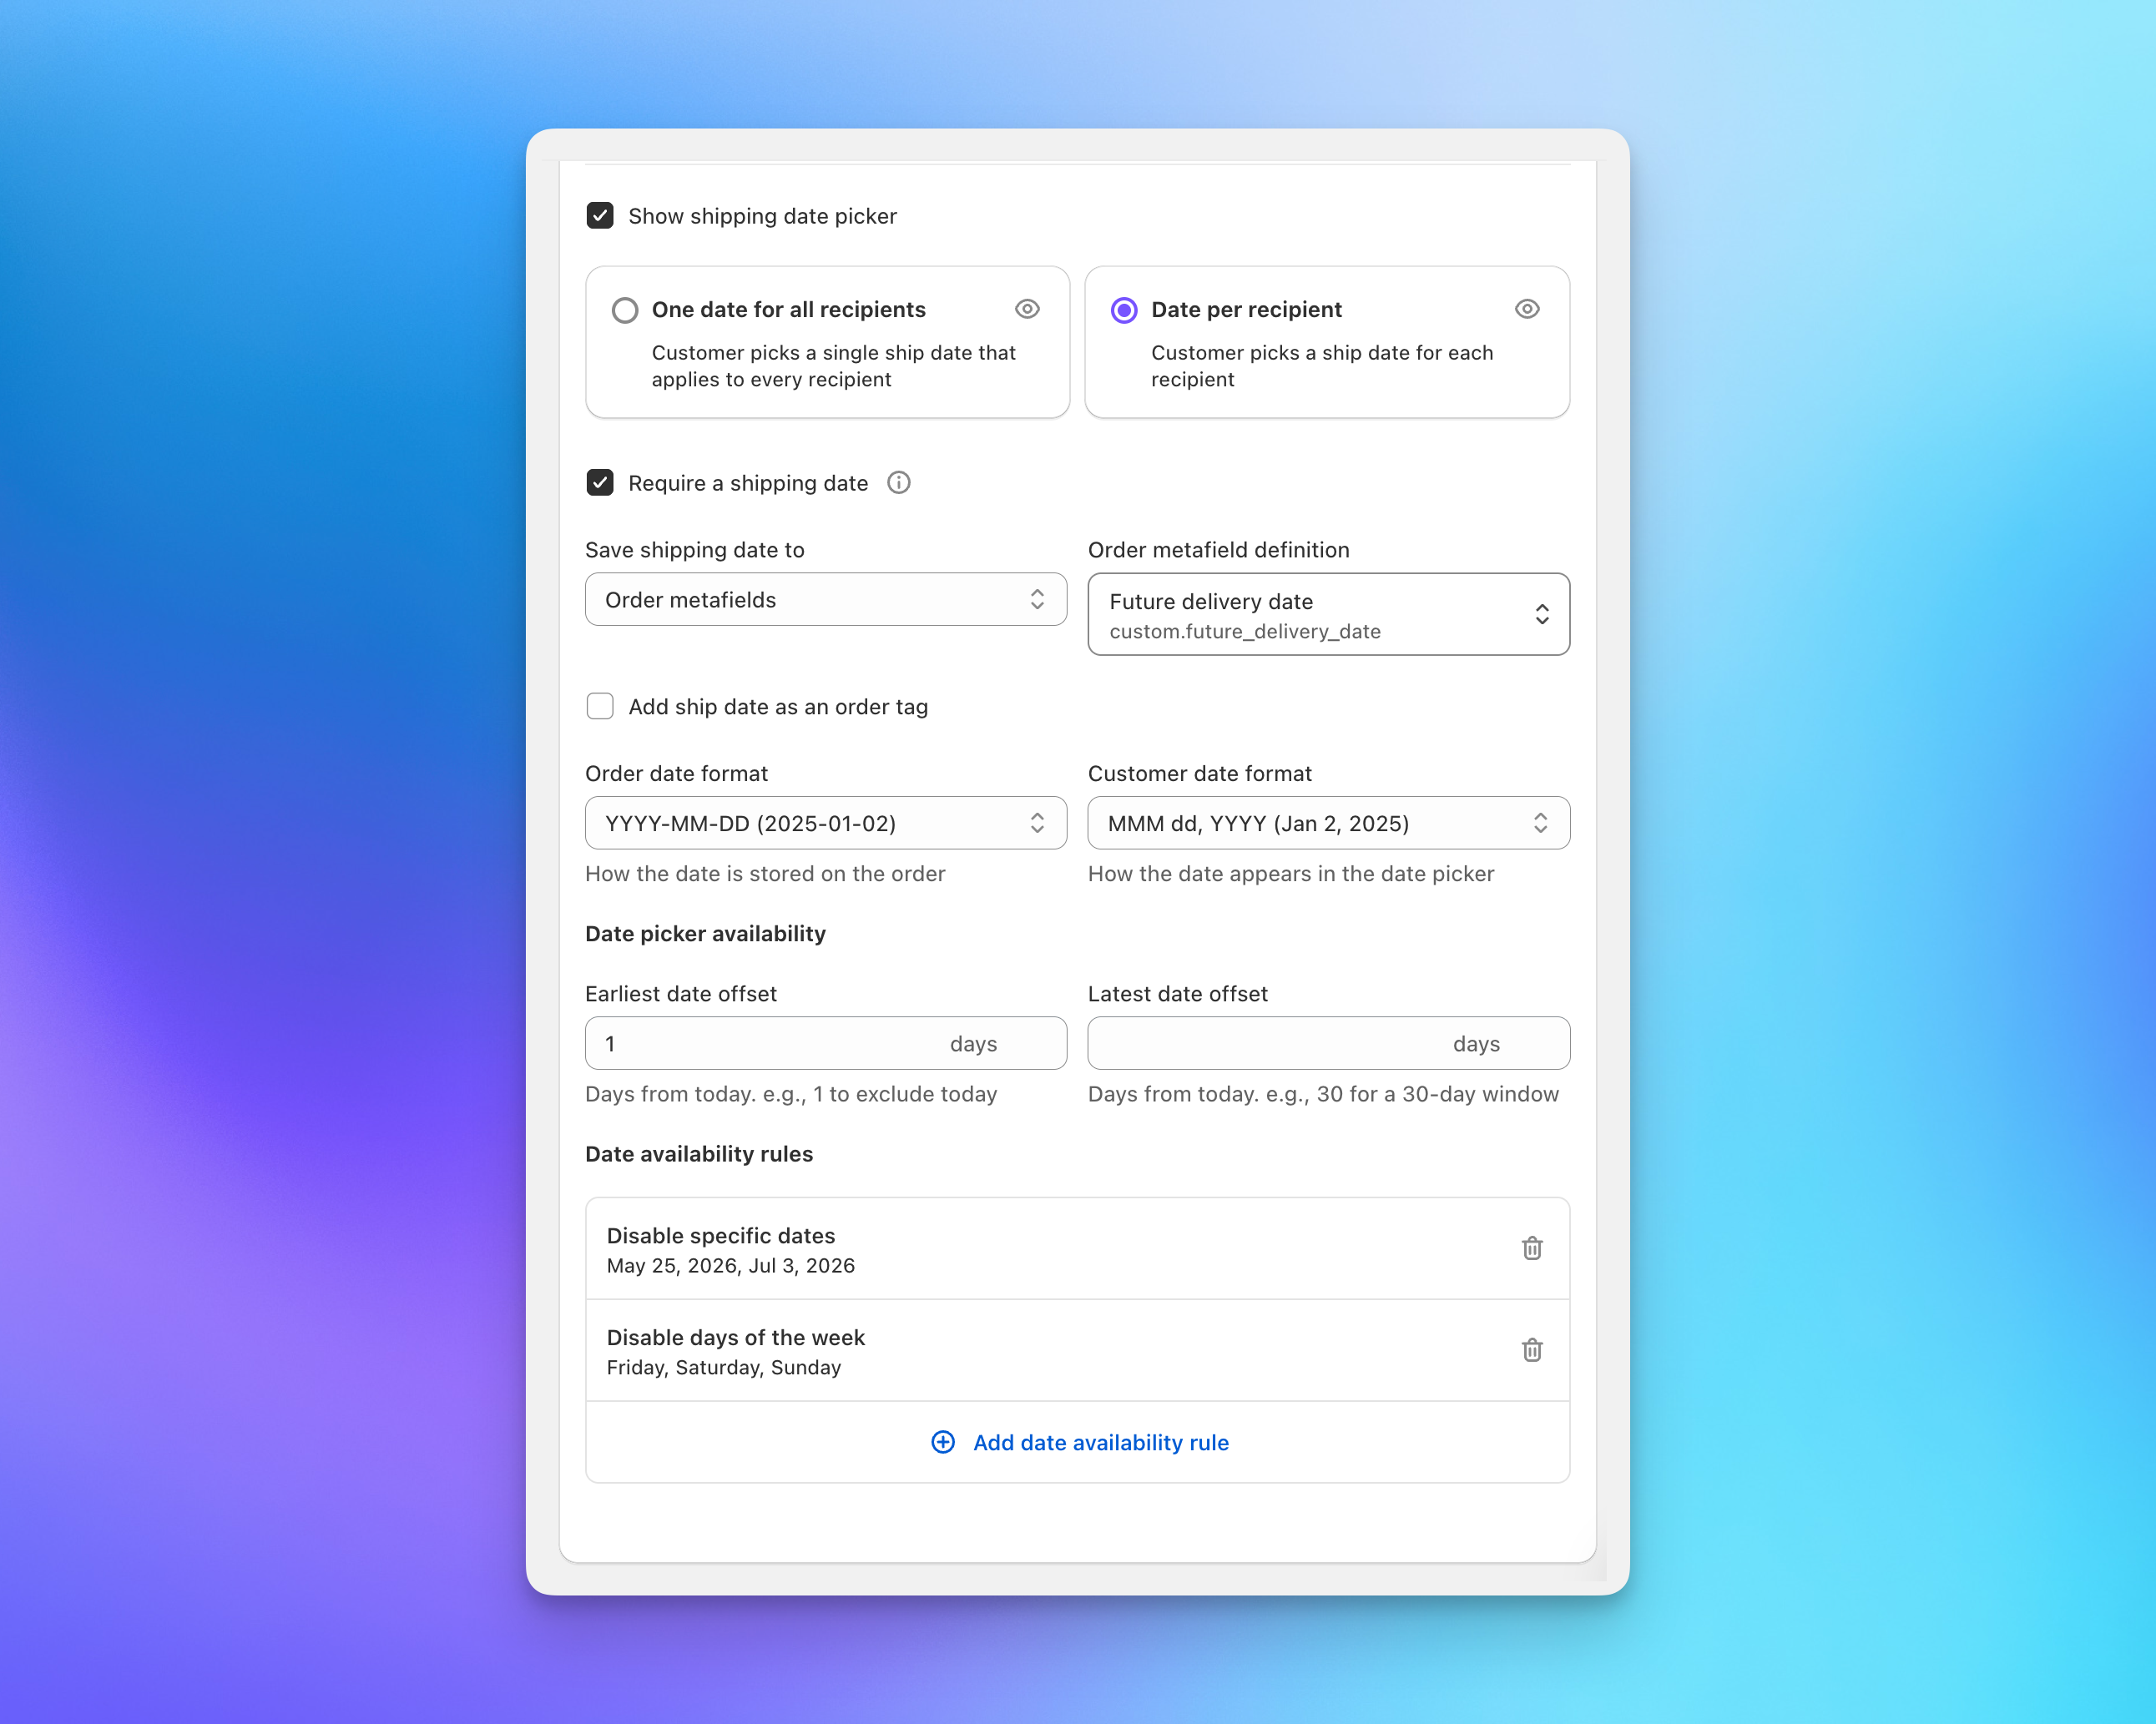
When you enable the shipping schedule, a date picker appears on the checkout form so shoppers can select delivery dates.
Date picker mode:
- Apply to all recipients: A single date picker appears once, and the selected date applies to every recipient.
- Apply to each recipient: A date picker appears on each recipient card. Each recipient can have a different shipping date.
Date storage: Configure where the selected shipping date is stored on each recipient order. Three options are available:
- Order additional details: Stores the date in the order's additional details, visible in the Shopify admin order page.
- Note attributes: Stores the date as a note attribute on the order.
- Metafield: Stores the date in an order metafield. This is the best option if your ERP or fulfillment system reads order metafields, since metafields are accessible via the Shopify API and can be displayed in custom workflows.
For all options, you set the key used to store the value (e.g., shipping_date). You can also toggle Add the shipping date as a tag on each order, which makes dates filterable in the Shopify order list.
Date formats: Two separate format settings control how dates are handled:
- Date format: The machine-readable format used to save the date on the order (e.g.,
YYYY-MM-DD). Choose a format that aligns with what your ERP, fulfillment system, or warehouse expects. This is the value stored in order data and available via the Shopify API. - Date display format: The human-readable format shown to shoppers on the checkout page (e.g.,
MMM D, YYYYfor "Jun 15, 2026"). This can be different from the storage format to make the date picker more intuitive for your customers.
Date picker availability: Control the earliest and latest selectable dates using day offsets from today. Start day offset sets how far out the earliest date is (e.g., 1 means tomorrow is the first option). End day offset sets the latest selectable date (e.g., 30 means shoppers can select up to 30 days out). Leave either blank for no restriction.
Date Availability Rules
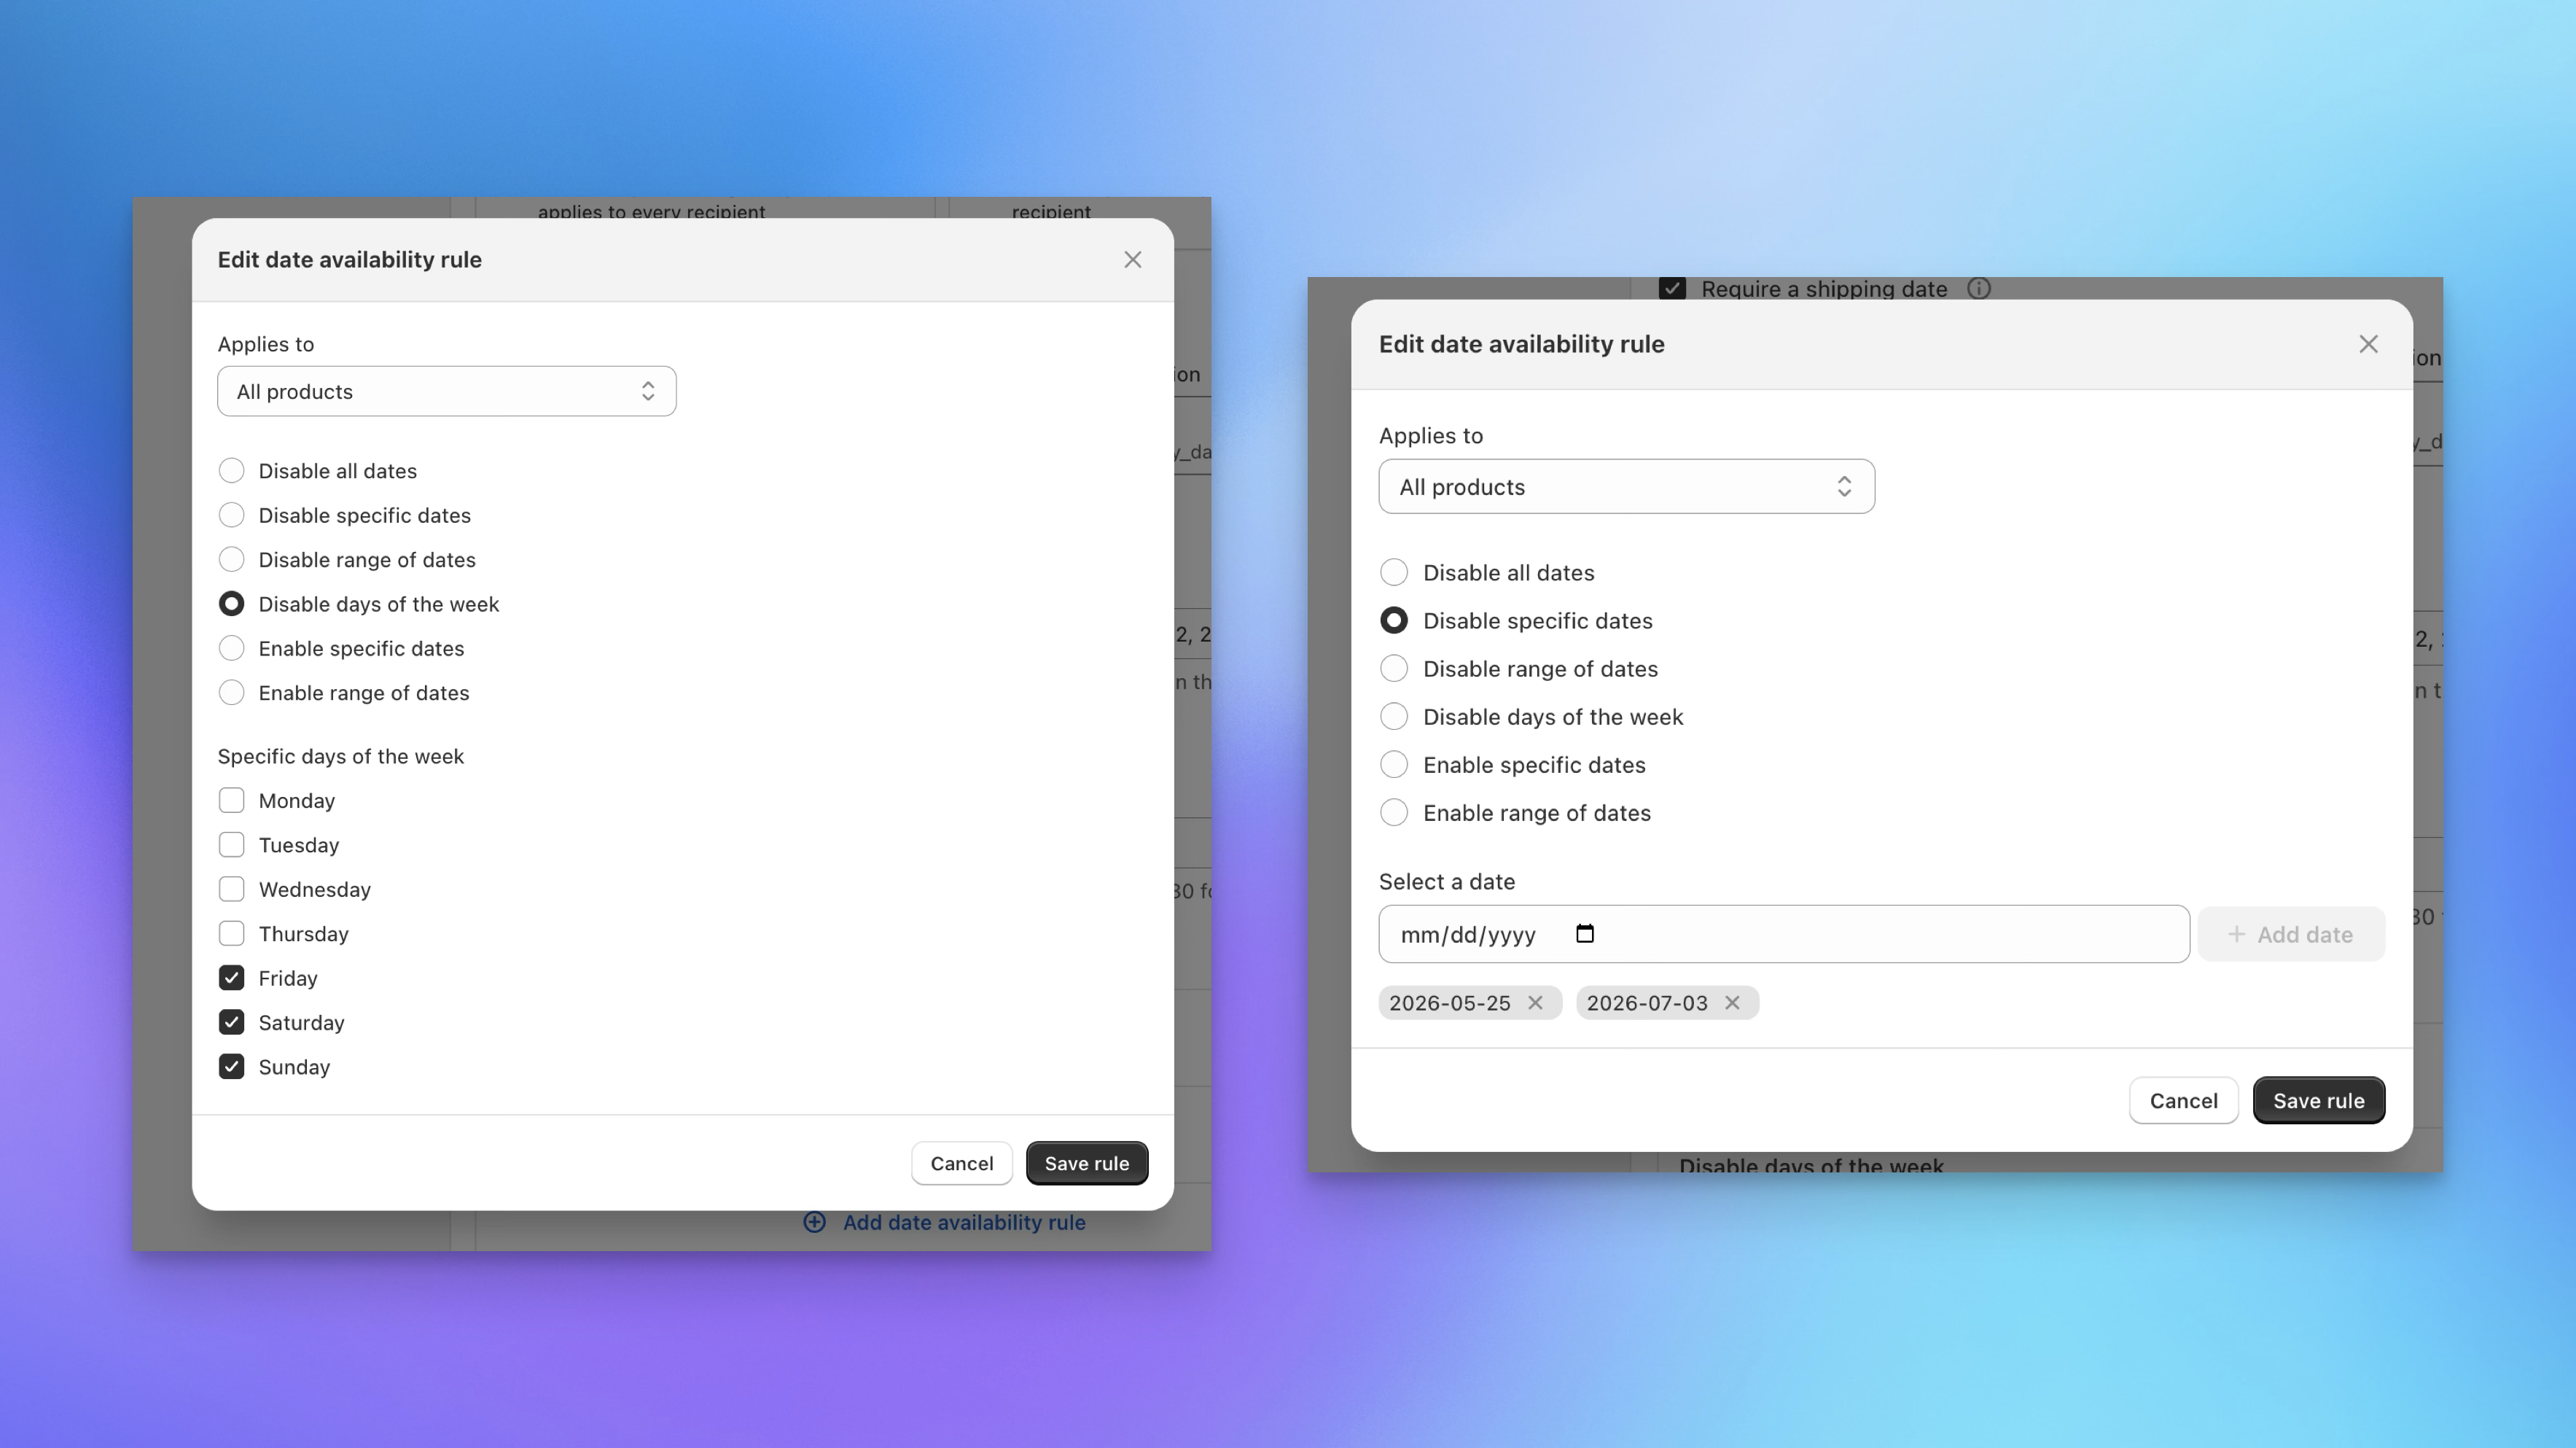
Date availability rules let you block specific dates or recurring days from the date picker. Click Add date availability rule to create a rule:
- Disable specific dates: Block individual dates like holidays or warehouse closures (e.g., December 25, January 1).
- Disable days of the week: Block recurring days (e.g., every Saturday and Sunday) for businesses that don't ship on weekends.
You can add as many rules as you need. Disabled dates are grayed out in the date picker and cannot be selected by shoppers.
Order-Level Fields
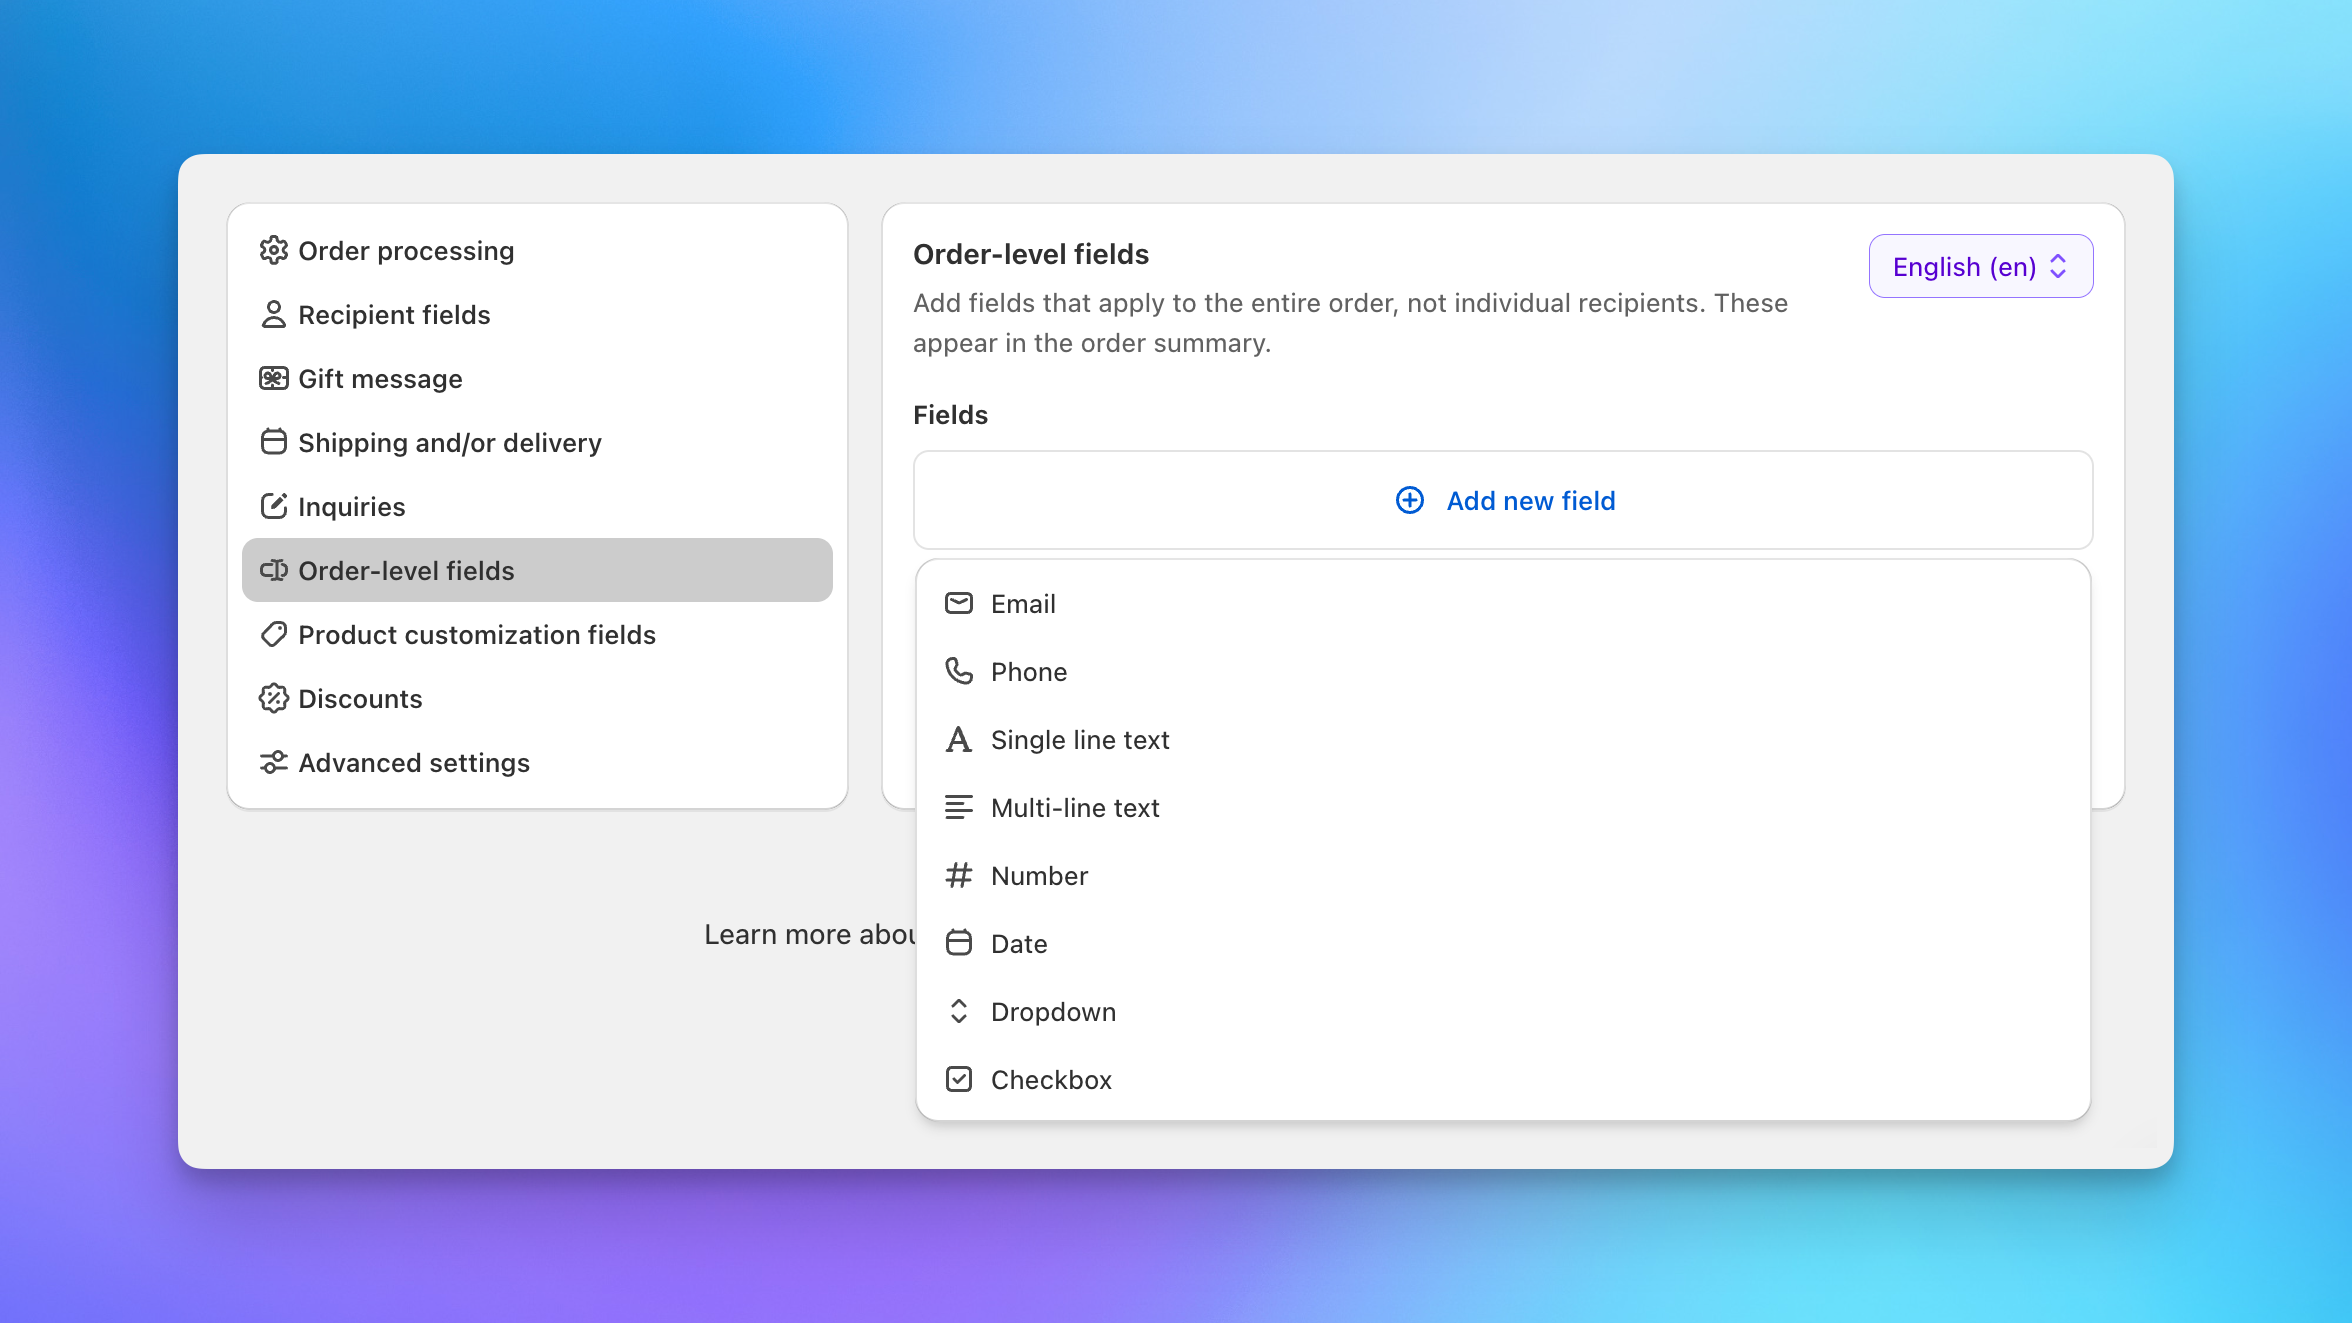
Dropdown and other order-level fields appear once at the top of the checkout, above the recipient list. These collect information that applies to the entire order rather than individual recipients.
Order-level dropdown fields support configurable options and are stored on the parent order. This is useful for fields like "occasion" or "department" that apply to the whole send.
Next Steps
- Additional settings: Form fields, shipping rate filters, and advanced options
- Discounts: Discount codes, volume discounts, and Shopify automatic discounts
- Setting up checkout: Step-by-step setup guide
- CSS customization: Match the checkout to your store's branding