How to Customize the Order Confirmation Email for Multi-Recipient Orders
Reassure gifters right after they pay. Edit Shopify's order confirmation email so it confirms a multi-recipient order and links to the Send detail page with every recipient and tracking number.
The moments after a gifter clicks pay shape how they feel about the whole gifting experience. They've sent gifts to everyone on their list, and they want to know it worked. The order confirmation email is one of the first things they see.
Shopify's default confirmation is written for an order going to one recipient. On a multi-recipient order, it reads like a receipt for a single shipment. No shipping confirmation follows it either, because the aggregate (gifter) order that captured the payment never ships.
This tutorial walks you through two changes that make the email work for multi-recipient gifters. Each one applies only to aggregate orders, and every other order confirmation stays as it is.
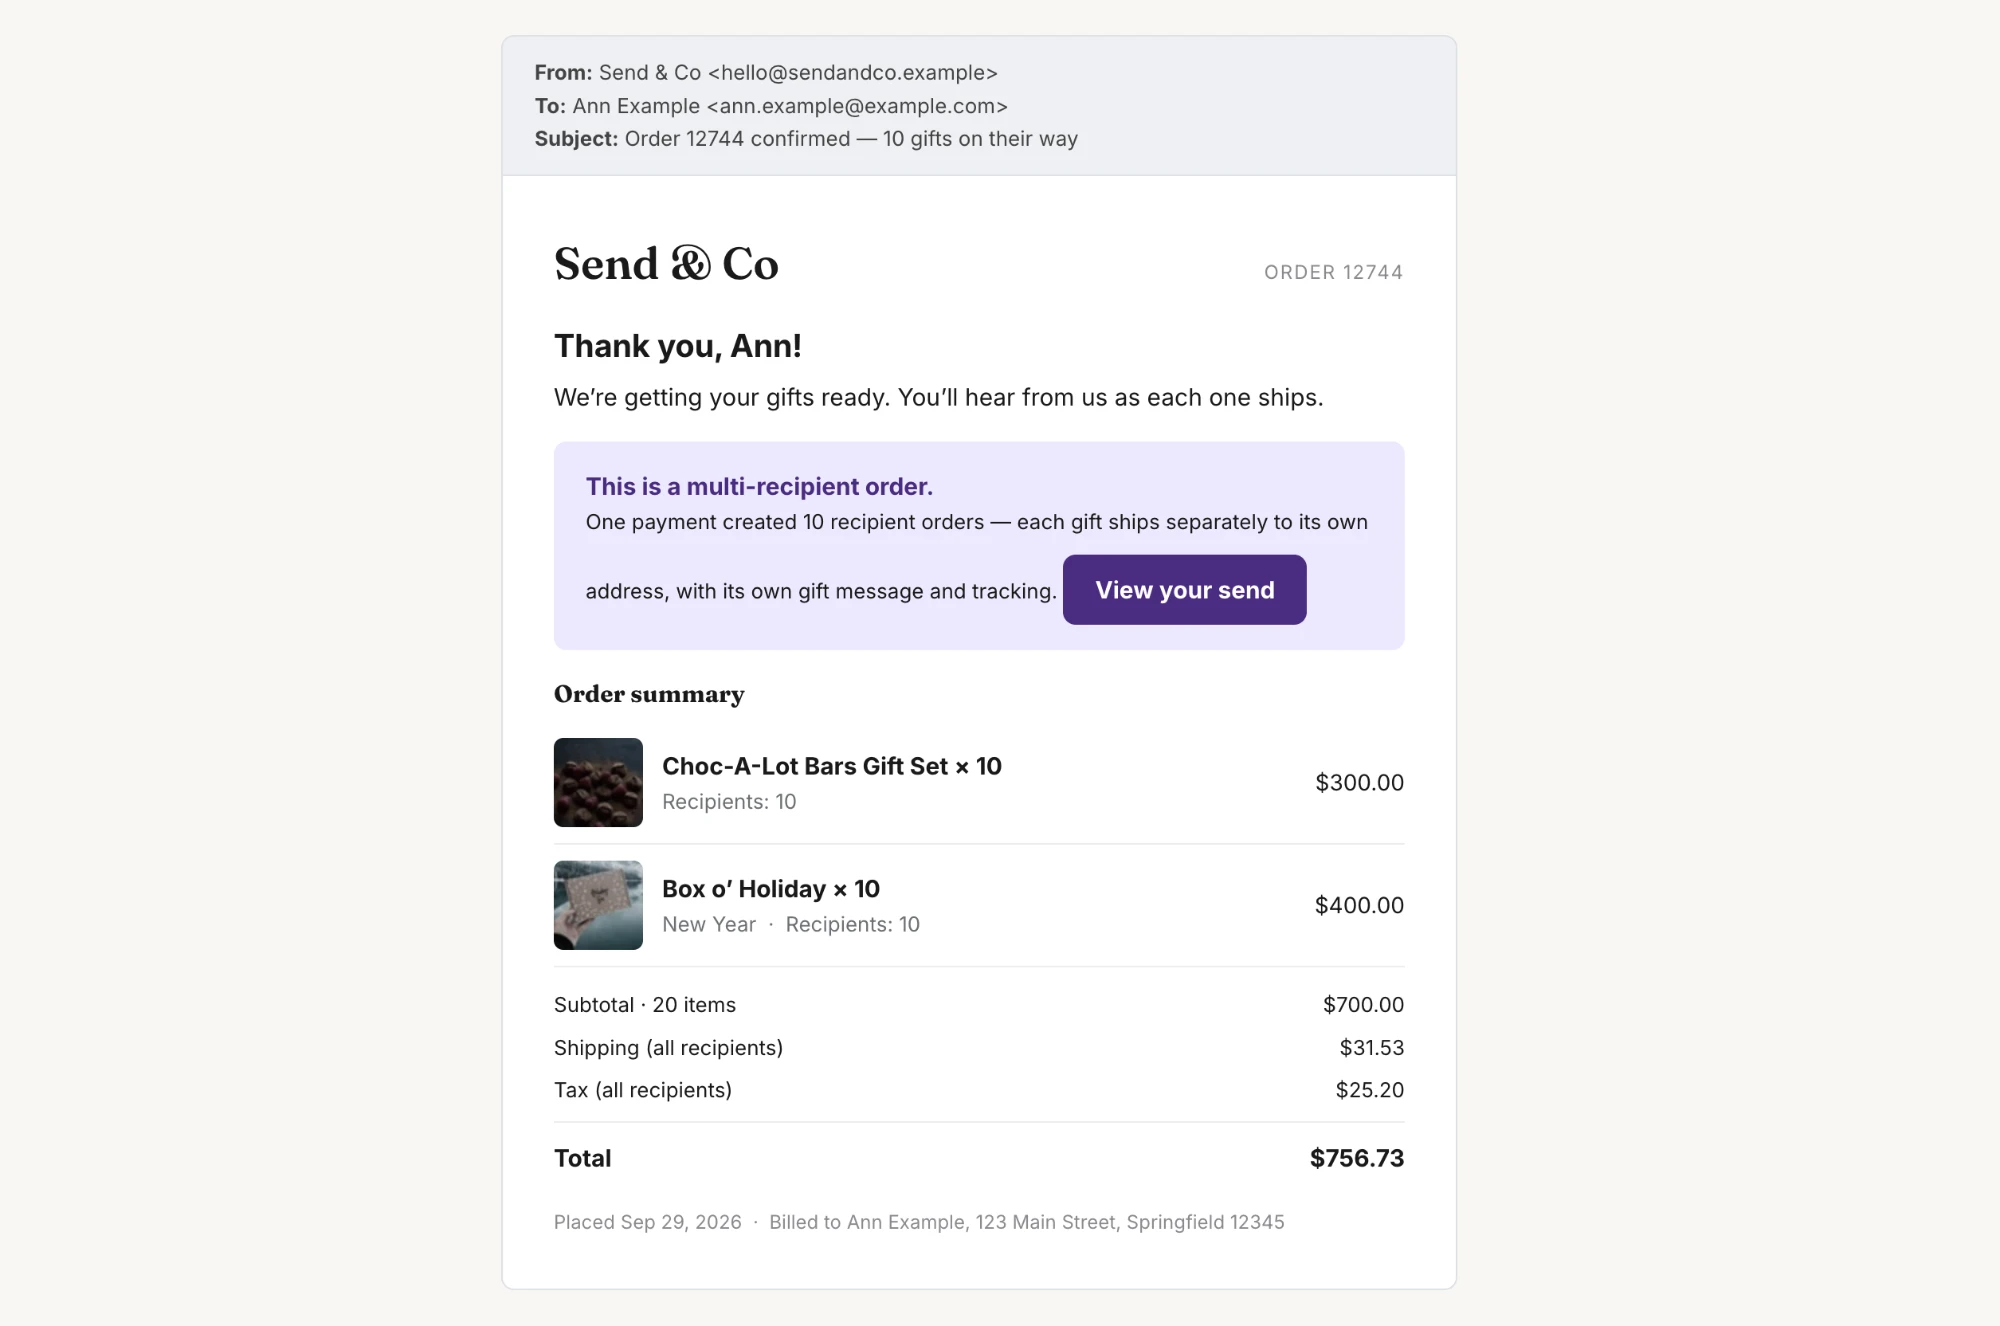
- A note confirming that this is a multi-address order and each gift ships separately, so the gifter knows the order went through the way they intended
- A link to their Send detail page, which has everything they need in one place: every recipient, delivery status, and tracking number
Here's an example of an order confirmation customized for a multi-recipient order:
Before you start
- Set up the customer account Sends page. The link in this email points to it. Without it, you can still add the note.
- Open the Order confirmation template under Settings > Notifications > Customer notifications in your Shopify admin. Copy the current template code into a text file first so you can restore it.
- Have one aggregate order in your store to preview against. Place a test multi-recipient order if you don't have one.
- If another app such as Klaviyo sends your order confirmations, rebuild the same conditionals in that tool's template editor.
Step 1: Find your Sends page URL
The Sends page lives under your store's customer account URL, and its page ID is the same in every store: 019d0bdc-632f-7d0e-8d6b-f88d44a1f1b6.
Log in to your storefront customer account and copy the account URL from the address bar. Account URLs differ from store to store, so copy yours from the browser. Then add pages/019d0bdc-632f-7d0e-8d6b-f88d44a1f1b6/ to the end. For example:
https://account.yourstore.com/pages/019d0bdc-632f-7d0e-8d6b-f88d44a1f1b6/
https://shopify.com/<your-shop-id>/account/pages/019d0bdc-632f-7d0e-8d6b-f88d44a1f1b6/
Adding ?send= and a Send ID to the end of that URL opens the Send's detail page. You'll build that link in Step 3.
Step 2: Detect aggregate orders
Paste this block at the very top of the Order confirmation template, above everything else. Replace <your-sends-page-url> on the second line with your URL from Step 1, keeping the trailing slash.
{% comment %} Send To Many: detect aggregate (multi-address) orders. stm_sends_page_url is the store's customer account Sends page. {% endcomment %}
{% assign stm_sends_page_url = "<your-sends-page-url>" %}
{% assign is_stm_aggregate = false %}
{% assign stm_send_id = "" %}
{% if tags contains "Send to Many aggregate" %}
  {% assign is_stm_aggregate = true %}
  {% for tag in tags %}
    {% if tag contains "Send to Many #" %}
      {% assign stm_send_id = tag | split: "#" | last %}
    {% endif %}
  {% endfor %}
{% endif %}
The block sets is_stm_aggregate to true when the order carries the Send to Many aggregate tag. It also reads the Send ID from the order's Send to Many #<id> tag so the link can open the right Send.
Email notification templates read order properties directly, so use tags, not order.tags.
Step 3: Add the multi-address note and link
Find the place where the template prints the intro text. In Shopify's default template it's these two lines:
<h2>{{ email_title }}</h2>
<p>{{ email_body }}</p>
Paste this directly below them:
{% if is_stm_aggregate %}
  <p>This is a multi-address order. Your gifts will ship separately to each recipient, so you won't receive a shipping confirmation for this order number.</p>
  {% if stm_sends_page_url != blank %}
    <p><a href="{{ stm_sends_page_url }}{% if stm_send_id != blank %}?send={{ stm_send_id }}{% endif %}">View every recipient and track each gift</a> (you'll be asked to sign in).</p>
  {% endif %}
{% endif %}
The link opens the Send detail page, where the gifter sees every recipient, delivery status, and tracking number for the Send. The Sends page only loads for the gifter who owns the Send, and only while they're signed in. That's why the link text mentions signing in.
On checkout orders, we add the Send to Many #<id> tag moments after the aggregate order is created. In rare cases it isn't there yet when the email renders, and the link opens the gifter's Sends list.
If you haven't set up the Sends page, set stm_sends_page_url to "" in Step 2. The note still appears and the link is left out.
On Shopify Plus, you can also show product thumbnails on the aggregate order's line items in this email. That's a separate feature with its own template changes. See Show Product Images on Shopify Bulk Order Invoices.
Step 4: Preview and save
- Click Preview in the template editor and choose an aggregate order. The note and link appear below the intro.
- Click the link while signed in as that gifter. It opens the Send's detail page.
- Preview a regular order. It looks the same as it did before your changes.
- Save the template.
Next steps
- Customize Shopify notifications for Send To Many orders: tailor the shipping confirmations that go to gifters and recipients.
- Order and shipping notifications for multi-recipient orders: control who receives recipient order emails.
- Set up delivery digest emails: send the gifter one daily shipping update per Send, with the same Send detail link.
- Customer account Sends page: set up the page this email links to.