How to Add the Sends Page and Order Send Banner to Shopify Customer Accounts
Give gifters one place to check on every gift after they pay. Enable the Sends page and Order Send Banner in Shopify customer accounts so each multi-recipient order links to its recipients, delivery statuses, and tracking numbers.
A multi-recipient gift order leaves a lot of room for doubt. After paying, a gifter wonders whether they entered every detail correctly and whether you have all the information you need for each recipient. Your job is to reassure them, and Send To Many gives you the tools to do it inside their customer account.
The Order Send Banner appears on any order that belongs to a Send, starting with the page they see right after checkout. It links to the Sends page, where they can check every recipient, delivery status, and tracking number in one place.
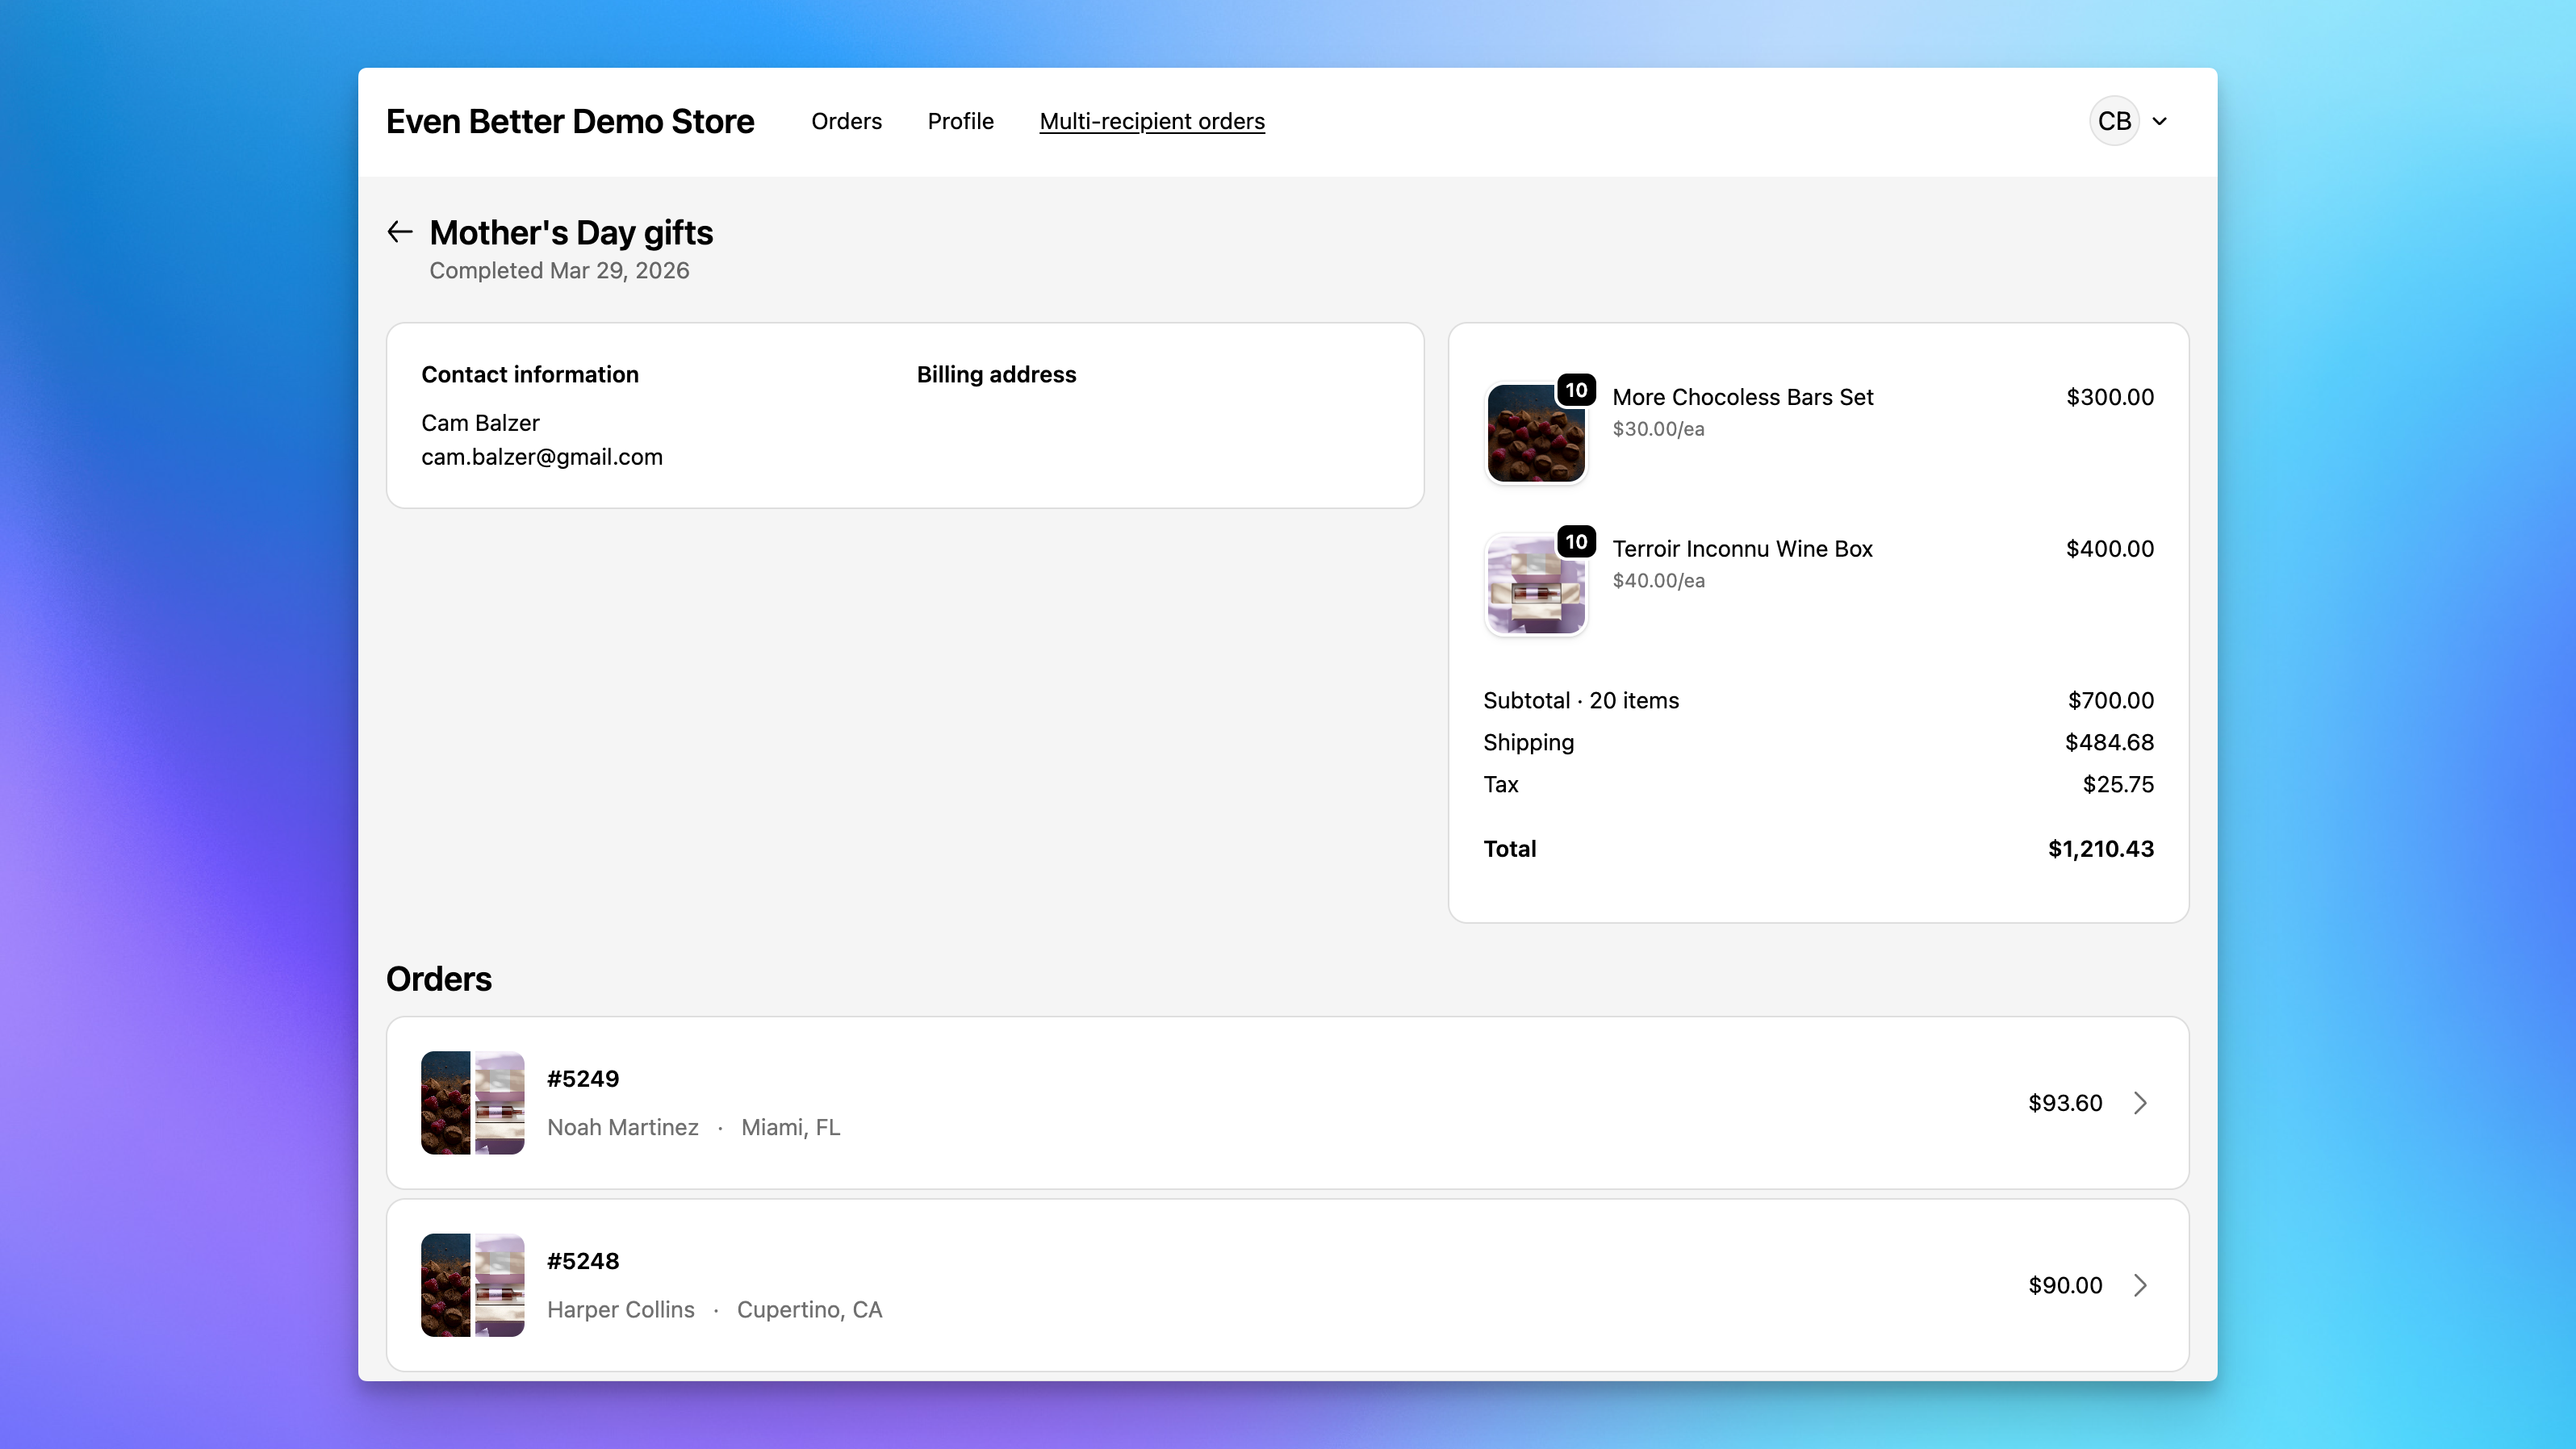
This is the first piece of the post-purchase experience to set up, because your order confirmation and delivery digest emails link to the Sends page.
Before you start
- Your store needs Shopify's new customer accounts. In your Shopify admin, go to Settings > Customer accounts and check that "Customer accounts" is selected, not "Legacy".
- Have one multi-recipient order in your store to test with. Place a test order if you don't have one.
Step 1: Open the customer account editor
In your Shopify admin, go to Online Store > Themes and click Customize. In the page picker at the top, select Checkout and customer accounts.
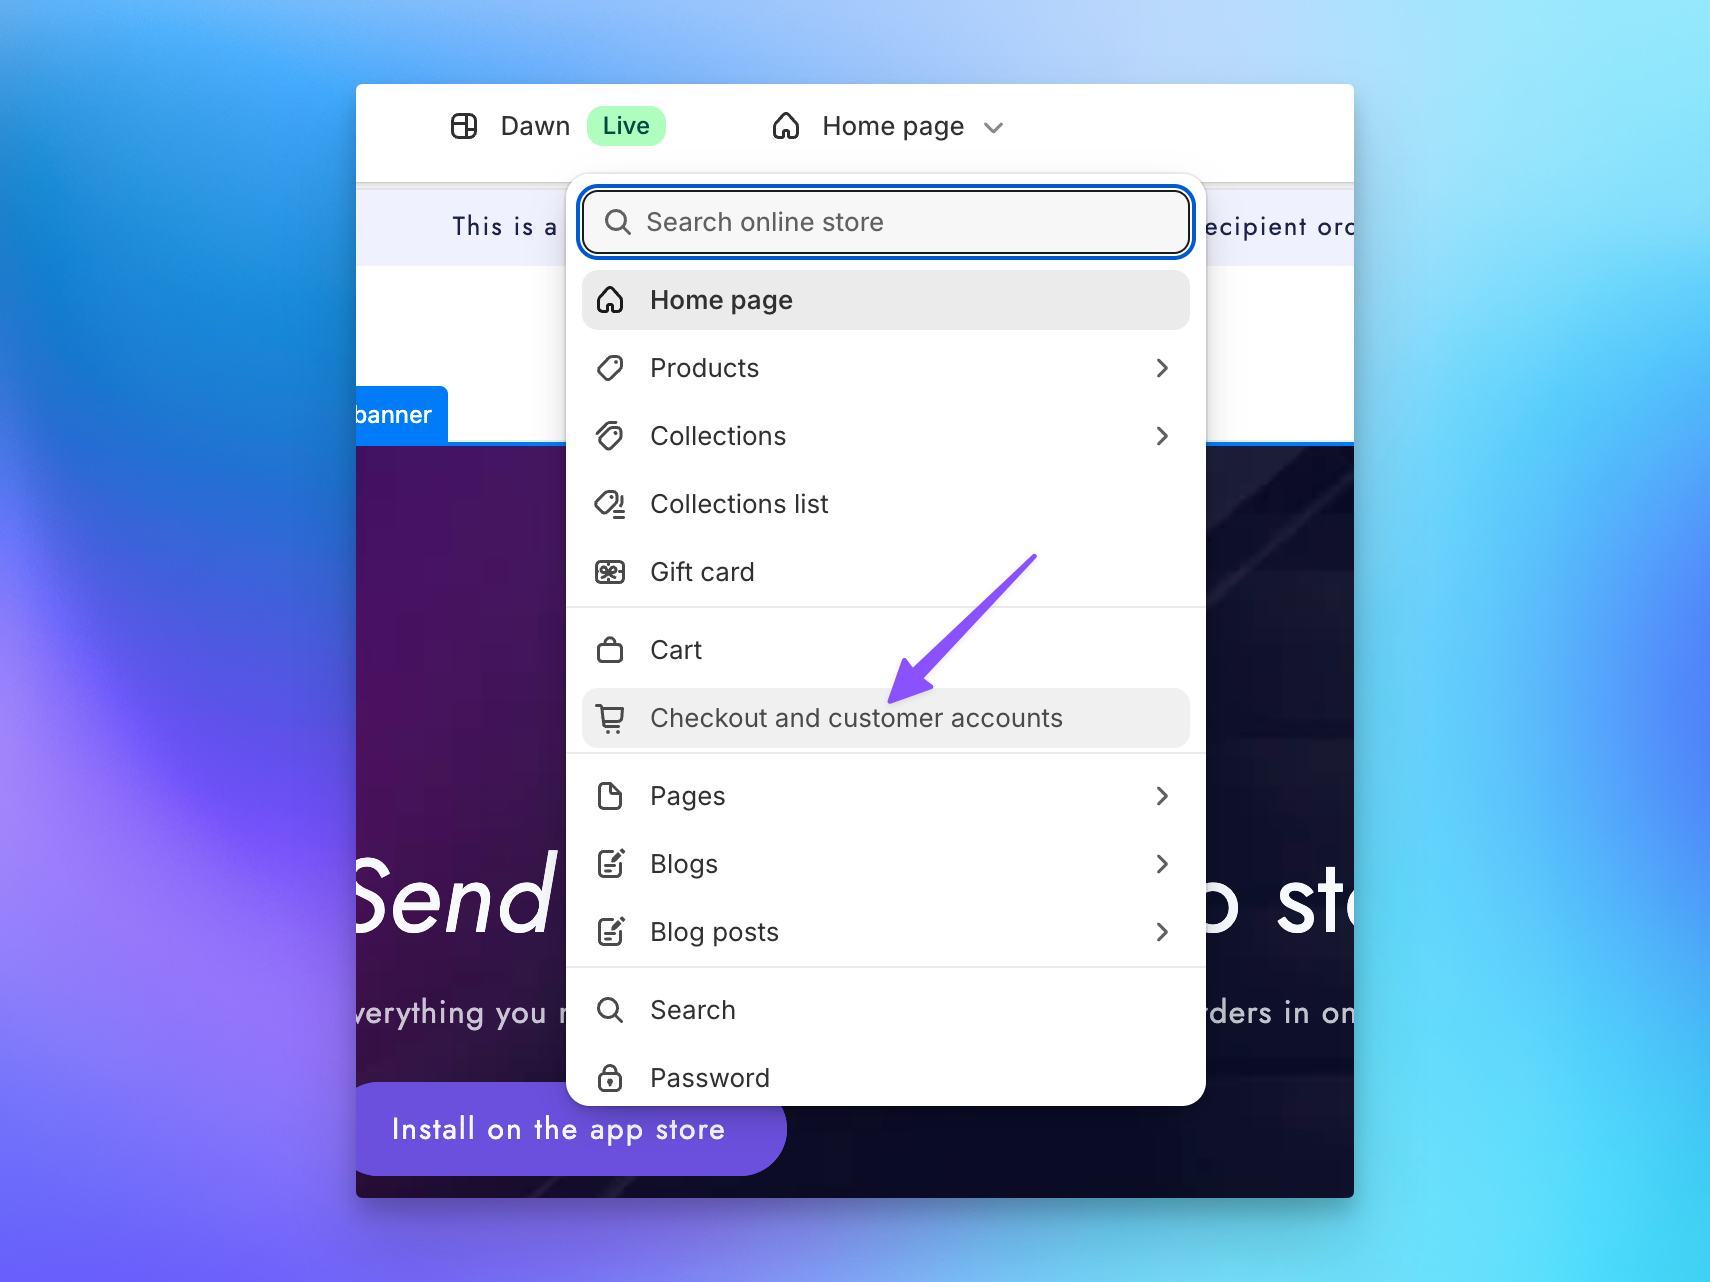
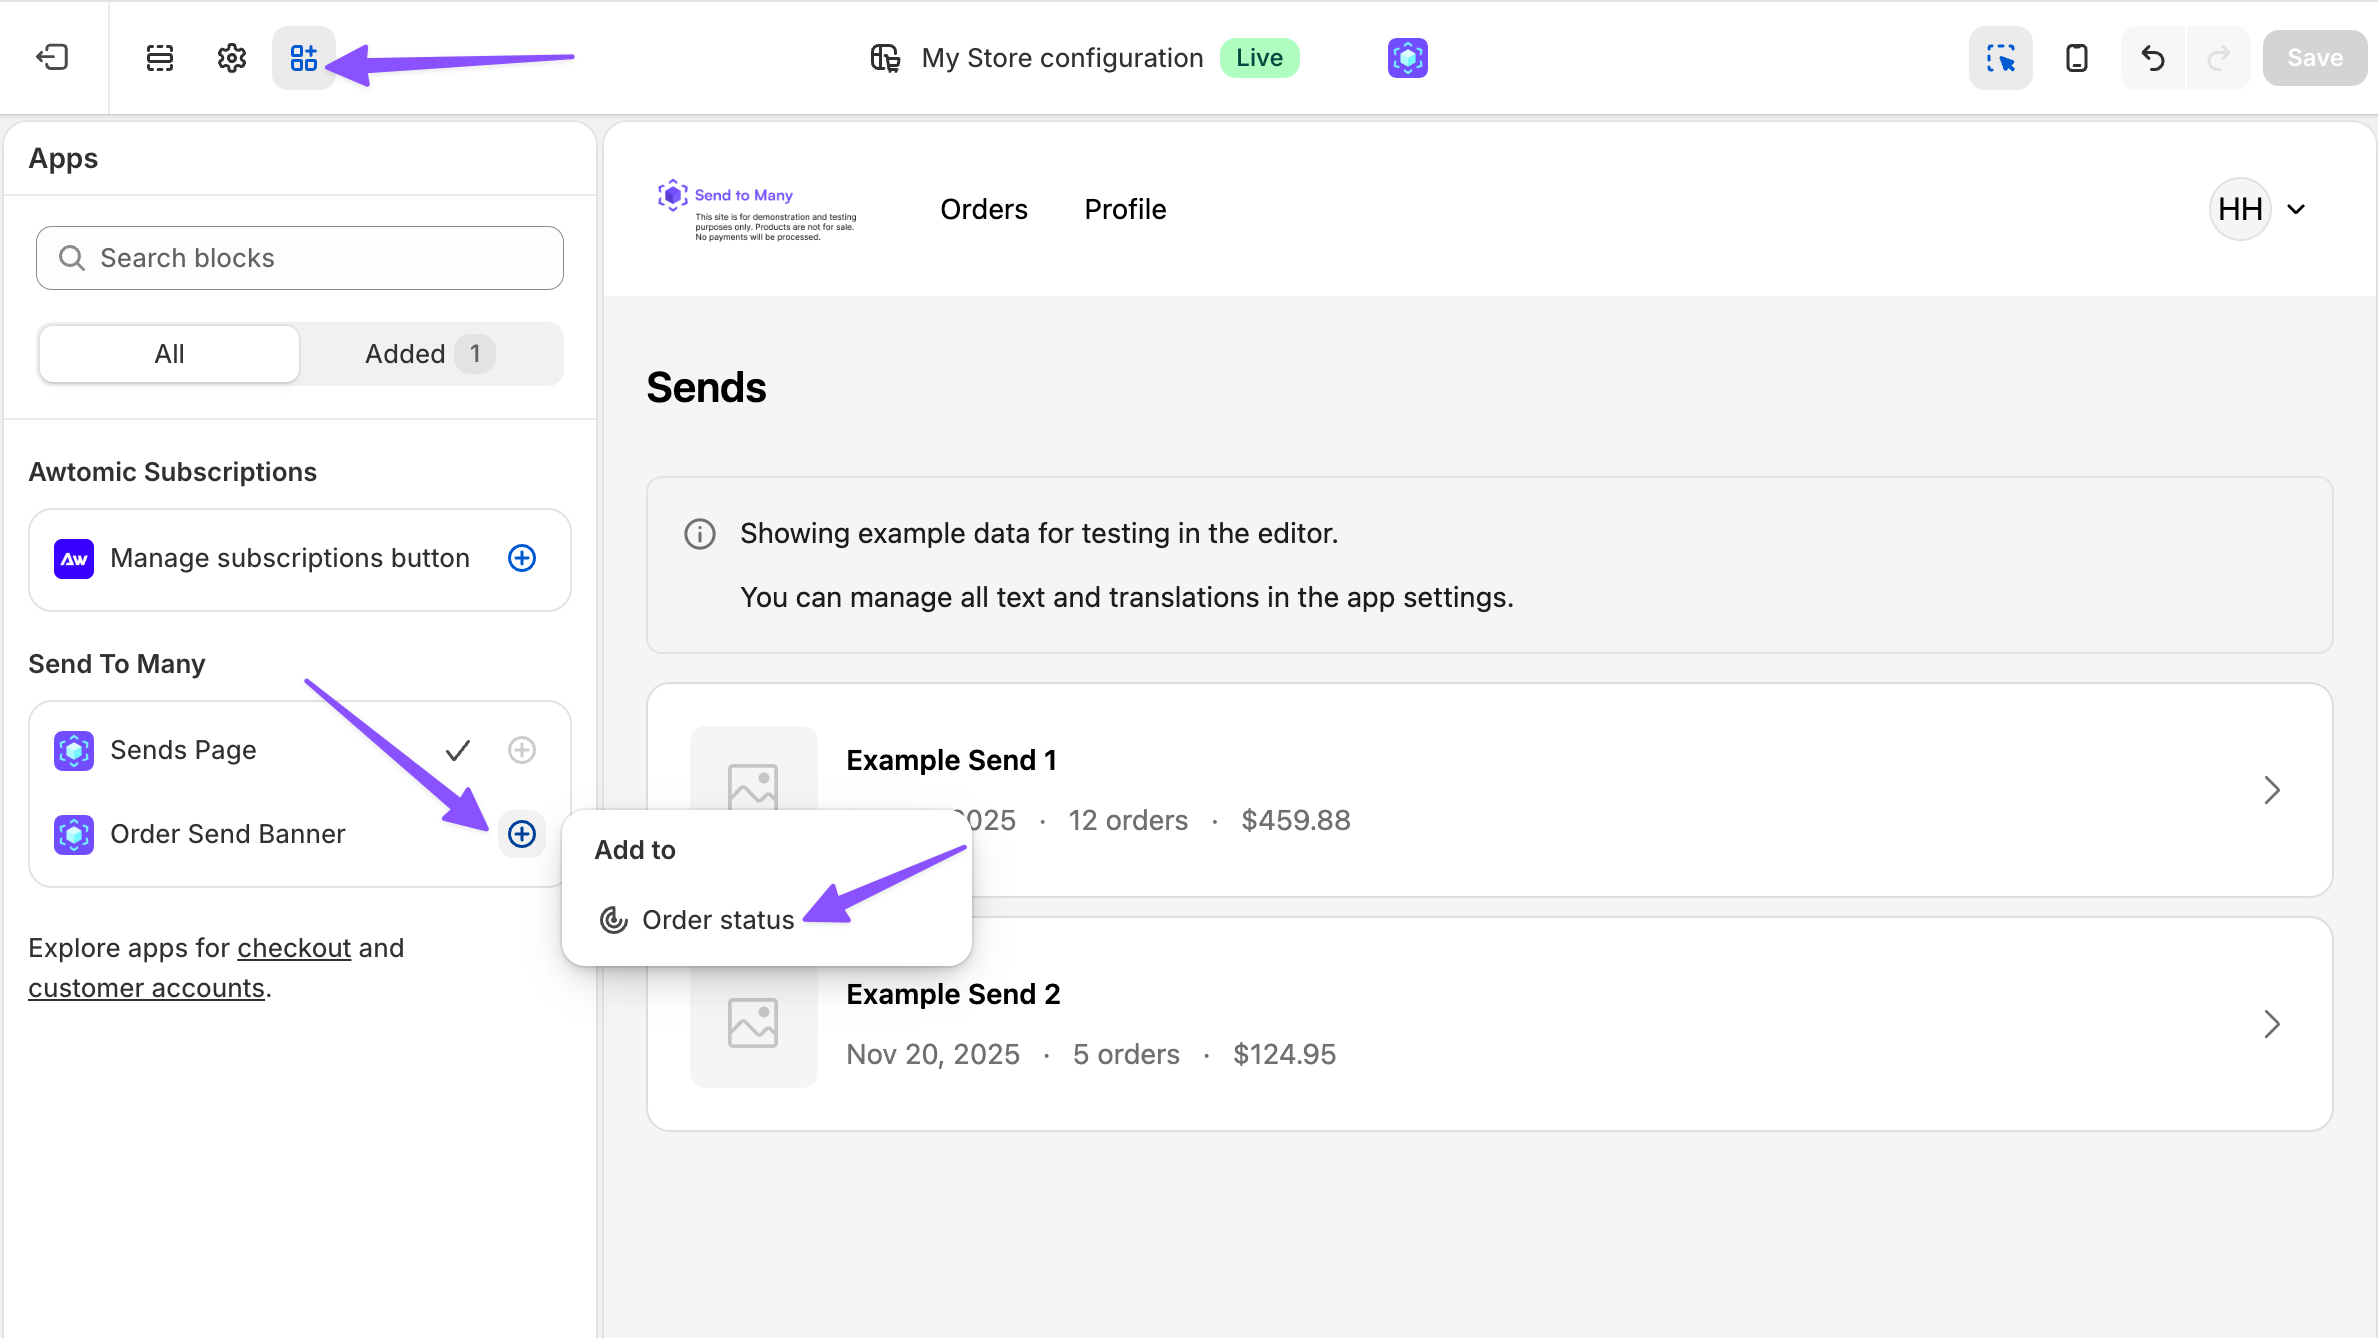
Step 2: Enable the Sends Page and Order Send Banner
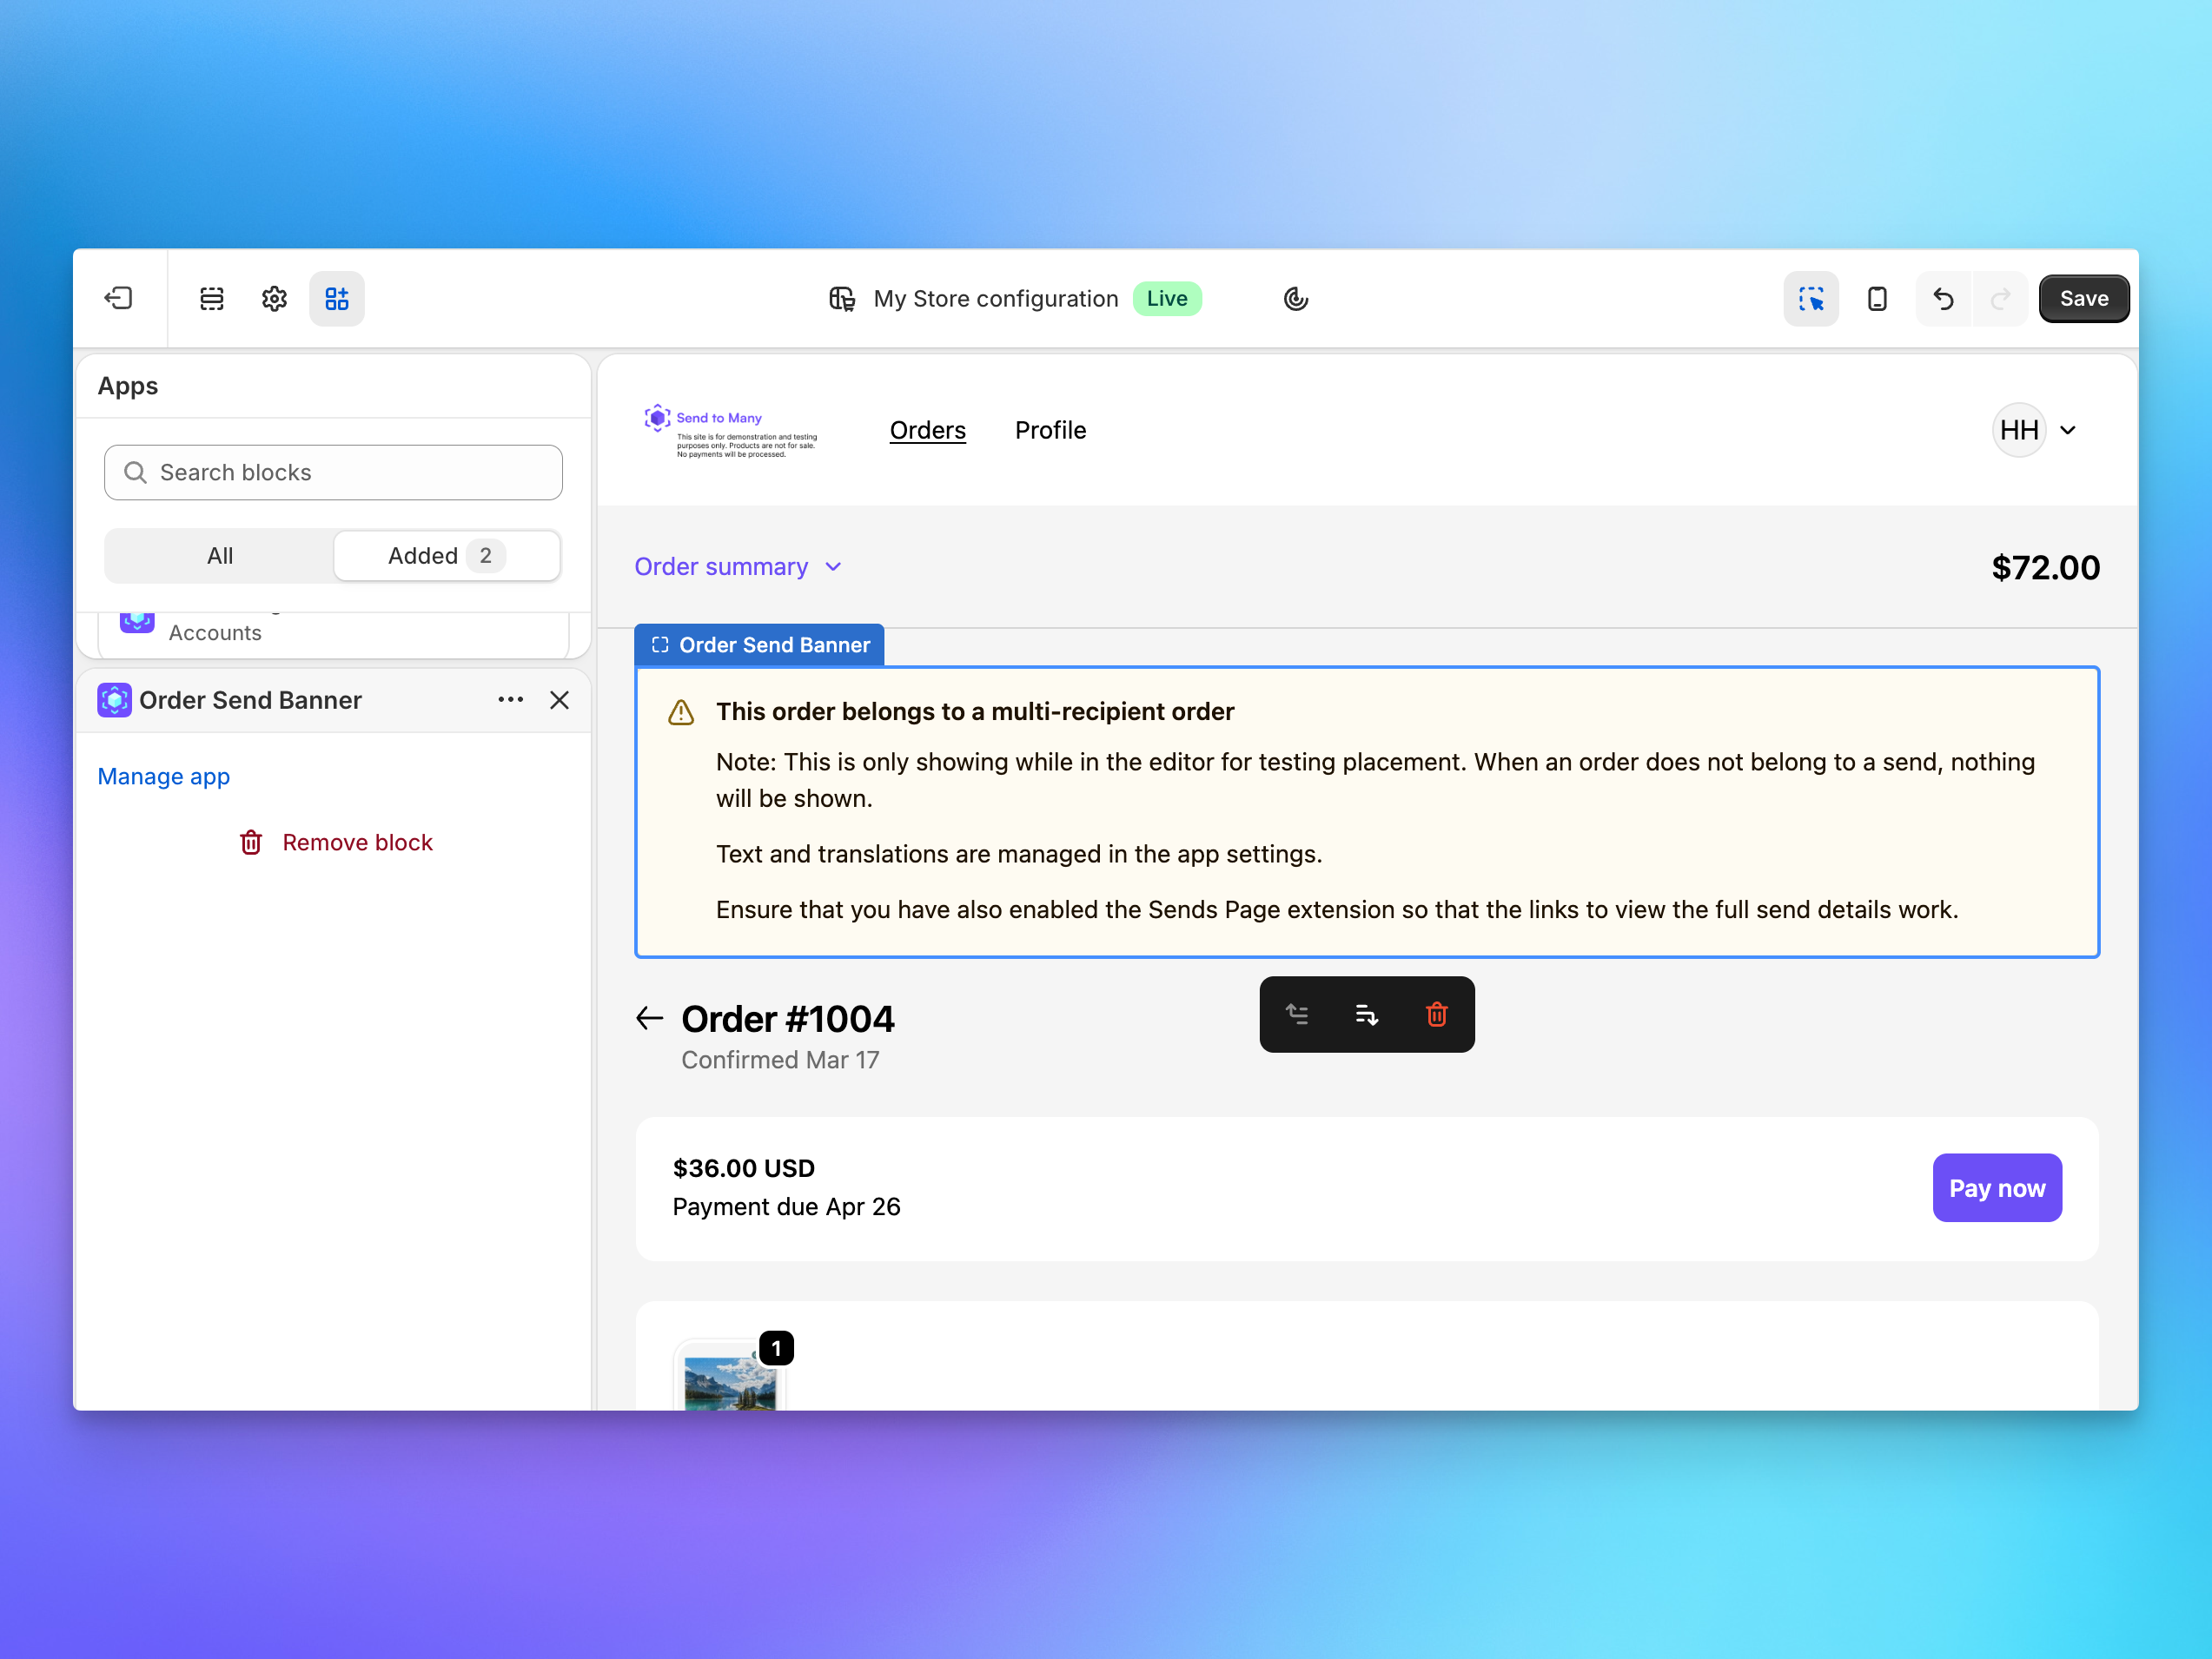
In the left sidebar, open the Apps section. Under Send To Many, enable Sends Page and Order Send Banner.
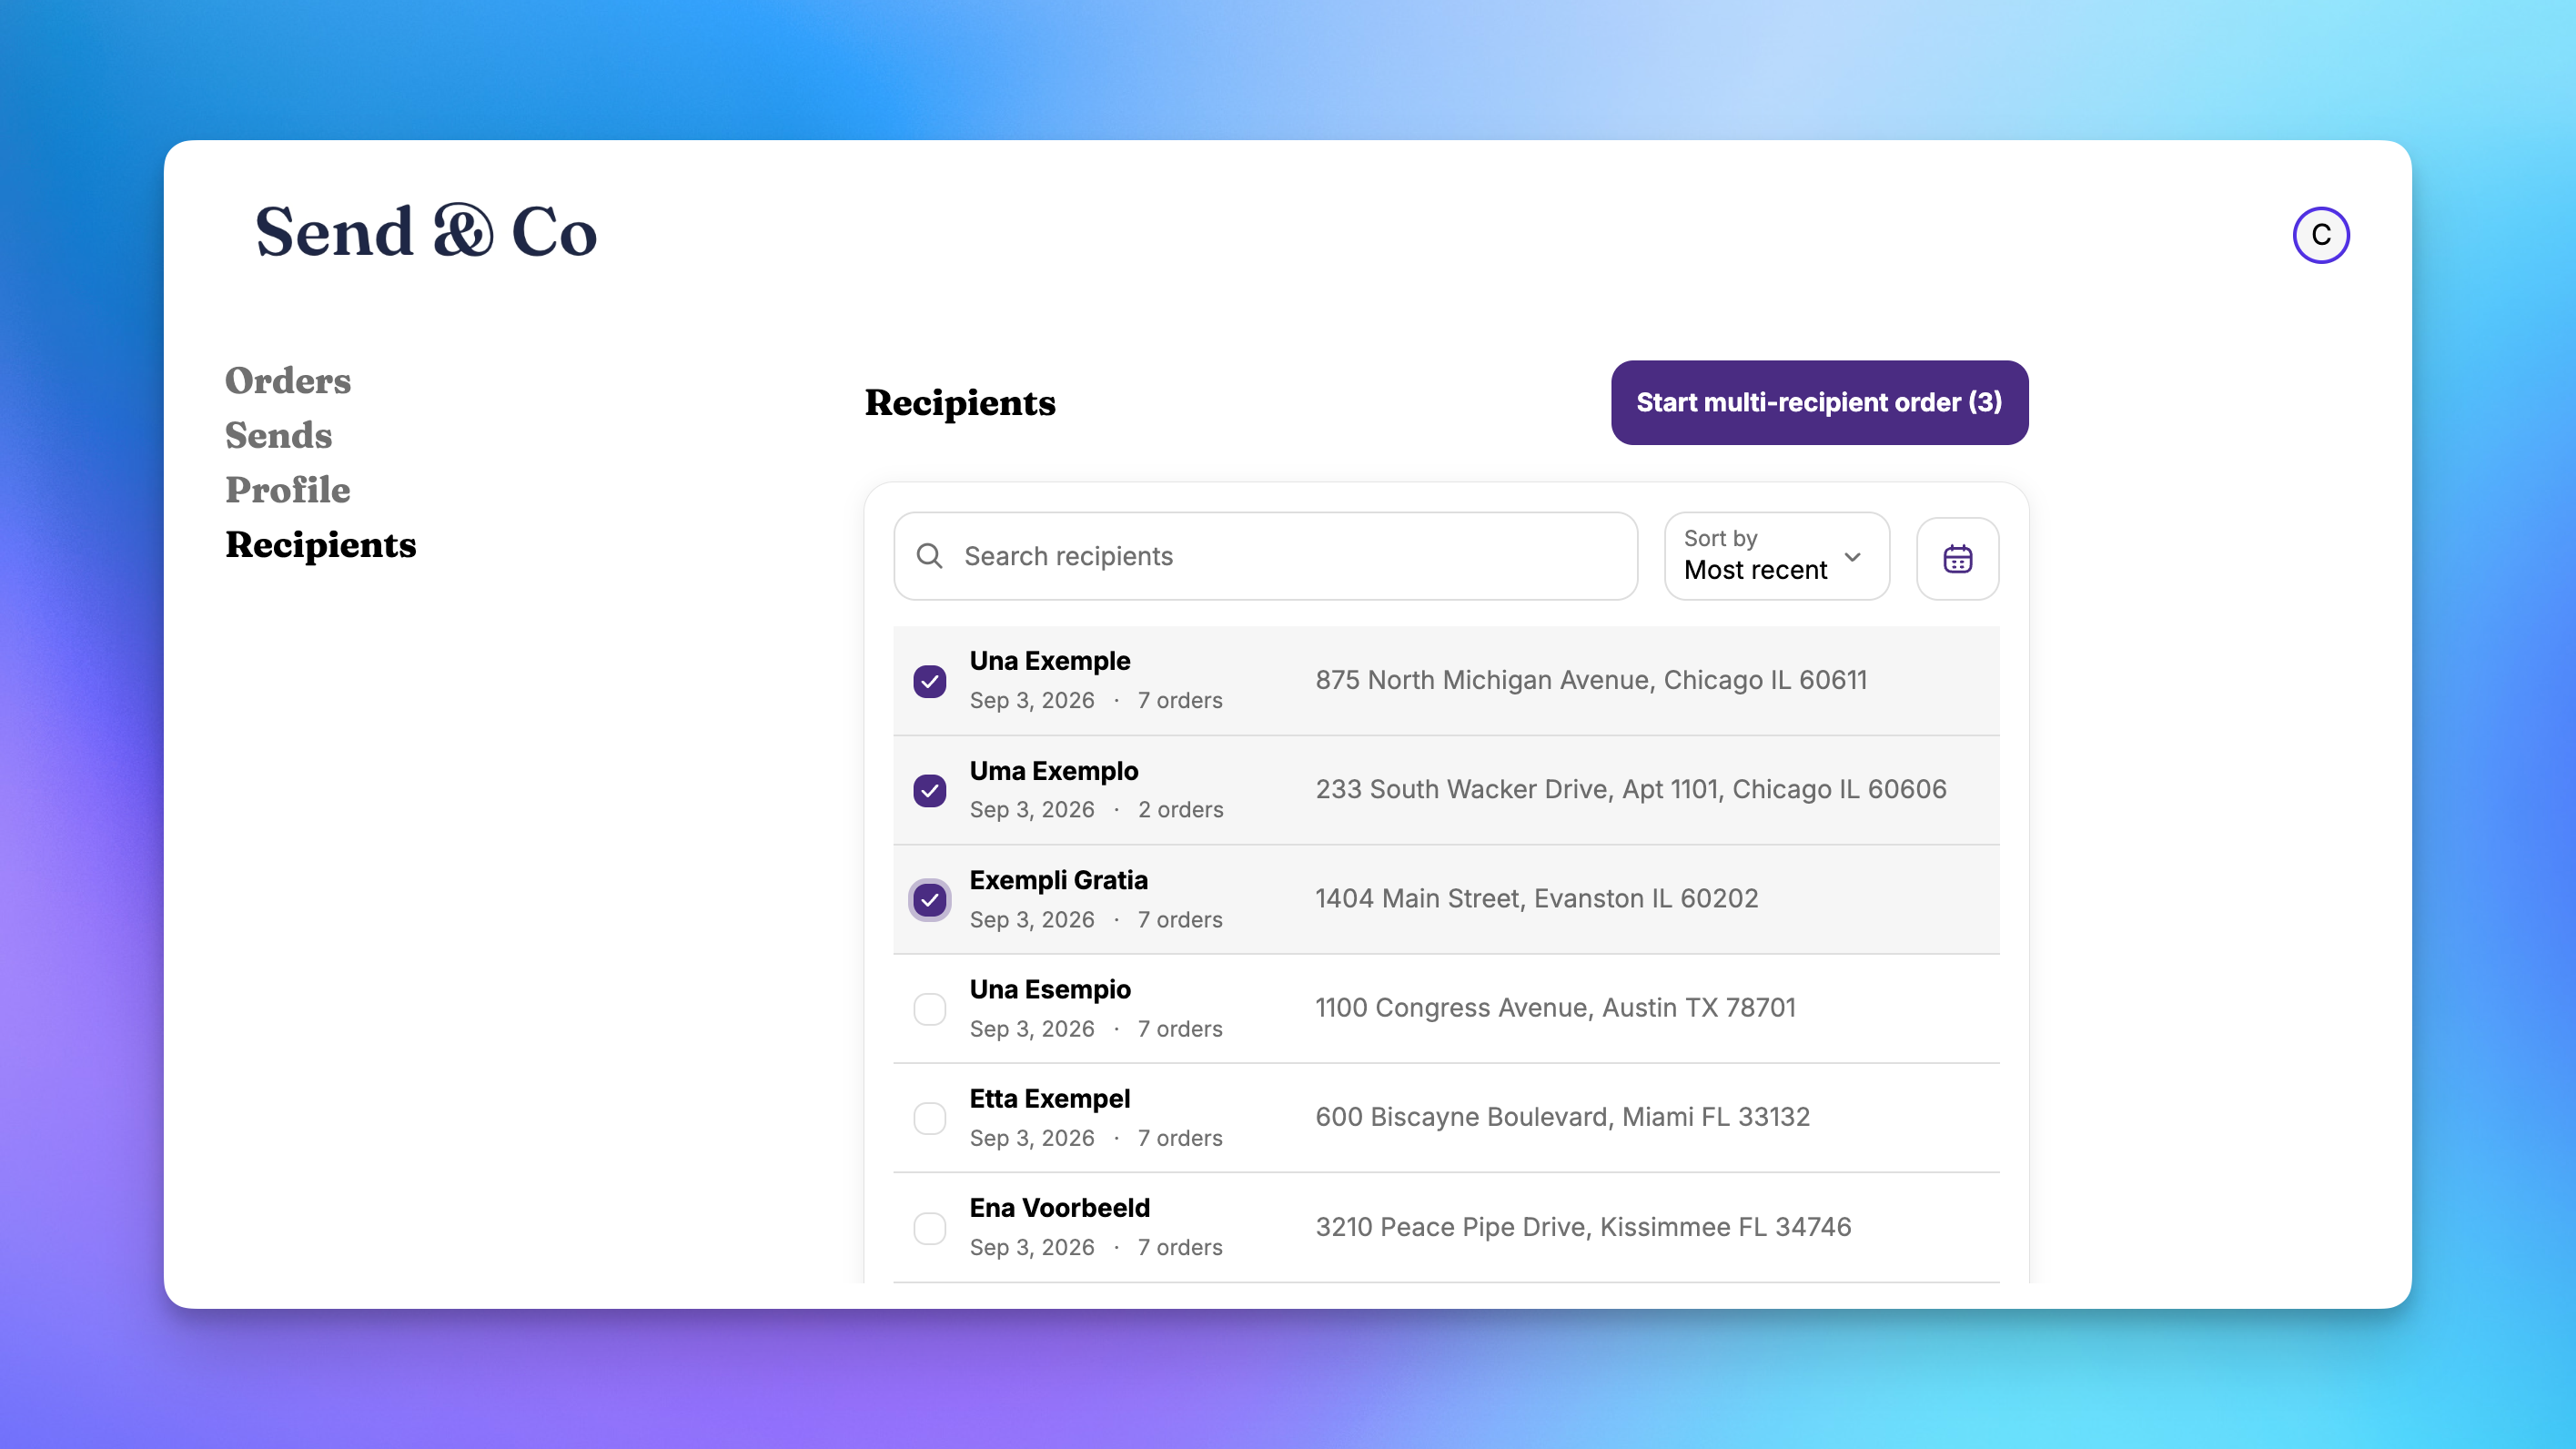
A third extension, Recipients Page, is optional. It gives gifters a way to place new multi-recipient orders from a list of their prior recipients. Enable it here if you plan to use Send Again. See Win back last year's holiday gifters with Send Again for the full setup.
Shopify prompts you to add the Sends Page to the account menu. You can dismiss the prompt. The banner takes gifters to the page, so a menu entry is optional. See adding the Sends page to account navigation if you want one.
The editor shows example data for both extensions so you can preview the layout. That data only appears in the editor.
Step 3: Add the banner to the order status page
The banner is now active on order pages inside the customer account. Add it to the order status page too, so gifters see it right after checkout.
- In the page picker, select the Order status page.
- Add the Order Send Banner block from Send To Many.
Shopify's Checkout Blocks app lets you add your own content to other pages in checkout and customer accounts, such as a message on the Thank you page.
Step 4: Save and test
- Click Save in the editor.
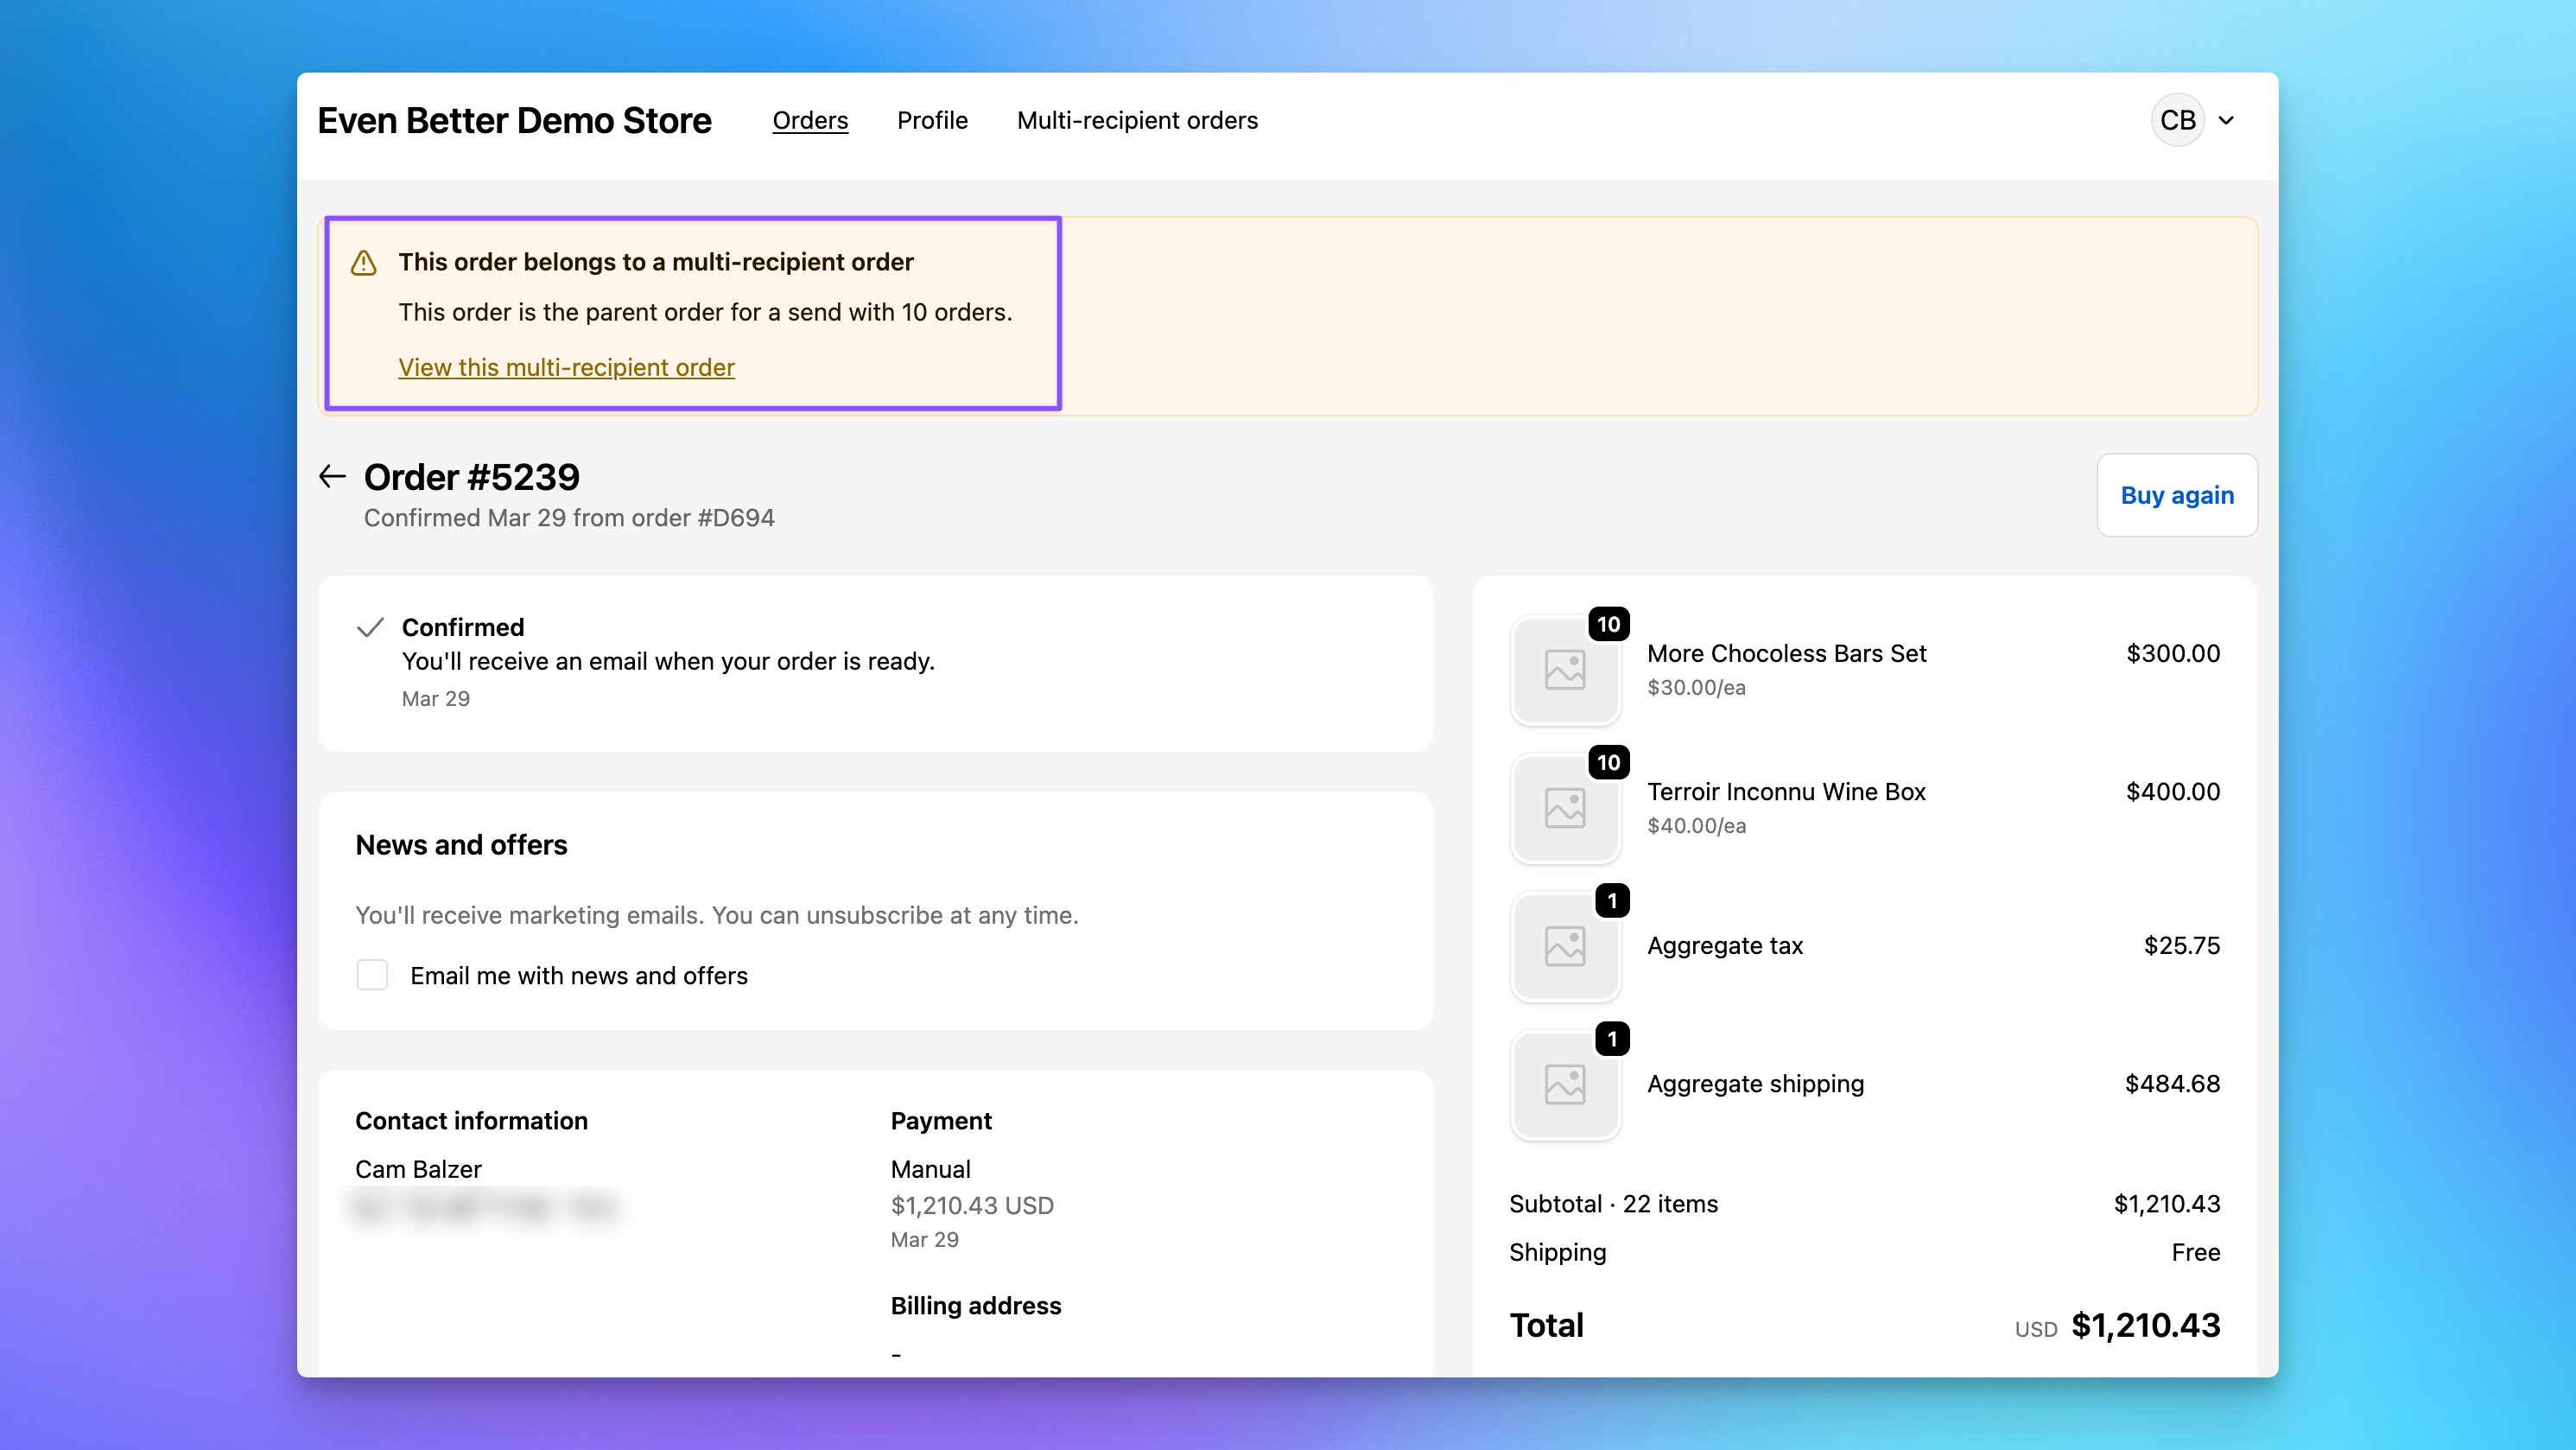
- Log in to your storefront customer account as the gifter on your test order and open that order. The banner appears at the top.
- Click View this multi-recipient order. The Sends page opens with every recipient order for that Send.
Next steps
- Customize the order confirmation email for multi-recipient orders: link the gifter to their Send detail page from the first email they receive.
- Set up delivery digest emails: send one daily shipping update per Send, with a link to the Sends page.
- Customer account Sends page and Order Send Banner reference: what gifters see, deep links to a Send, and text customization.
- Send Again for repeat multi-recipient orders: let gifters reload a past Send into the cart.